Install without Gang Box
-
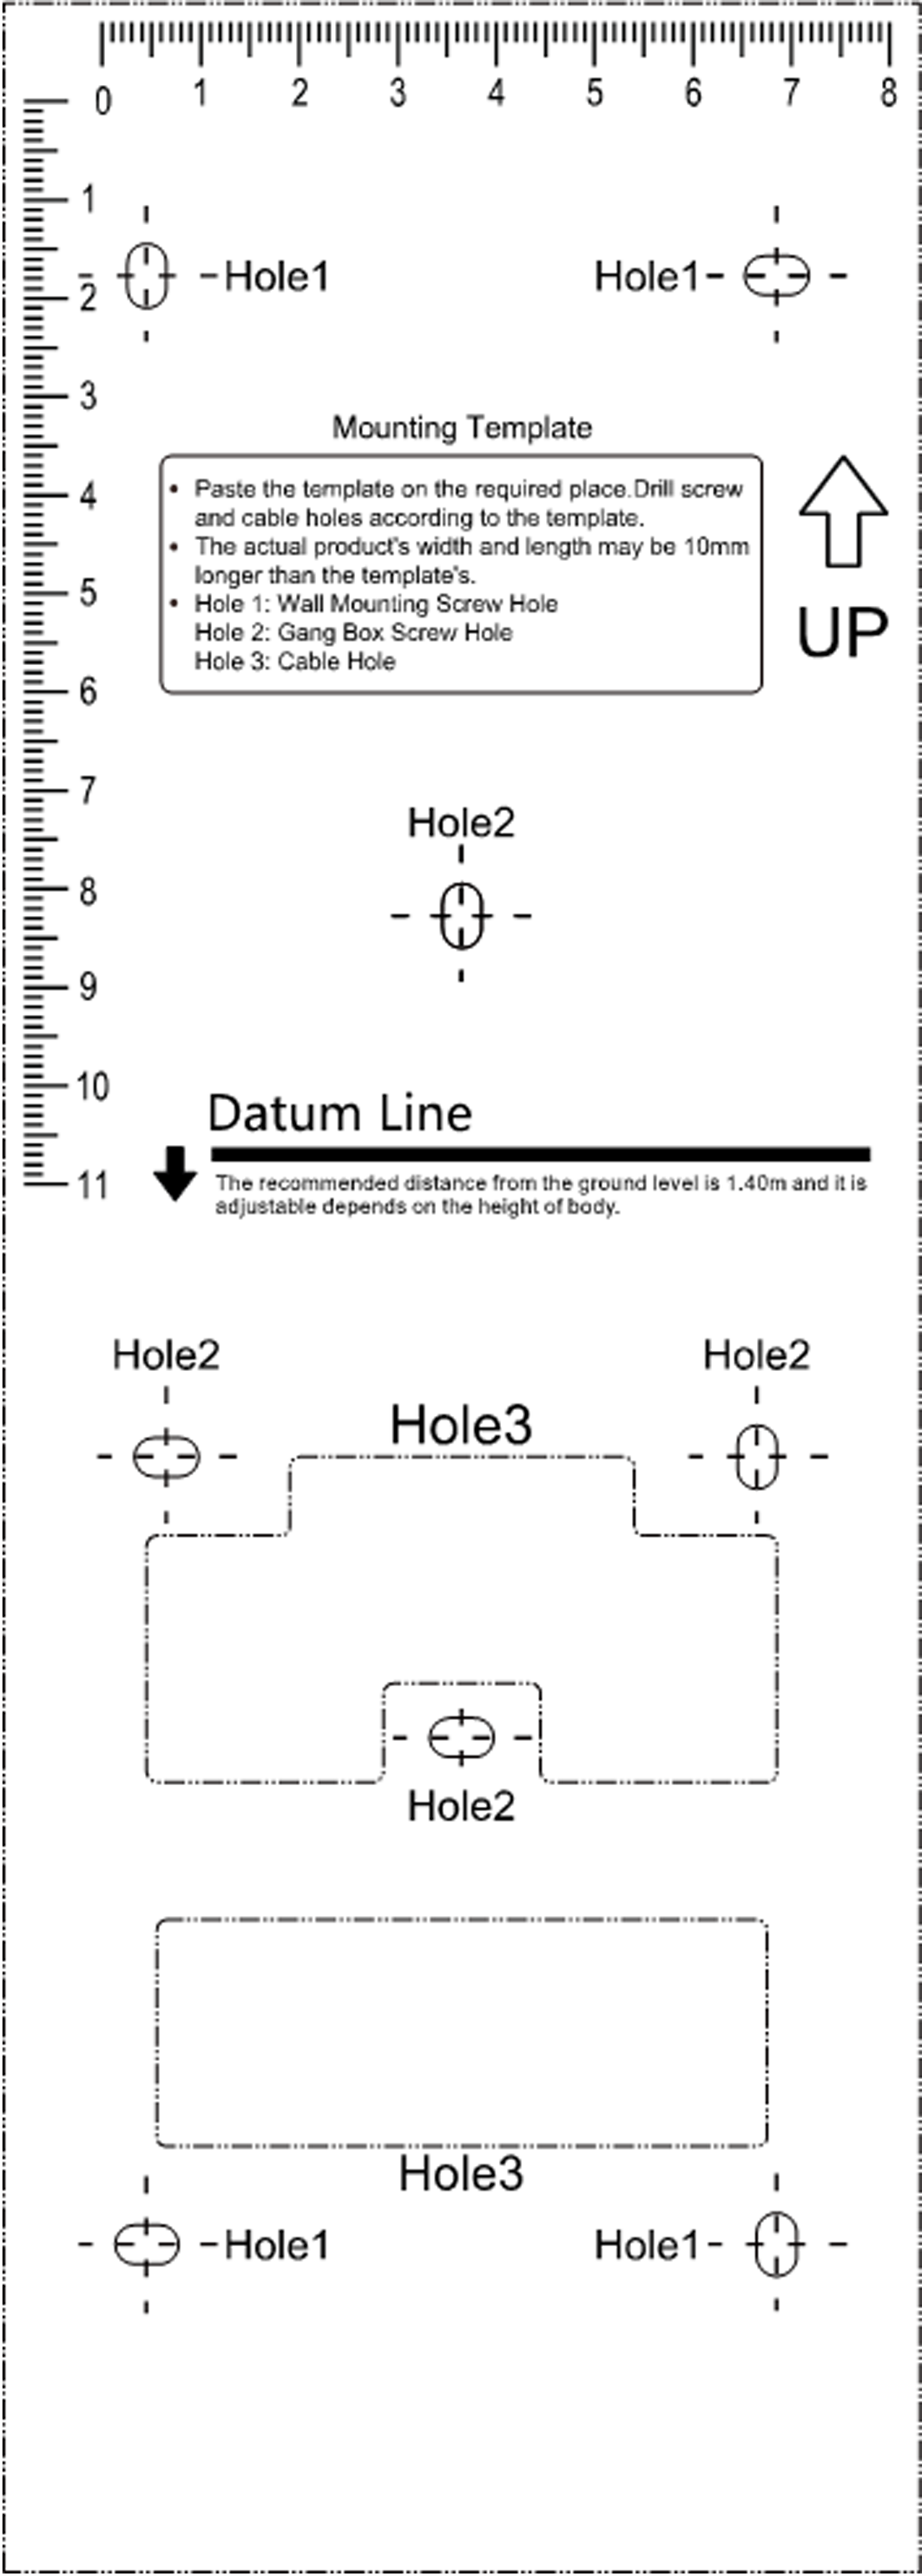
According to the baseline on the mounting template, stick the mounting template
on the wall or other surface, 1.4 meters higher than the ground.
Figure 1. Mounting Template

- Drill 4 holes on the wall or other surface according to Hole 1 in the mounting template.
-
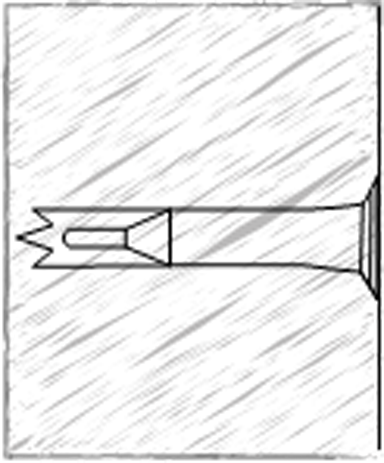
Insert the screw sockets of the setscrews in the drilled holes.
Figure 2. Insert Screw Socket

- Align the 4 holes to the mounting plate with the drilled holes.
- Route the cables through the cable hole of the mounting plate, and connect to the corresponding external devices' cables.
-
Cover the interfaces with the supplied back sheet and secure the sheet with
three screws.
Note:
Apply Silicone sealant among the wiring hole to keep the raindrop from entering.
Figure 3. Device Back Sheet
- Fix and fasten the screws in the sockets on the wall or other surface.
- Remove the screw at the bottom of the device.
- Align the device with the mounting plate and buckle them together.
-
Use a hex wrench to fasten the screw at the bottom.
Note:
-
The installation height here is the recommended height. You can change it according to your actual needs.
-
You can also install the device on the wall or other places without the gang box. For details, see Installing without Gang Box.
-
For easy installation, drill holes on mounting surface according to the supplied mounting template.
Figure 4. Install without Gang Box
-
- Legal Information
- Symbol Conventions
- Regulatory Information
- Safety Instruction
- Available Models
- Overview
- Appearance
- Installation
- Wiring
- Activation
- Basic Operation
- Client Software Configuration
- Person Management
- Add Organization
- Configure Basic Information
- Issue a Card to One Person
- Upload a Face Photo from Local PC
- Take a Photo via Client
- Collect Face via Access Control Device
- Collect Fingerprint via Client
- Collect Fingerprint via Access Control Device
- Configure Access Control Information
- Customize Person Information
- Configure Resident Information
- Configure Additional Information
- Import and Export Person Identify Information
- Import Person Information
- Import Person Pictures
- Export Person Information
- Export Person Pictures
- Get Person Information from Access Control Device
- Move Persons to Another Organization
- Issue Cards to Persons in Batch
- Report Card Loss
- Set Card Issuing Parameters
- Configure Schedule and Template
- Set Access Group to Assign Access Authorization to Persons
- Configure Advanced Functions
- Configure Device Parameters
- Configure Remaining Open/Closed
- Configure Multi-Factor Authentication
- Configure Custom Wiegand Rule
- Configure Card Reader Authentication Mode and Schedule
- Configure First Person In
- Configure Anti-Passback
- Configure Multi-door Interlocking
- Configure Other Parameters
- Configure Linkage Actions for Access Control
- Door/Elevator Control
- Time and Attendance
- Person Management
- Tips for Scanning Fingerprint
- Tips When Collecting/Comparing Face Picture
- Tips for Installation Environment
- Dimension
Install without Gang Box
-
According to the baseline on the mounting template, stick the mounting template
on the wall or other surface, 1.4 meters higher than the ground.
Figure 1. Mounting Template

- Drill 4 holes on the wall or other surface according to Hole 1 in the mounting template.
-
Insert the screw sockets of the setscrews in the drilled holes.
Figure 2. Insert Screw Socket

- Align the 4 holes to the mounting plate with the drilled holes.
- Route the cables through the cable hole of the mounting plate, and connect to the corresponding external devices' cables.
-
Cover the interfaces with the supplied back sheet and secure the sheet with
three screws.
Note:
Apply Silicone sealant among the wiring hole to keep the raindrop from entering.
Figure 3. Device Back Sheet
- Fix and fasten the screws in the sockets on the wall or other surface.
- Remove the screw at the bottom of the device.
- Align the device with the mounting plate and buckle them together.
-
Use a hex wrench to fasten the screw at the bottom.
Note:
-
The installation height here is the recommended height. You can change it according to your actual needs.
-
You can also install the device on the wall or other places without the gang box. For details, see Installing without Gang Box.
-
For easy installation, drill holes on mounting surface according to the supplied mounting template.
Figure 4. Install without Gang Box
-