Add Face Picture
Add user's face picture to the device. And the user can use the face picture to authenticate.
Up to 3000 face pictures can be added.
- Tap User > + to enter the Add User page.
-
Edit the employee ID.
Note:
-
The employee ID should be less than 32 characters. And it can be a combination of lower letters, upper letters, and numbers.
-
The employee ID should not start with 0 and should not be duplicated.
-
-
Tap the Name field and input the user name on the soft keyboard.
Note:
-
Numbers, upper case letters, lower case letters, and special characters are allowed in the user name.
-
Up to 32 characters are allowed in the user name.
-
-
Tap the Face Picture field to enter the face picture adding page.
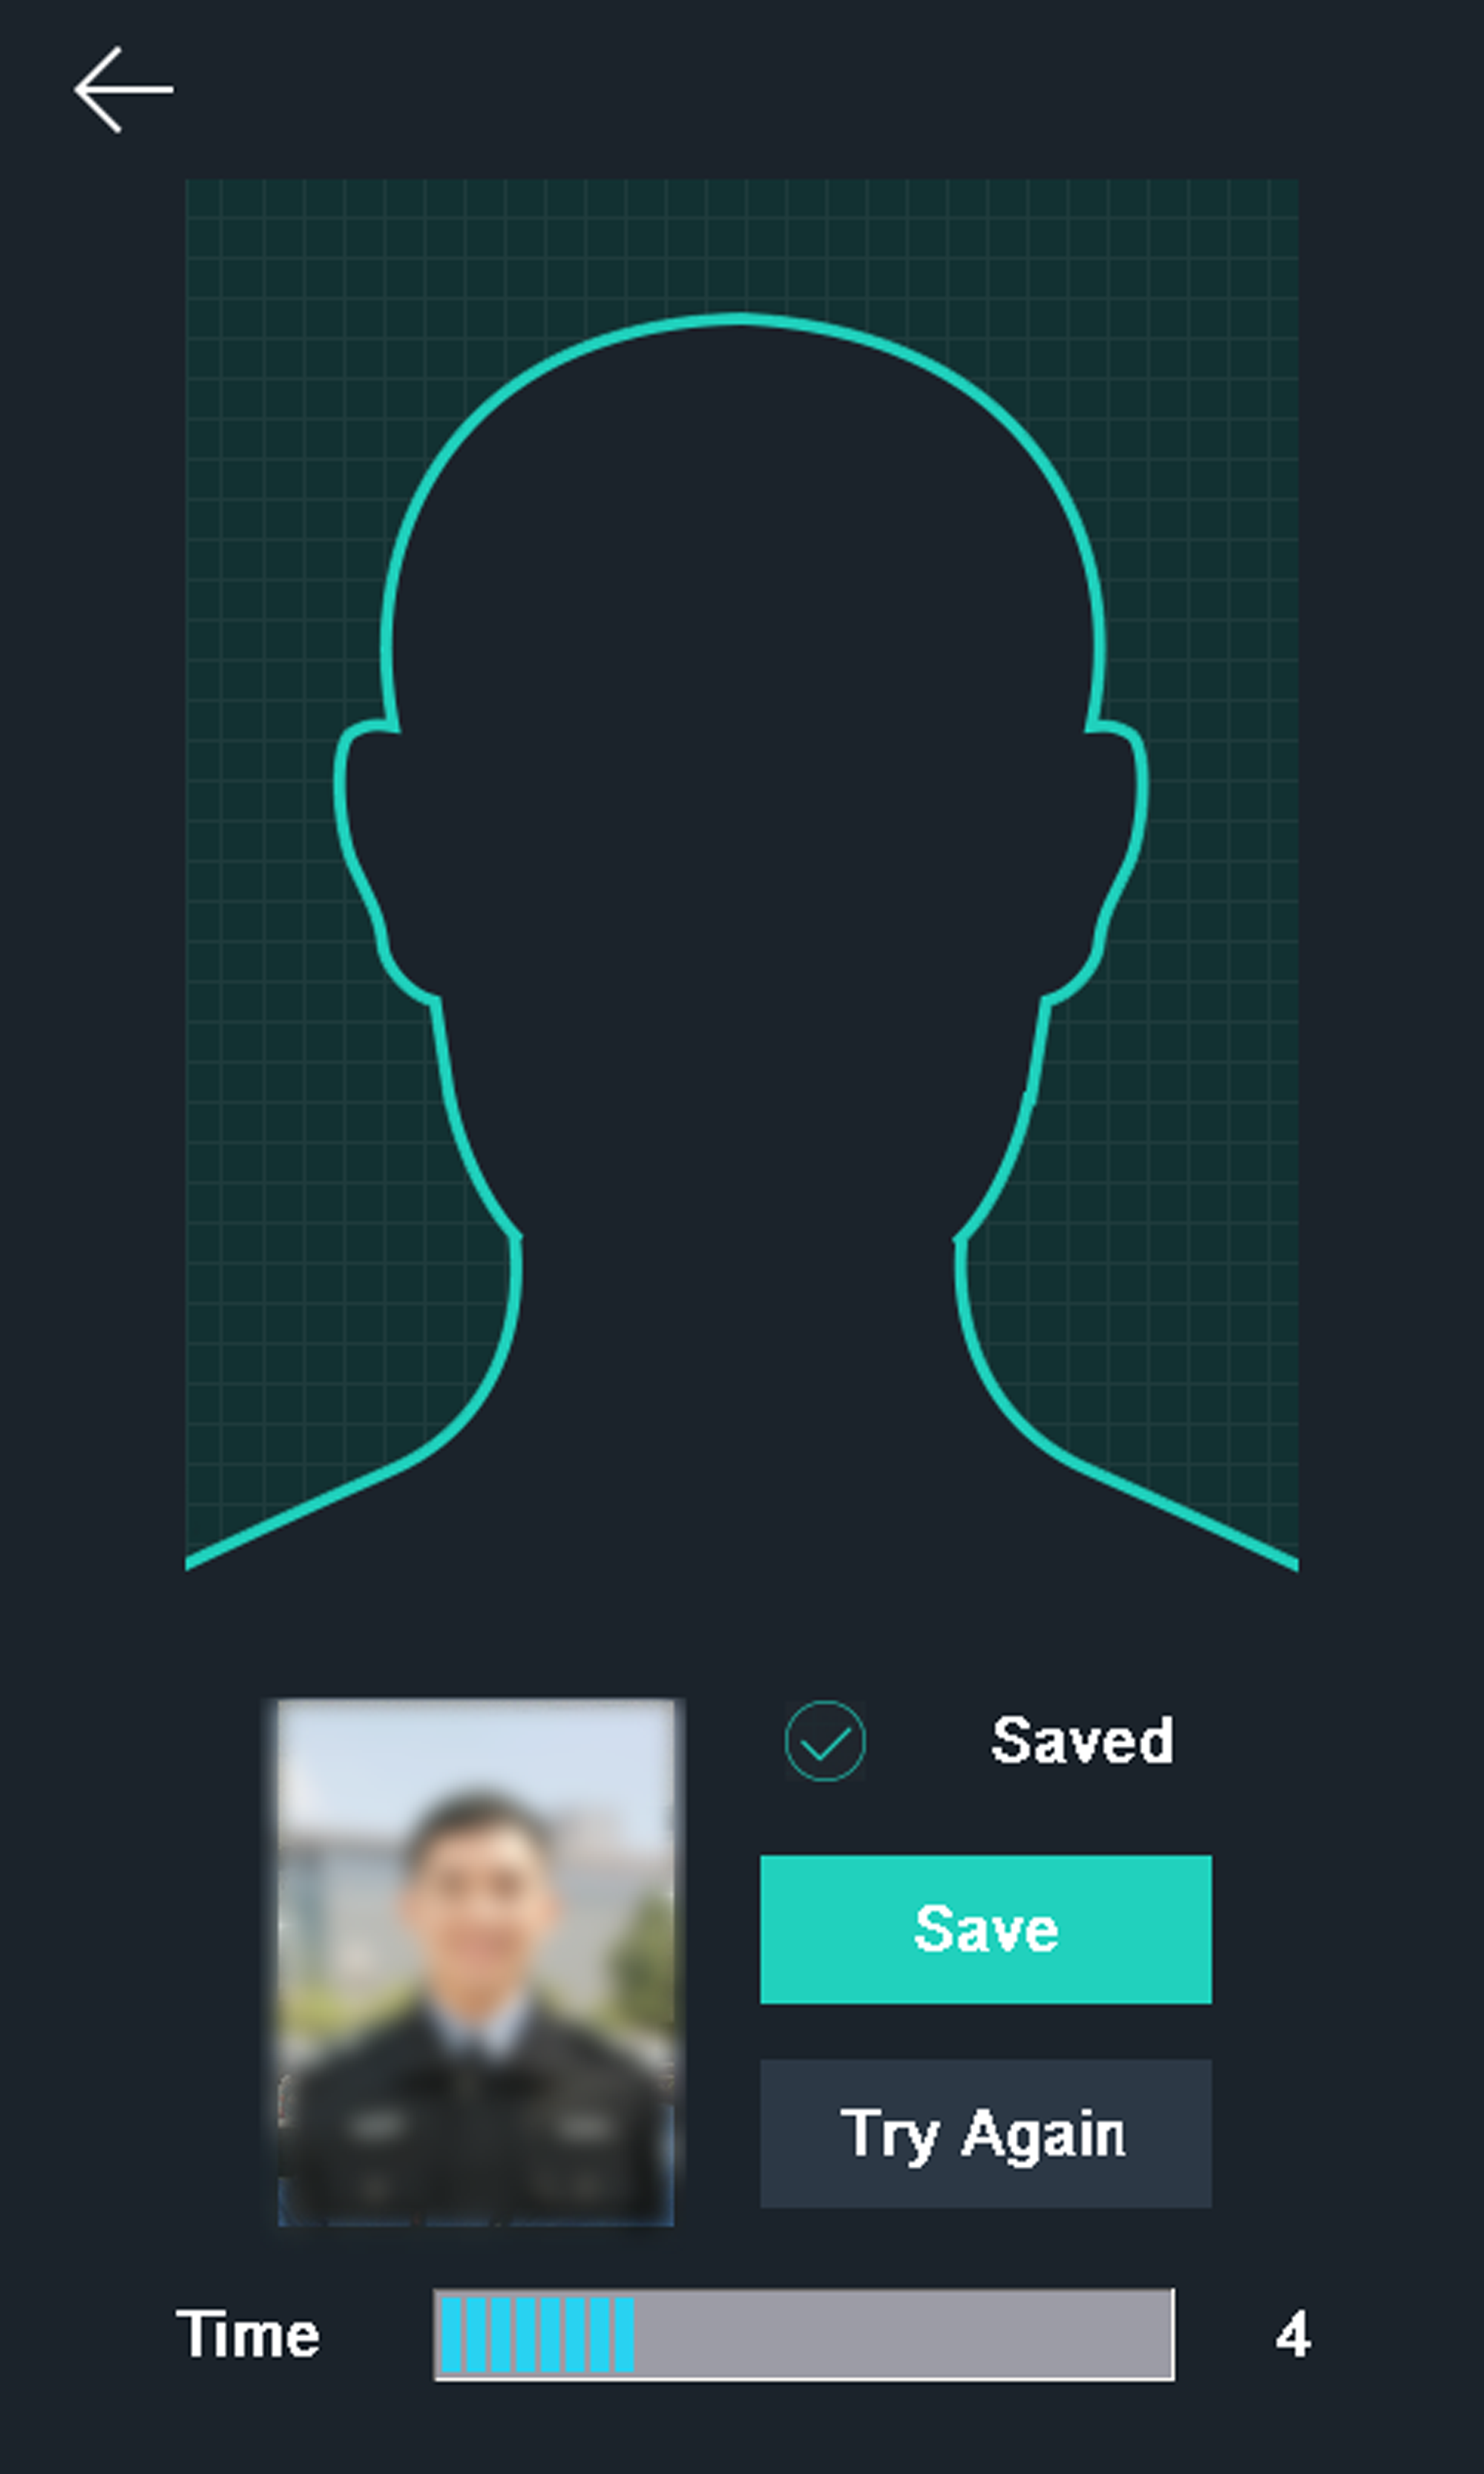
Figure 1. Add Face Picture
-
Position your face looking at the camera.
Note:
-
Make sure your face picture is in the face picture outline when adding the face picture.
-
Make sure the captured face picture is in good quality and is accurate.
-
For details about the instructions of adding face pictures, see Tips When Collecting/Comparing Face Picture.
After completely adding the face picture, a captured face picture will be displayed at the upper right corner of the page.
-
- Tap Save to save the face picture.
- Optional:
Tap Try Again and adjust your face position to add the
face picture again.
Note:
The maximum duration for adding a face picture is 15s. You can check the remaining time for adding a face picture on the left of the page.
-
Enable or disable the Administrator Permission function.
- Enable Administrator Permission
-
The user is the administrator. Except for the normal attendance function, the user can also enter the Home page to operate after authenticating the permission.
- Disable Administrator Permission
-
The User is the normal user. The user can only authenticate or take attendance on the initial page.
- Optional: Tap the Schedule Template field, select a schedule template and save the settings.
-
Tap
 to save the settings.
- Legal Information
- Symbol Conventions
- Regulatory Information
- Safety Instruction
- Available Models
- Overview
- Appearance
- Installation
- Wiring
- Activation
- Basic Operation
- Client Software Configuration
- Person Management
- Add Organization
- Configure Basic Information
- Issue a Card to One Person
- Upload a Face Photo from Local PC
- Take a Photo via Client
- Collect Face via Access Control Device
- Collect Fingerprint via Client
- Collect Fingerprint via Access Control Device
- Configure Access Control Information
- Customize Person Information
- Configure Resident Information
- Configure Additional Information
- Import and Export Person Identify Information
- Import Person Information
- Import Person Pictures
- Export Person Information
- Export Person Pictures
- Get Person Information from Access Control Device
- Move Persons to Another Organization
- Issue Cards to Persons in Batch
- Report Card Loss
- Set Card Issuing Parameters
- Configure Schedule and Template
- Set Access Group to Assign Access Authorization to Persons
- Configure Advanced Functions
- Configure Device Parameters
- Configure Remaining Open/Closed
- Configure Multi-Factor Authentication
- Configure Custom Wiegand Rule
- Configure Card Reader Authentication Mode and Schedule
- Configure First Person In
- Configure Anti-Passback
- Configure Multi-door Interlocking
- Configure Other Parameters
- Configure Linkage Actions for Access Control
- Door/Elevator Control
- Time and Attendance
- Person Management
- Tips for Scanning Fingerprint
- Tips When Collecting/Comparing Face Picture
- Tips for Installation Environment
- Dimension
Add Face Picture
Add user's face picture to the device. And the user can use the face picture to authenticate.
Up to 3000 face pictures can be added.
- Tap User > + to enter the Add User page.
-
Edit the employee ID.
Note:
-
The employee ID should be less than 32 characters. And it can be a combination of lower letters, upper letters, and numbers.
-
The employee ID should not start with 0 and should not be duplicated.
-
-
Tap the Name field and input the user name on the soft keyboard.
Note:
-
Numbers, upper case letters, lower case letters, and special characters are allowed in the user name.
-
Up to 32 characters are allowed in the user name.
-
-
Tap the Face Picture field to enter the face picture adding page.
Figure 1. Add Face Picture
-
Position your face looking at the camera.
Note:
-
Make sure your face picture is in the face picture outline when adding the face picture.
-
Make sure the captured face picture is in good quality and is accurate.
-
For details about the instructions of adding face pictures, see Tips When Collecting/Comparing Face Picture.
After completely adding the face picture, a captured face picture will be displayed at the upper right corner of the page.
-
- Tap Save to save the face picture.
- Optional:
Tap Try Again and adjust your face position to add the
face picture again.
Note:
The maximum duration for adding a face picture is 15s. You can check the remaining time for adding a face picture on the left of the page.
-
Enable or disable the Administrator Permission function.
- Enable Administrator Permission
-
The user is the administrator. Except for the normal attendance function, the user can also enter the Home page to operate after authenticating the permission.
- Disable Administrator Permission
-
The User is the normal user. The user can only authenticate or take attendance on the initial page.
- Optional: Tap the Schedule Template field, select a schedule template and save the settings.
-
Tap to save the settings.