Add a Detected Online Indoor Station
The online video intercom devices on the same local subnet with the current Web Client or SYS server can be displayed in the list, and you can add the detected indoor station to the system one by one.
-
Make sure the devices you are going to use are correctly installed and connected to the network as specified by the manufacturers. Such initial configuration is required in order to be able to connect the devices to the HikCentral Professional via network.
-
The devices to be added should be activated. Refer to Create Password for Inactive Device(s) for detailed operation about activating devices.
-
Click
 in the Operation Column to open
the Add Online Device window.
in the Operation Column to open
the Add Online Device window.
-
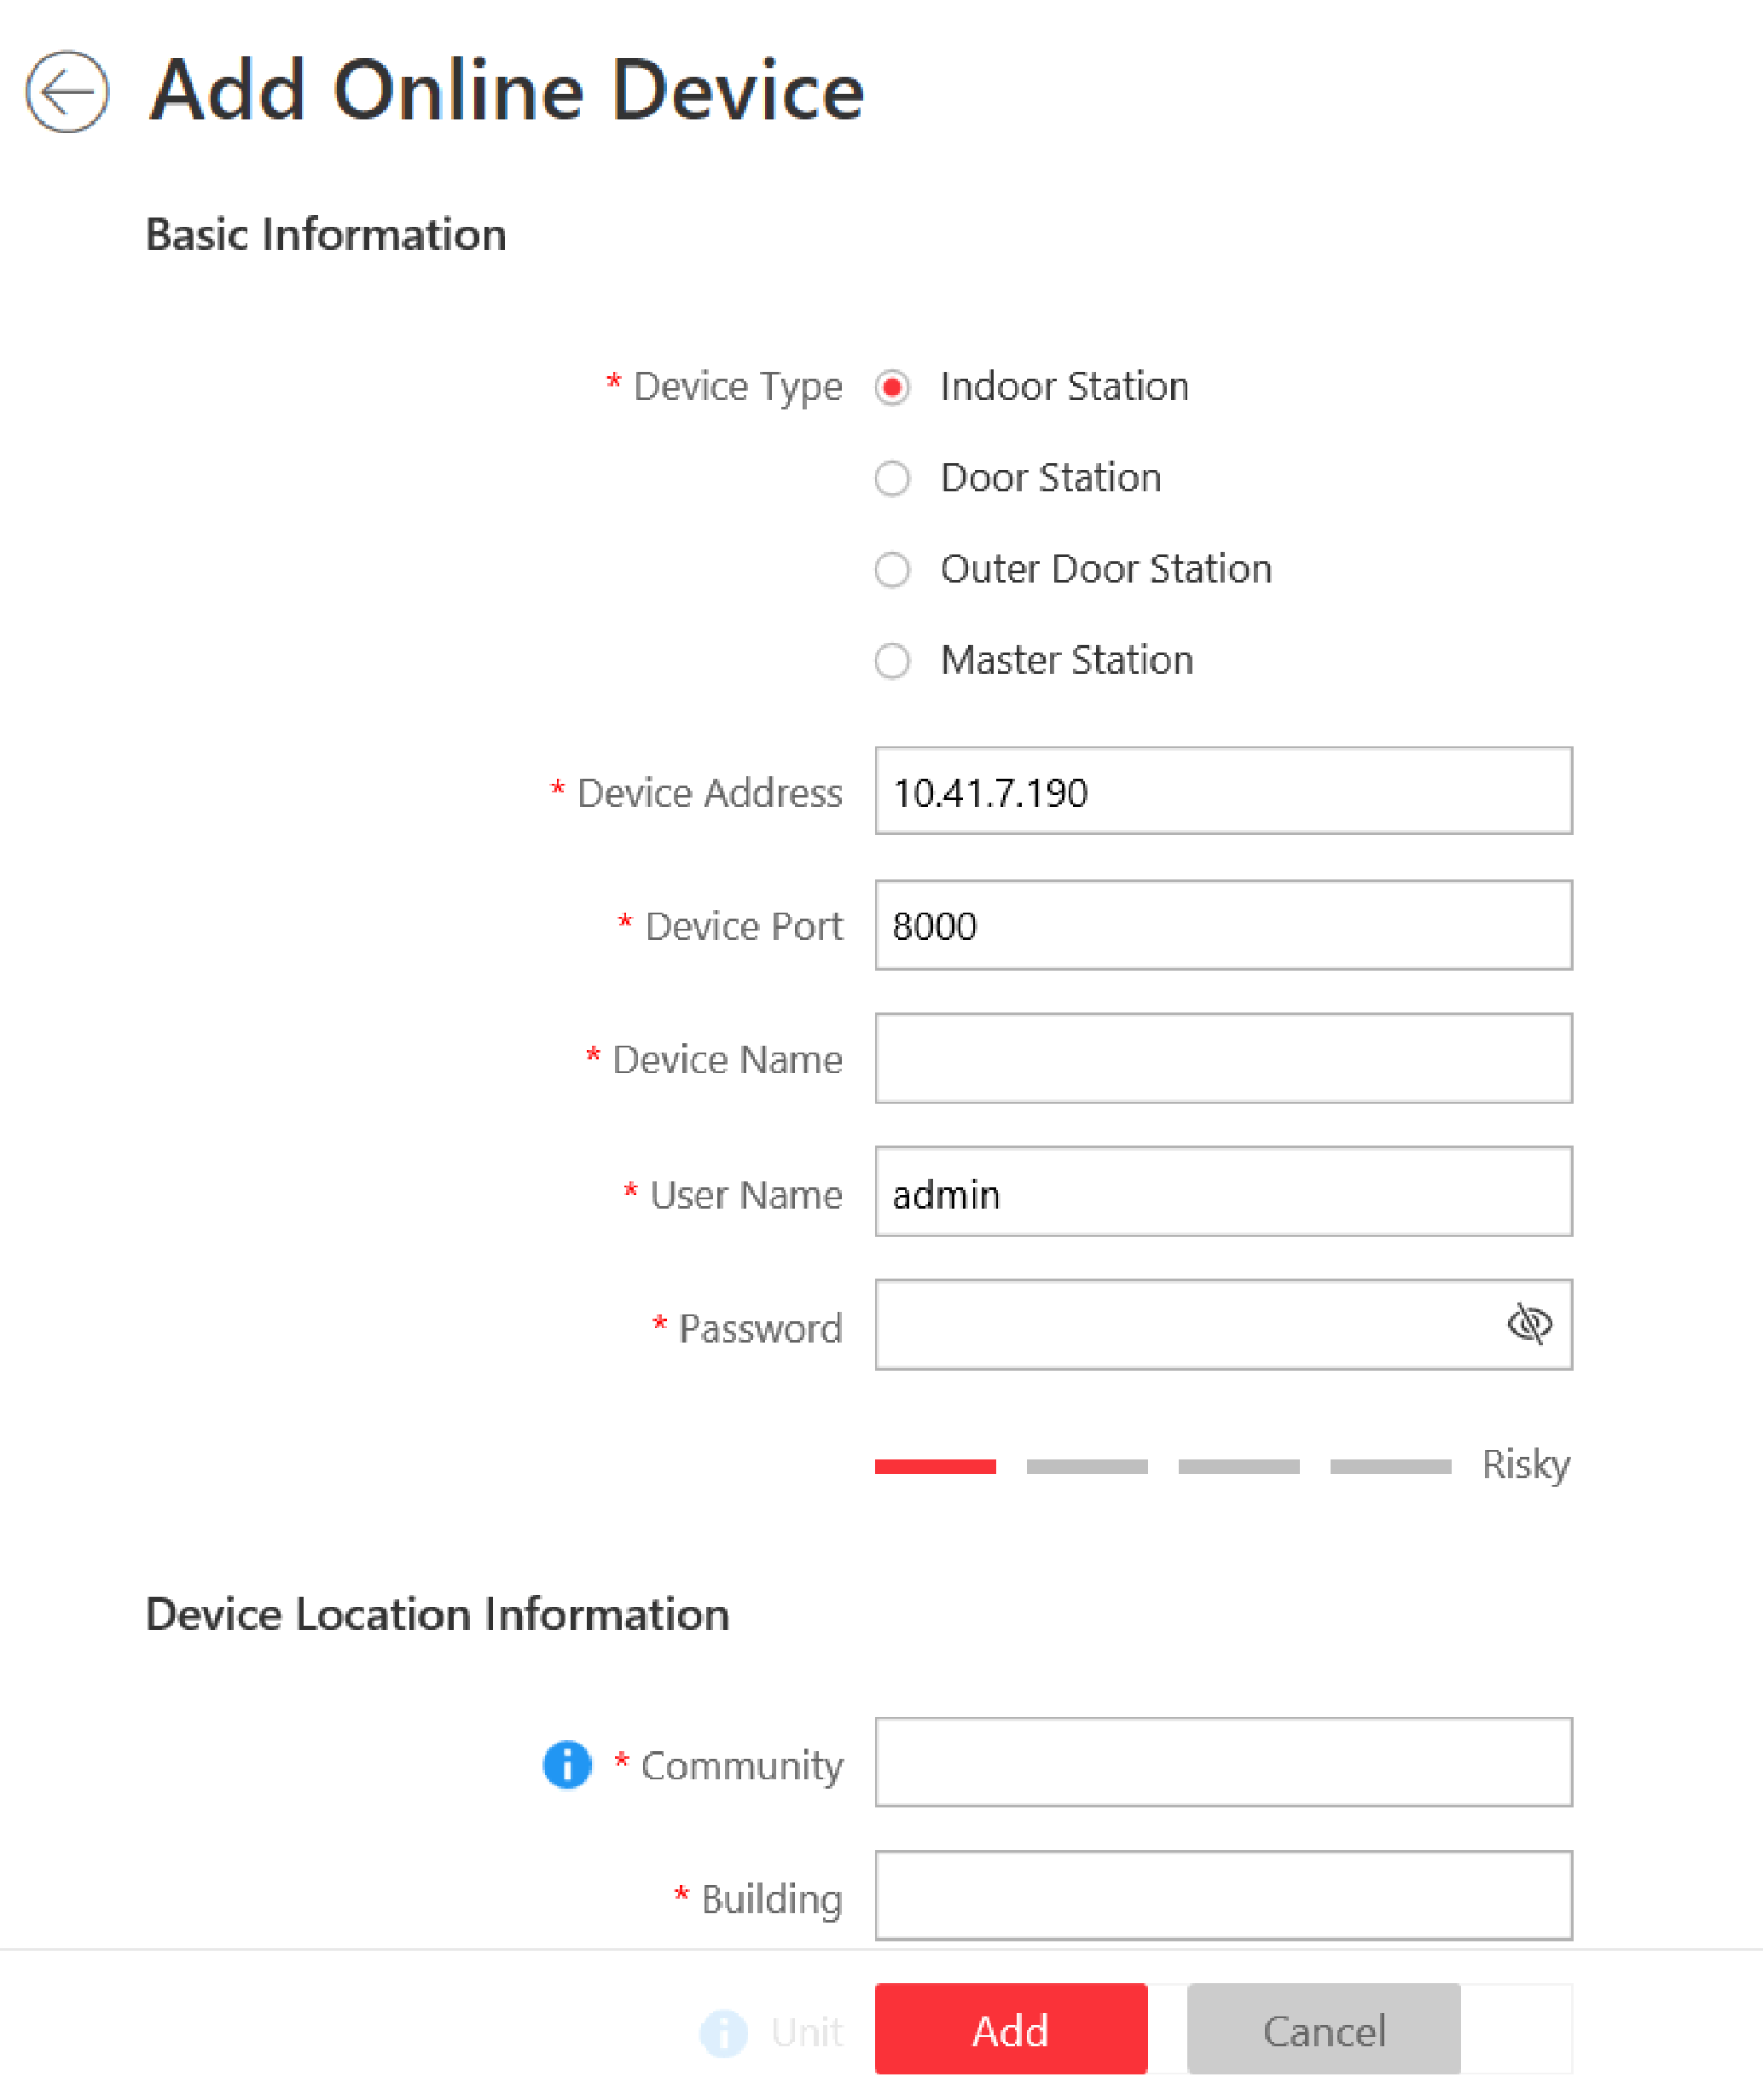
Select Indoor Station as the device type.
Figure 1. Add Online Indoor Station
-
In the Resident Information Area, click
 to select
resident(s) to be linked with the device.
Note:
to select
resident(s) to be linked with the device.
Note:Up to 10 residents can be linked to the device.
-
Perform the following operation(s) after adding the online device.
Option Description Remote Configurations
Click
 to set the remote configurations of
the corresponding device. For details, refer to Configure Device Parameters.
to set the remote configurations of
the corresponding device. For details, refer to Configure Device Parameters.Change Password
Select the added device(s) and click to change the password for the device(s).Note:
-
You can only change the password for online HIKVISION devices currently.
-
If the devices have the same password, you can select multiple devices to change the password for them at the same time.
Add Related Camera
Click
 to relate
camera(s) with the added indoor station(s). For details, refer toRelate Camera with Indoor Station.
to relate
camera(s) with the added indoor station(s). For details, refer toRelate Camera with Indoor Station.Apply Device Settings
When you have edited the device location information or device IP address, the parameters in the system are inconsistent with the parameters on the video intercom device(s), and the icon
 will be
displayed on the right side of the Apply Device Settings.
Click Apply Device Settings to apply the current settings in
the system to the device(s).
will be
displayed on the right side of the Apply Device Settings.
Click Apply Device Settings to apply the current settings in
the system to the device(s).Restore Default
Select the added device(s), and click Restore Default to restore the configured device parameters excluding network parameters and account information.
Note:If you want to restore all the device parameters, you should check Restore device parameters excluding network parameters and account information, such as user name and password. in the pop-up window.
-
Add a Detected Online Indoor Station
The online video intercom devices on the same local subnet with the current Web Client or SYS server can be displayed in the list, and you can add the detected indoor station to the system one by one.
-
Make sure the devices you are going to use are correctly installed and connected to the network as specified by the manufacturers. Such initial configuration is required in order to be able to connect the devices to the HikCentral Professional via network.
-
The devices to be added should be activated. Refer to Create Password for Inactive Device(s) for detailed operation about activating devices.
-
Click in the Operation Column to open
the Add Online Device window.
-
Select Indoor Station as the device type.
Figure 1. Add Online Indoor Station
-
In the Resident Information Area, click to select
resident(s) to be linked with the device.
Note:
Up to 10 residents can be linked to the device.
-
Perform the following operation(s) after adding the online device.
Option Description Remote Configurations
Click
to set the remote configurations of
the corresponding device. For details, refer to Configure Device Parameters.Change Password
Select the added device(s) and click to change the password for the device(s).Note:-
You can only change the password for online HIKVISION devices currently.
-
If the devices have the same password, you can select multiple devices to change the password for them at the same time.
Add Related Camera
Click
to relate
camera(s) with the added indoor station(s). For details, refer toRelate Camera with Indoor Station.Apply Device Settings
When you have edited the device location information or device IP address, the parameters in the system are inconsistent with the parameters on the video intercom device(s), and the icon
will be
displayed on the right side of the Apply Device Settings.
Click Apply Device Settings to apply the current settings in
the system to the device(s).Restore Default
Select the added device(s), and click Restore Default to restore the configured device parameters excluding network parameters and account information.
Note:If you want to restore all the device parameters, you should check Restore device parameters excluding network parameters and account information, such as user name and password. in the pop-up window.
-