Add Camera

Add Camera

Add the desired camera for arming.

Obtain the IP address, user name and login password of the camera.

Note:
  • Add one camera only for each time.

  • indicates control center and indicates area. The camera should be added to control center first before added to area. Here we take adding camera to control center "test" as an example.

  1. Go to Target Arming > Task Management > Camera Management.
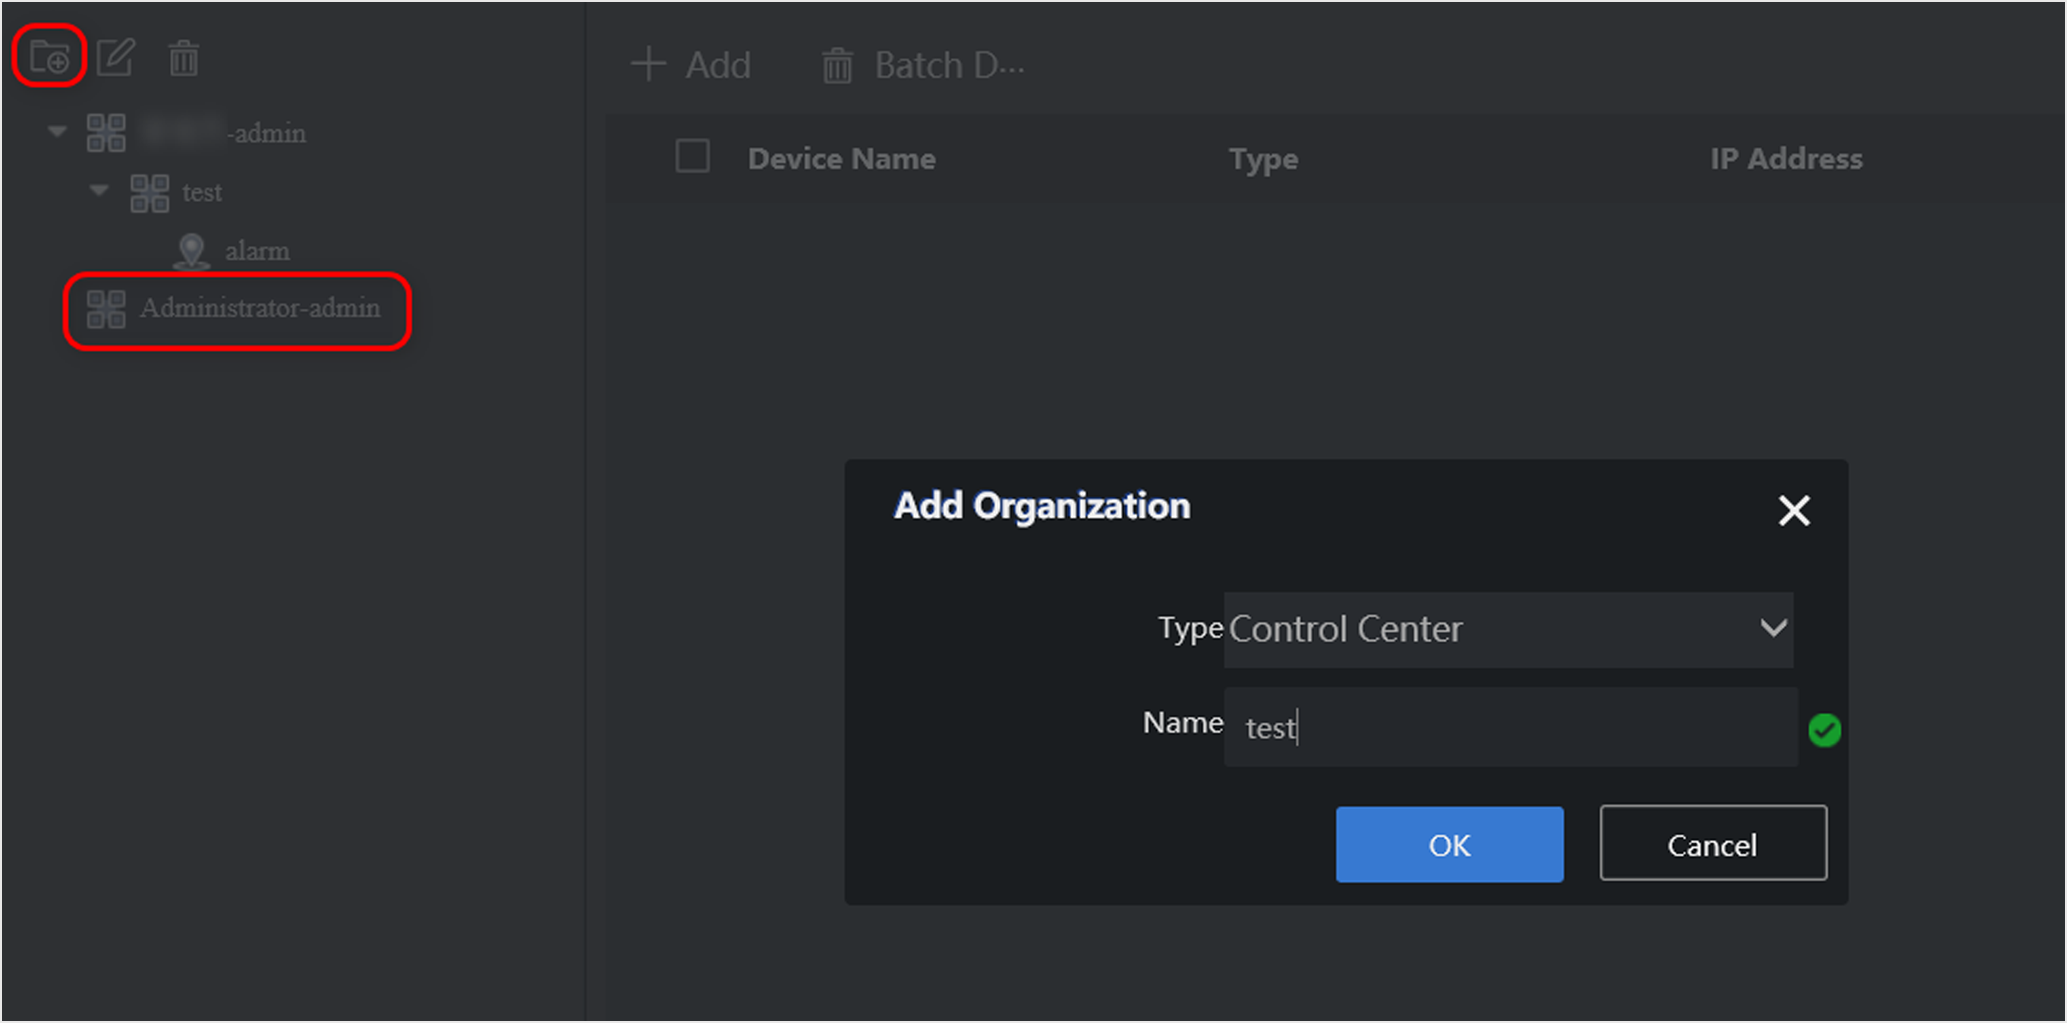
  2. Go to Administration-admin > .
    Figure 1. Add Control Center
  3. Select Control Center as Type and enter the name of control center.
  4. Click OK.
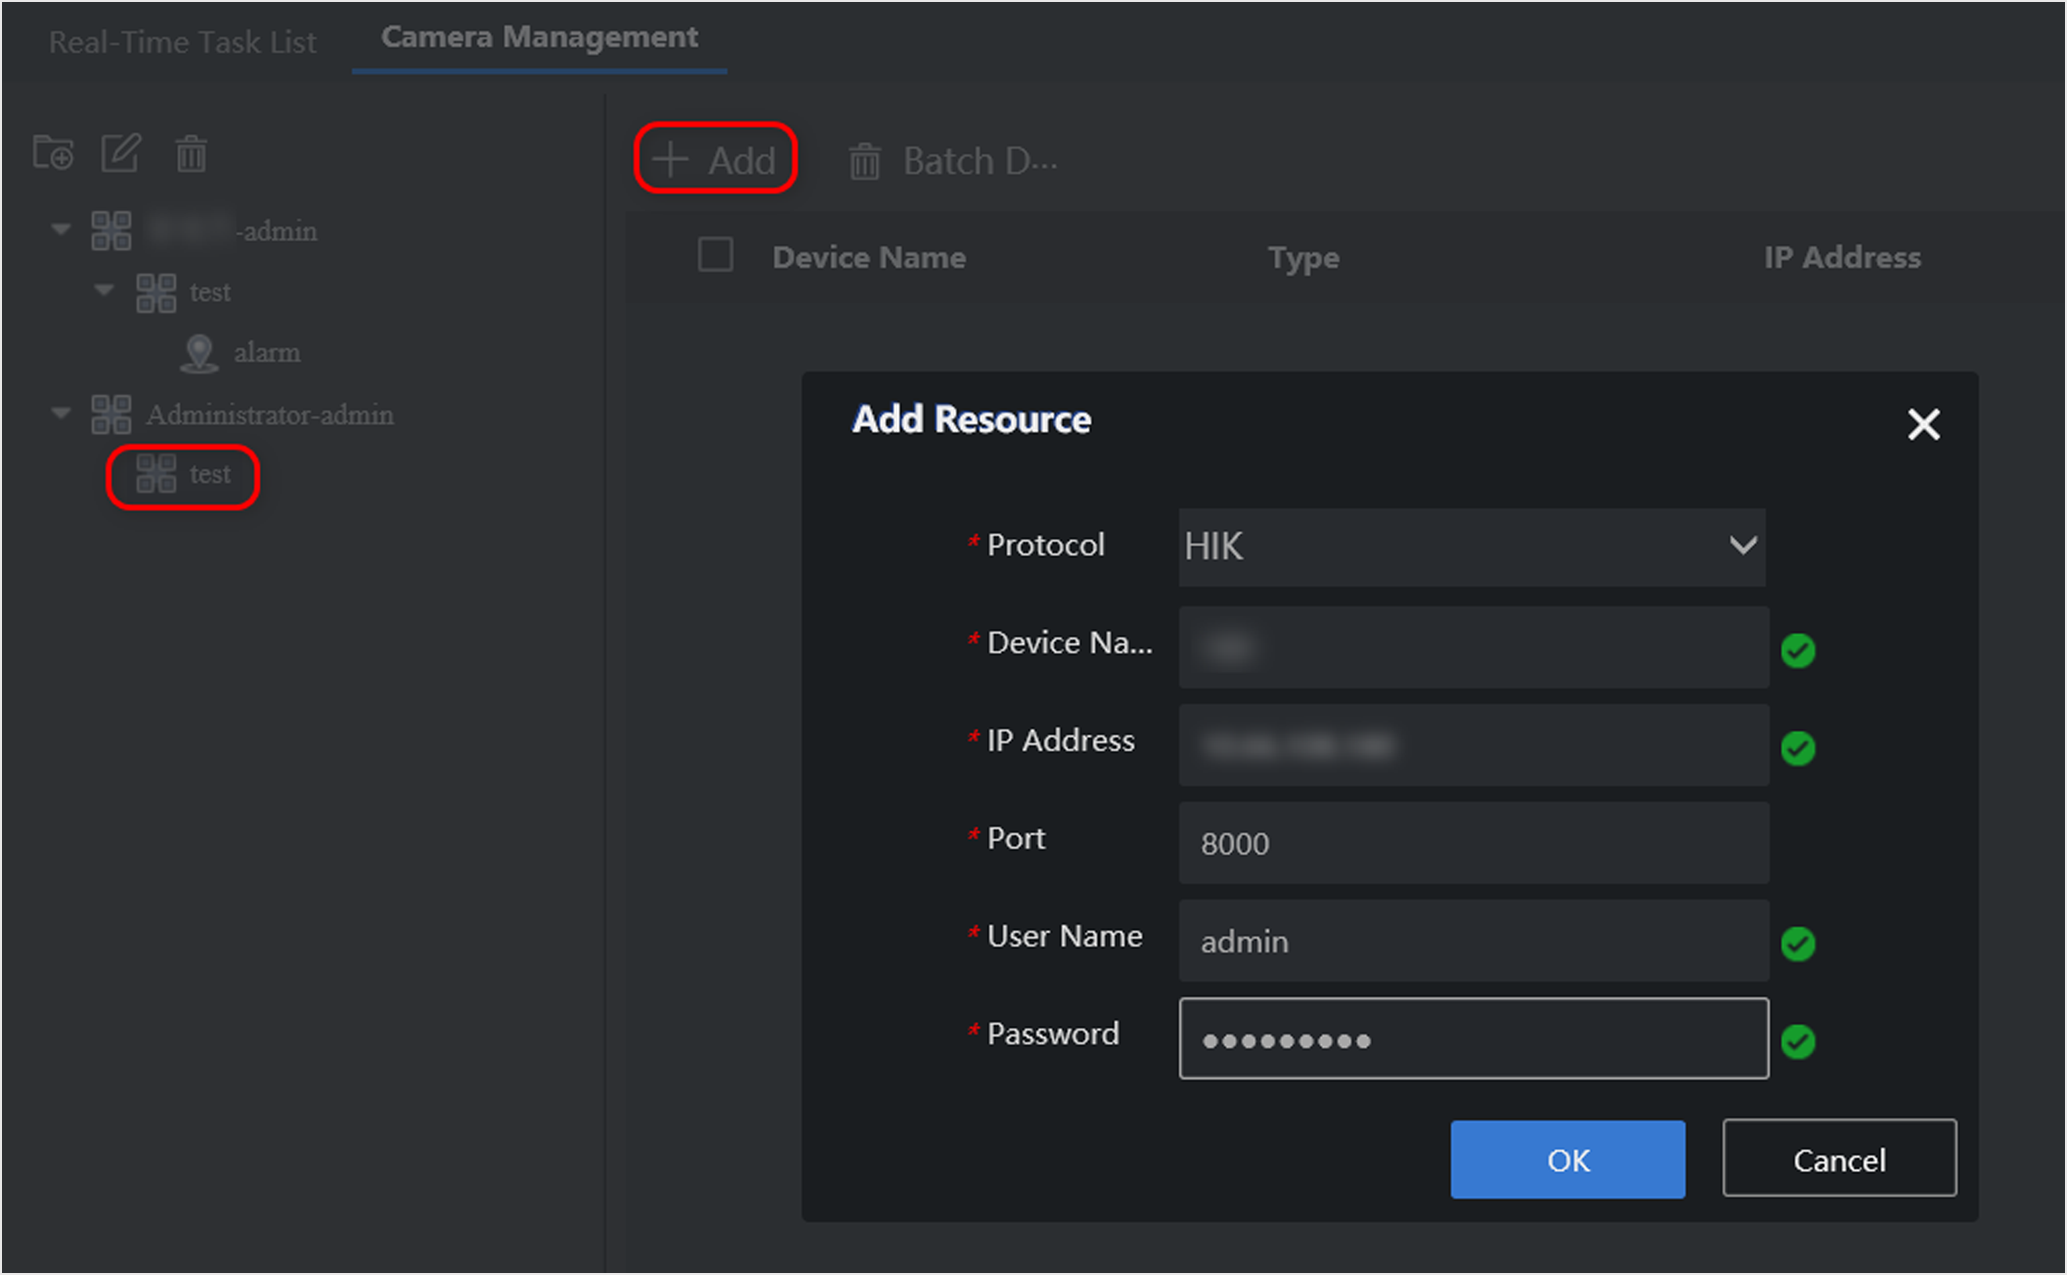
  5. Click the newly-added control center and enter information in the popup window.
    Figure 2. Add Camera
  6. Click OK.
  7. Click .
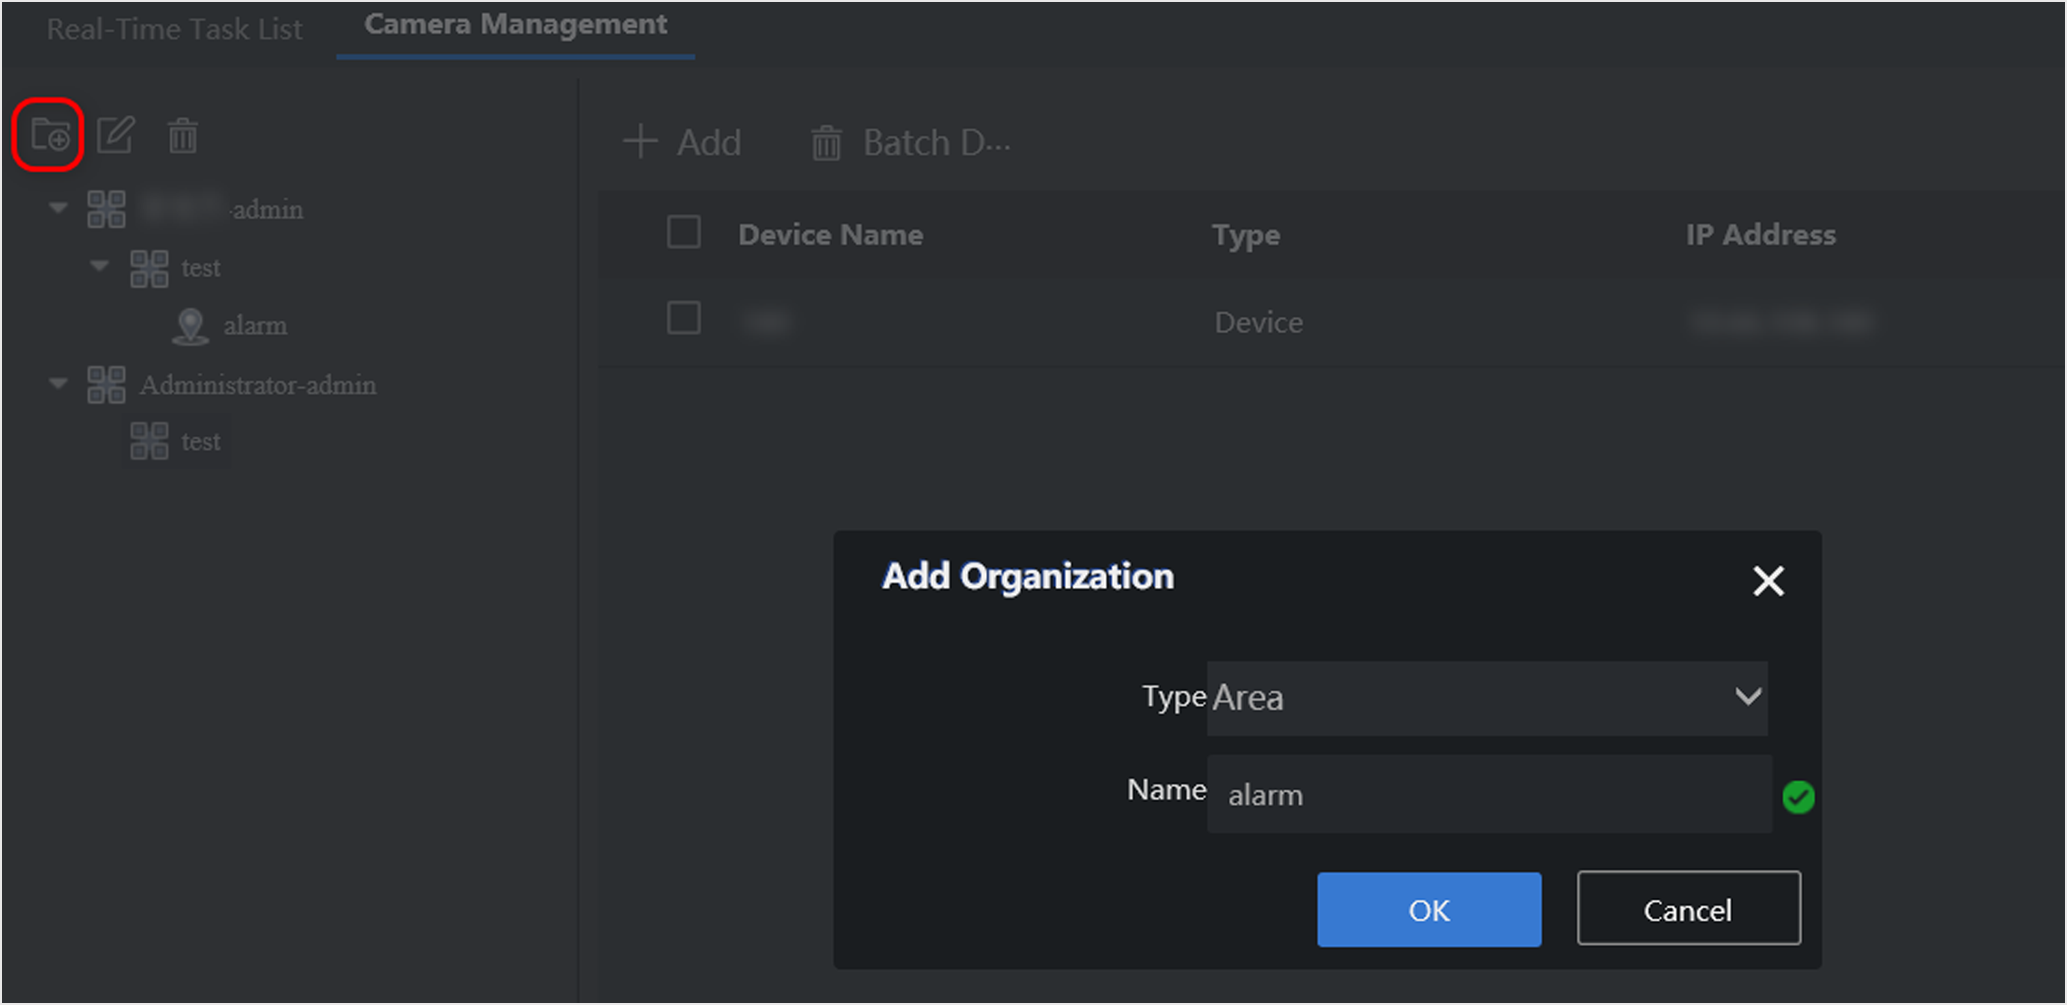
  8. Select Area as Type and enter the name of area.
    Figure 3. Add Area
  9. Click OK.
    Note:

    The area name supports digits, lower-case letters, upper-case letters, and special characters like "-" and " _". Up to 32 characters are allowed.

  10. Click the newly-added area and then click Add.
    Figure 4. Add Camera to Area
    Note:

    The camera can be armed only after it is added to area.

  11. Select the desired camera.
  12. Click OK.
    Note:

    Both control center and area can be added to control center, but only camera can be added to area.

Add Camera

Add the desired camera for arming.

Obtain the IP address, user name and login password of the camera.

Note:
  • Add one camera only for each time.

  • indicates control center and indicates area. The camera should be added to control center first before added to area. Here we take adding camera to control center "test" as an example.
  1. Go to Target Arming > Task Management > Camera Management.
  2. Go to Administration-admin > .
    Figure 1. Add Control Center
  3. Select Control Center as Type and enter the name of control center.
  4. Click OK.
  5. Click the newly-added control center and enter information in the popup window.
    Figure 2. Add Camera
  6. Click OK.
  7. Click .
  8. Select Area as Type and enter the name of area.
    Figure 3. Add Area
  9. Click OK.
    Note:

    The area name supports digits, lower-case letters, upper-case letters, and special characters like "-" and " _". Up to 32 characters are allowed.

  10. Click the newly-added area and then click Add.
    Figure 4. Add Camera to Area
    Note:

    The camera can be armed only after it is added to area.

  11. Select the desired camera.
  12. Click OK.
    Note:

    Both control center and area can be added to control center, but only camera can be added to area.