Set Self-Service Reservation Parameters
Self-service reservations refer to visit reservations made by visitors themselves. You can enable the Self-Service Reservation feature to get a QR code, which you can send to visitors to allow them to make visit reservations by scanning the QR code. In addition, you can set related parameters to ensure that self-service reservations meet the visitor management standards of your organization/company.
Self-reserved visitors are only allowed to access the access points contained in the default access level for visitors. For details about setting the default access level, see Add Access Level for Visitors.
To configure a different access level for a visitor, you need to make a reservation for them. For details, see Reserve a Visitor.
-
On the top left of the Web Client, select
 > Passing Management > Visitor > Basic Configuration > Self-Service Reservation.
- Optional:
Configure the following parameters.
- Face Quality Verification
-
After the visitor uploads a profile picture by a cellphone, the selected device will automatically start checking the profile picture's quality. If the profile picture is not qualified, the visitor will be notified. Only when the uploaded profile picture is qualified can the visitor reserve successfully. Otherwise, the visitor information cannot be uploaded to the platform.
Note:To use this function properly, make sure you have added an access control device or video intercom device to the platform beforehand.
- Visitor Group
-
Select a visitor group. After reserving successfully, the visitors will be added to the group. If you do not select, the visitor will be added to the default visitor group.
- Self-Service Reservation Approval
-
If you enable this, after the visitor self-service reservation, you need to review the visitor information on the Visitor to Be Approved page. After review, the visitor will be added to the selected visitor group. See Review Visitor Reservations for details about how to review.
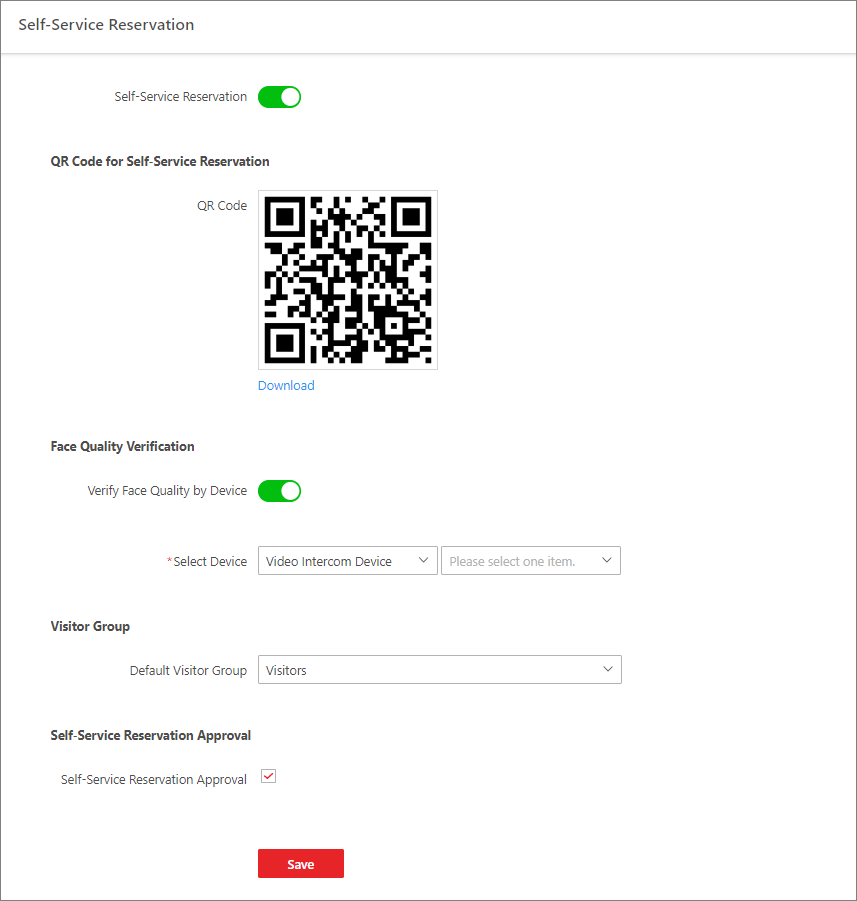 Figure 1 Self-Service
Reservation
Figure 1 Self-Service
Reservation