Before configuring parking guidance, you need to add a floor to a parking
lot. After that, you can perform further operations to the floor, including relating
devices, configuring a map, marking display screens, and configuring the types of parking
spaces.
-
On the parking guidance configuration page of a selected parking lot, click
Add Floor.
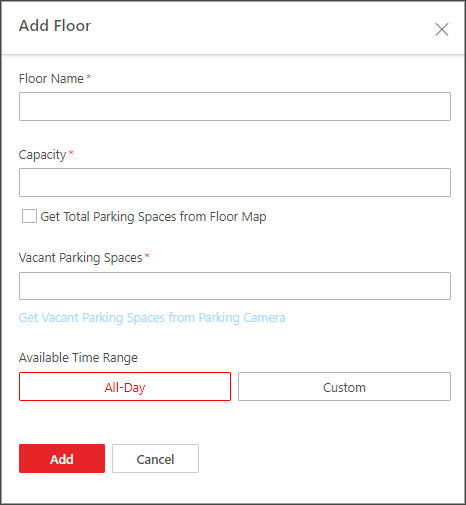 Figure 1 Add Floor Pane
-
Create a name for the floor.
-
Set the total number of parking spaces (capacity) of the floor.
Note:
If you have added parking spaces on the map of the floor, you
can check Get Total Parking Spaces from Floor
Map, and the number of parking spaces on the map will be
synchronized here.
-
Set the number of vacant parking spaces of the floor.
Note:
If the floor has been related with parking camera(s), you
can check Get Vacant Parking Spaces from Parking
Camera, and the number of vacant parking spaces counted
by the parking camera(s) will be synchronized here.
-
Set the period during which the floor is available for parking. Click
All-Day, or click Custom to
customize a period.
-
Click Add.
You will enter the page where you can relate devices, configure
a map, mark guidance screen, and configure types for parking spaces.