Line Crossing Detection
Line crossing detection detects people, vehicles, and objects crossing a set virtual line. The detection direction can be set as bidirectional, from left to right or from right to left.
- Go to Smart Analysis > Smart Event Settings > Perimeter Protection.
- Select a camera.
-
Click Line Crossing.
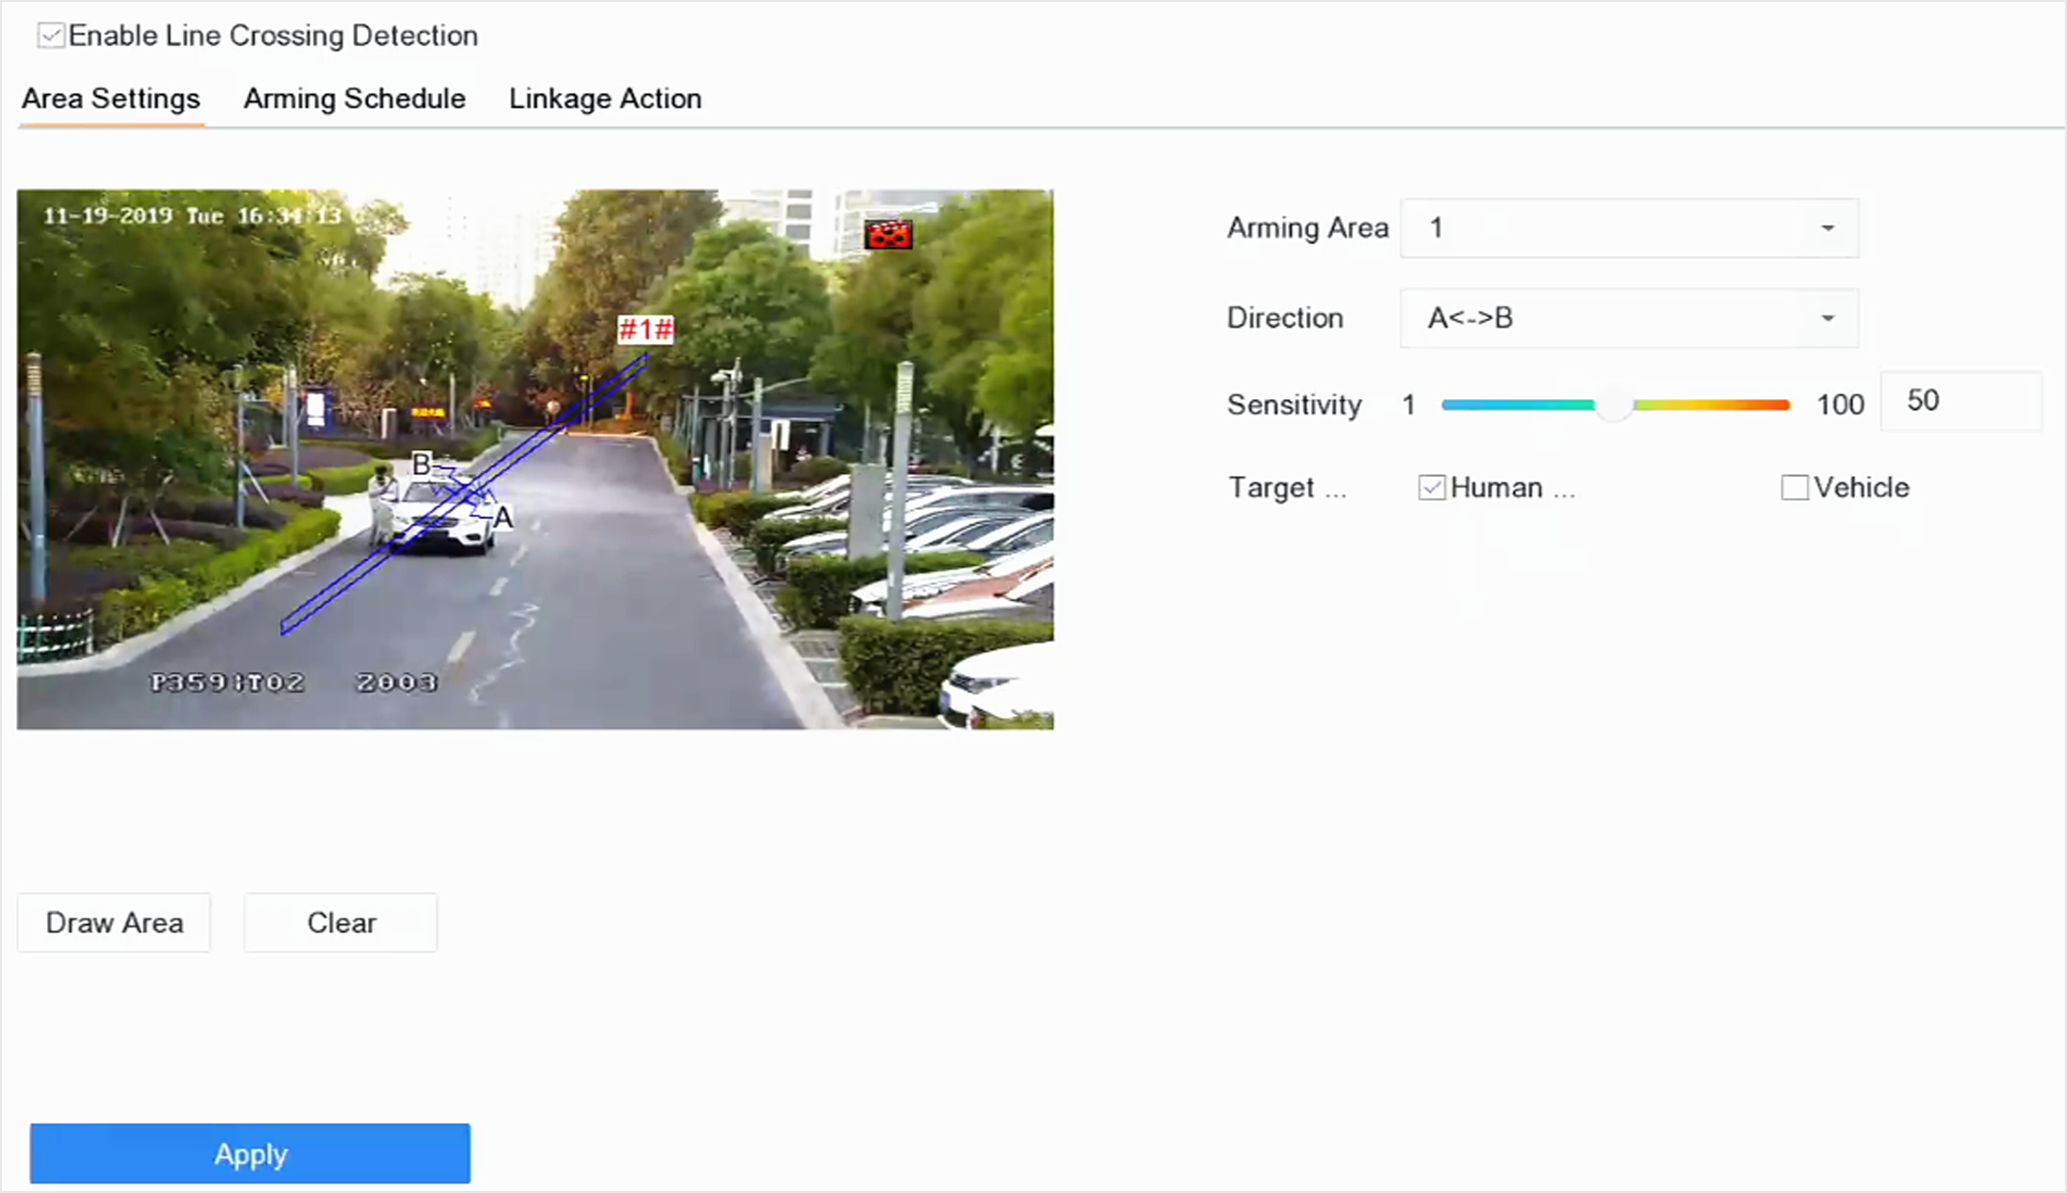 Figure 1 Line Crossing
Detection
Figure 1 Line Crossing
Detection - Check Enable Line Crossing Detection.
- Optional: Check Save VCA Picture to save the captured pictures of line crossing detection.
-
Set the line crossing detection rules and detection areas.
- Select an arming area.
-
Select Direction as
A<->B, A->B, or
A<-B.
- A<->B
-
Only the arrow on the B side shows. When an object goes across the configured line with both directions can be detected and alarms are triggered.
- A->B
-
Only the object crossing the configured line from the A side to the B side can be detected.
- B->A
-
Only the object crossing the configured line from the B side to the A side can be detected.
- Set the detection sensitivity. The higher the value is, the more easily the detection alarm can be triggered.
- Click Draw Region.
- Draw a virtual line in the preview window.
- Optional:
Draw the maximum size/minimum size for targets.
Note:
Only the targets in the size ranging from maximum size to minimum size will trigger line crossing detection.
- Click Max. Size/Min. Size.
- Draw an area in preview window.
- Click Stop Drawing.
- Optional: Select Detection Target as Human or Vehicle to discard alarms which are not triggered by human body or vehicle.
- Set the arming schedule. Refer to Configure Arming Schedule.
- Set linkage actions. Refer to Configure Linkage Actions.
- Click Apply.