Import Persons from Access Control Devices or Video Intercom Devices
If the added access control devices and video intercom devices have been configured with person information, you can get the person information from these devices and import it to the platform. The person information that can be imported includes person names, profile pictures, credentials (PIN codes, cards, and fingerprints), effective periods, person roles, etc.
-
On the top navigation bar, select
 > Basic Management > Person.
-
Click
 > Import Person Information from Device.
-
If the following window pops up, select a method to import the person
information.
Note:
If not, skip this step.
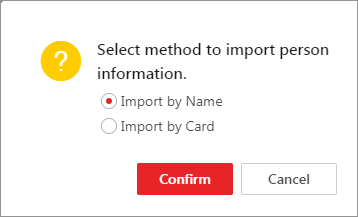 Figure 1 Select an Import
Method
Figure 1 Select an Import
Method- Import by Name
-
The person information directly linked to the access control devices will be imported.
Note:This method is usually used for the access control devices with facial recognition capability.
- Import by Card
-
The person information linked to the cards of the access control devices will be imported
-
Note:
This method is usually used for the access control devices which link person information via cards.
- Optional:
Perform the following operation(s).
Option Description Edit Person
Click the person name to edit the person details.
Note:When editing the person's effective period, if you have issued temporary card(s) to the person, make sure the expiry date(s) of the person's temporary card(s) are within the effective period.
Delete Persons
Check the person(s) and click
 to delete the
selected person(s).
to delete the
selected person(s).Delete All Persons
Hover the cursor onto
 beside
  , and then click
Delete All to delete all persons.
, and then click
Delete All to delete all persons.Clear Profile Pictures
Hover the cursor onto
beside , and then click
Delete Profile Picture Only to clear all
the uploaded profile pictures.Export Person Information
Click
 > Export Person Information to export all the added person information as a ZIP
file to your PC. For information security, you need to set a
password for decompressing the ZIP file.Note:
> Export Person Information to export all the added person information as a ZIP
file to your PC. For information security, you need to set a
password for decompressing the ZIP file.Note:You can check Access Level Information or Schedule Information to export the additional information at the same time.
Export Profile Pictures
Click
> Export Profile Picture to export the profile pictures of the added persons
as a ZIP file to your PC. For information security, you need to set
a password for decompressing the ZIP file.Note:To activate this function, you should go to page to check the Export Profile Pictures.
Adjust Person
-
Move the persons to another department. Once moved, the access levels and schedules of the selected persons will be changed.
-
Select one or more persons, click
 > Adjust Department.
 -
Select the target department to which the persons are about to be moved.
-
Click Move.
-
-
Adjust the effective period for the person in applications.
-
Select one or more persons, click
> Adjust Effective Period. -
Select the effective period from the drop-down list.
-
Click OK.
-
-
Adjust the person's status as resigned.
-
Select one or more persons, click
> Adjust Effective Period. -
Set the departure date, type, and reason..
-
Click OK.
-
Synchronize Domain Persons
Select person(s) whose information has changed in the AD domain and click at the top of person list to get the latest person information.
Link Persons to Indoor Stations
Select one or more persons, and click , then select an indoor station for each person to apply the person information to the indoor station. For details, refer to Link Persons to an Indoor Station.
Note:-
A pop-up window will appear after you click Save. Click Yes to save the indoor station's room number as the room number, or click No to keep the old room number (if there is not an old room number, the room number of the indoor station you select will be saved).
-
Make sure you have added indoor stations to the platform.
-
Up to 10 persons can be linked to one indoor station. And one person can only be linked to one indoor stations.
-
Make sure the room number is consistent with the actual location information of the indoor station.
Clear Access Levels
Select one or more persons, click to clear the access levels of the selected persons.
Note:The access levels of these persons cannot be restored once they are cleared.
Disable Access Levels
Select one or more persons, and click to disable the access levels of the selected persons temporarily.
Note:The access level settings of the selected persons will not be cleared, and will be restored after restoring the persons access levels.
Restore Access Levels
Select one or more persons, and click to restore the disabled access levels.
Enable/Disable Check-In/Out via Mobile Client
Select one or more persons, click .
Check Person Authorization
Select one or more persons, click to enter Check Person Authorization page. On the page, you can test whether the person's access levels and credentials are applied to the access control devices, elevator control devices, and video intercom devices. If failed to be applied, you can apply them again.
Filter Displayed Persons
Enter a person's full name, ID, or card No. and click Filter to filter persons as required.
Note:When entering the card No., you can select Read Card Number by Device to select a device to read the card No. For details, refer to Set Card Issuing Parameters.
View/Edit Credential Information
In Credential Information column, you can view/edit a person's card, fingerprint, face picture, and iris information, and view and download the person's QR code.
-