Add Parking Lot
You can add one or multiple parking lots for management, including adding entrances and exits, setting the number of parking spaces, editing the parking lot formation, setting entry & exit rules and parking fee rules.
-
On
the top navigation bar, select
 > Passing Management > Parking Lot.
-
In the top right corner of the page, click Add
Parking Lot to open the Add Parking Lot pane.
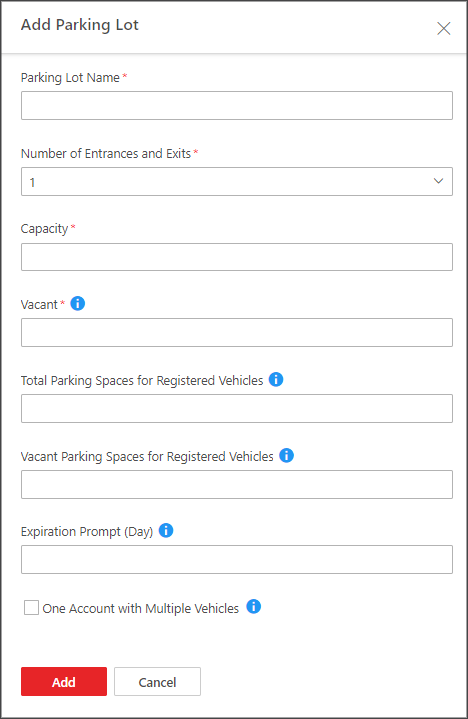 Figure 1 Add Parking
Lot
Figure 1 Add Parking
Lot - Optional:
Edit the parking lot as needed.
Option Description Delete a Parking Lot
In a parking lot area, click Delete to delete it.
Edit the Number of Vacant Parking Spaces
In a parking lot area, click
 above Vacant to edit it.
Edit the Number of Vacant Parking Spaces for Registered Vehicles
In a parking lot area, click
above Vacant Parking Spaces for Registered
Vehicles to edit it.Edit Parking Lot Information
-
In a parking lot area, click to enter the page of this parking lot.
-
In the upper-right corner, click Edit to open the Edit Parking Lot pane.
Note:You can also click
on the
top of the parking lot list to edit its information. -
Edit the information of the parking lot, such as the name, capacity, etc.
-
Click Save.
Add Allowed Parking Duration
-
In a parking lot area, click to enter the page of this parking lot.
-
On the right side of Allowed Parking Duration, click Add.
-
In the pop-up window, select a vehicle type from Vehicle List.
-
Enter the maximum parking duration allowed for the selected vehicle parked in the created parking lot.
Note:You can configure an event or alarm which will be triggered when a vehicle's parking is due. For example, if you enter 300 here, an event or alarm (if any) will be triggered if a vehicle of the selected type has parked longer than 5 hours (i.e., 300 minutes).
Add/Edit/Delete a Sub Parking Lot
In a parking lot area, click to enter the page of this parking lot.
-
On the top of the parking lot list, click
 to add a sub
parking lot.
to add a sub
parking lot. -
Select a sub parking lot, and click
on the top
of the parking lot list or Edit in
the upper-right corner to edit it. -
Select a sub parking lot and click
 on the top
of the parking lot list to delete it.
on the top
of the parking lot list to delete it.
-