For the terminal which supports ISUP, you can set general authentication
code on the platform. The authentication code is used for the terminal to register on the
platform by ISUP. After enabling general authentication code on the platform, you should
enter the authentication code on the terminal, which can then be added to the platform
automatically.
-
On the top navigation bar, select to enter the device management page.
-
On the top, select Device.
-
On the left navigation pane, click .
-
Click General Authentication Code Settings.
-
Switch on General Authentication Code Settings.
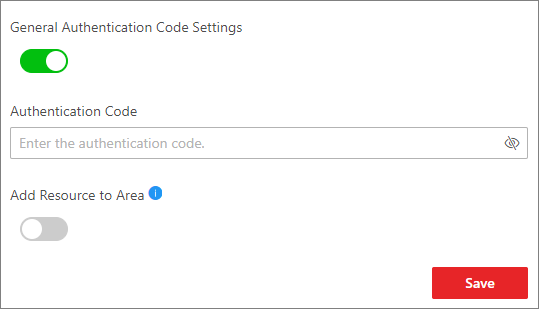 Figure 1 Set General
Authentication Code
Figure 1 Set General
Authentication Code
-
Enter the authentication code.
Note:
The authentication code should contain 8 to 16 characters,
including at least two of the following categories: upper case letters,
lower case letters, and numbers.
- Optional:
Import the resources of the device to the area.
-
Switch on Add Resource to Area.
-
Select Create Area by Device Name or
Existing Area.
- Create Area by Device Name
-
Create a new area by the device name.
- Existing Area
-
Select an existing area from the area
list.
Note:
You can create a new area by the device
name or select an existing area. Also, you can click
Add
to add new area(s). For details, refer to Add an Area for Current Site.
-
Click Save.
- Optional:
Perform the following operations.
| Option |
Description |
|---|
|
Change Password
|
Select one or more devices, and click Change
Password to change the password for the selected
devices.
Note:
If multiple devices have the same password, you can
change the password for them simultaneously.
|
|
Delete Device
|
Select one or more devices, and click
Delete to delete the selected
devices.
Note:
If the device which has been linked to the video wall
is deleted, the corresponding video wall program cannot be
released.
|
|
Search Device(s)
|
Enter a keyword in the search box on the upper right
corner of the page to quickly search the target device(s).
|
|
Configure Device Display Settings
|
Select one or more devices and click Display
Settings to enter the Display Settings page. See
Configure Device Display Settings for details.
|
|
Configure Device Privacy Settings
|
Select one or more devices, and then click
Privacy Settings to enter the Privacy
Settings page. See Configure Device Privacy Settings.
|
|
Set Time Zone
|
Select one or more devices, and click Time
Zone to configure the time zones of the selected
devices.
You can select Get Device's
Time Zone or Manually Set Time
Zone according to your requirements.
|
After setting the general authentication code on the platform, you
should enter the IP address of the platform, registration port number (7600 by
default), and the authentication code on the terminal's registration interface. Then
the terminal will be added to the platform automatically.
 > Basic Management > Device to enter the device management page.