The Web Client automatically searches for online
on-board
devices on the same local subnet with it or the SYS server. You can batch add multiple detected online
on-board
devices to the platform if they share the same user account.
-
Make sure the devices you are going to add are correctly
installed and connected to the network as specified by the manufacturers.
Such initial configuration is required in order to be able to connect the
devices to the HikCentral Professional via
network.
-
Make sure you have activated the devices. Refer to Create Password for Inactive Device(s) for detailed instructions on activating devices.
-
On the top left of the Web Client, click .
-
Select some detected online
on-board
devices from the Online Device list.
-
Click Add to Device List.
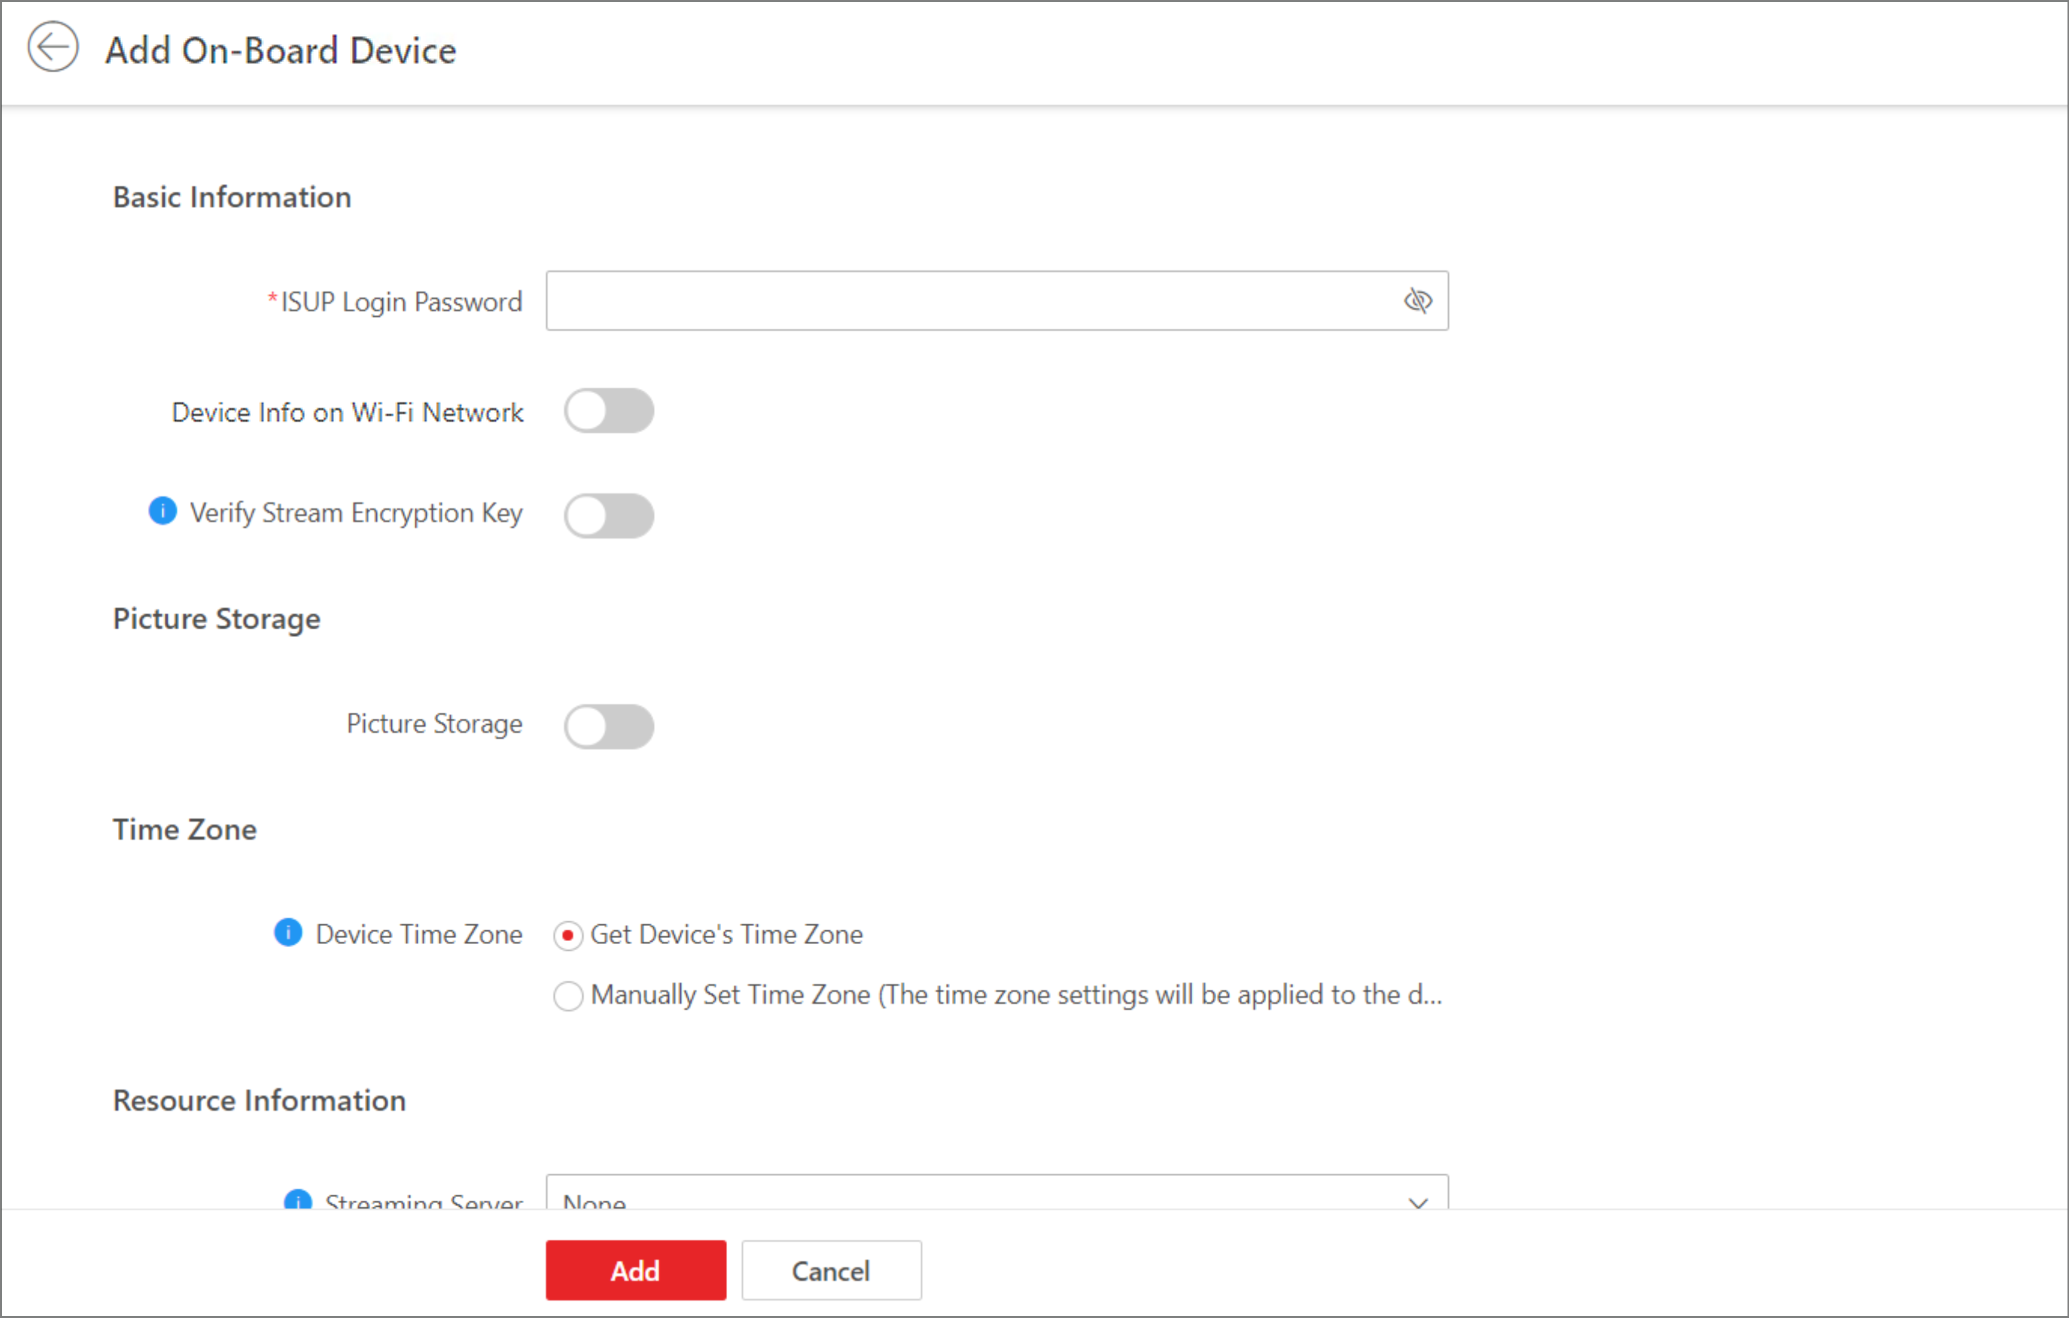 Figure 1 Batch Add Detected
Online
On-Board
Devices
Figure 1 Batch Add Detected
Online
On-Board
Devices
-
Set basic information.
-
Enter the ISUP login password of the
on-board
devices.
CAUTION:
The password strength of the device can be automatically checked. We
highly recommend you change the password of your own choosing (using a minimum of 8
characters, including at least three kinds of following categories: upper case
letters, lower case letters, numbers, and special characters) in order to increase
the security of your product. And we recommend you change your password regularly,
especially in the high security system, changing the password monthly or weekly can
better protect your product.
Proper configuration of all passwords and other security settings is the
responsibility of the installer and/or end-user.
- Optional:
Switch on
Device
Info on Wi-Fi
Network and
enter the address and port of the
on-board
devices as well as the user name and password of the Wi-Fi.
Note:
Once a vehicle reaches its destination and the
on-board
device successfully connects to the Wi-Fi there, the video
recorded during the journey will be copied back to the
platform.
- Optional:
Switch on Verify Stream Encryption Key and enter
the stream encryption key set on the
on-board
devices.
Note:
The precondition is that the
on-board
devices supports stream encryption and this feature has been
enabled for them.
When starting live view or remote playback of the
cameras related to the
on-board
devices, the Client will verify the key stored in the SYS server for security
purpose.
- Optional:
Set picture storage.
-
Switch on Picture Storage.
-
Select a storage location.
Note:
-
If you select Local
Storage, you need to click
Configure
to configure picture storage on the SYS server.
-
If you select Hybrid Storage Area
Network, Cluster
Storage, pStor,
or Network Video Recorder, you
need to select a storage medium from the drop-down
list.
-
Set devices' time zone.
- Get Device's Time Zone
-
The time zone of the device will be automatically
chosen according to the region of the device.
- Manually Set Time Zone
-
You can select a time zone and the settings will be
applied to the device automatically.
-
Set resource information.
-
Select a Streaming Server.
- Optional:
Check Wall Display via Streaming Server.
Note:
If the encoding device is not on the same network
with cameras, it will get the stream for live view and playback
via the Streaming Server. If they are on the same network, the
encoding device can get stream directly from cameras.
- Optional:
Check Get Device's Recording Settings to get
cameras' recording settings configured on the
on-board
device.
-
Click Add.
- Optional:
Perform the following operations after adding these
on-board
devices.
| Option |
Description |
|---|
|
Edit
On-Board
Device
|
On
the device list, click the name of an
on-board
device to edit it.
|
|
Configure
On-Board
Device Remotely
|
On the device list, click  in the Operation
column to configure an
on-board
device remotely. in the Operation
column to configure an
on-board
device remotely.
|
|
Reset Device's Time Zone
|
On the device list, select one or multiple
on-board
devices and click Time Zone to edit their
time zones.
|
|
Delete
On-Board
Device
|
Select one or multiple devices and click
Delete to delete them.
|
|
Search for
On-Board
Device(s)
|
Enter key words in the search box and click  to search for
specified
on-board
device(s). to search for
specified
on-board
device(s).
|
 > Device > Device and Server > On-Board Device.