Search for Recording Status of Resource

You can search for the recording status of cameras on the current site. The recording status includes the recording integrity rate, total time length abnormal recording, times of recording interruptions, etc.

  1. On the top, select > Basic Management > Maintenance.
  2. Select System Log > Resource Logs on the left.
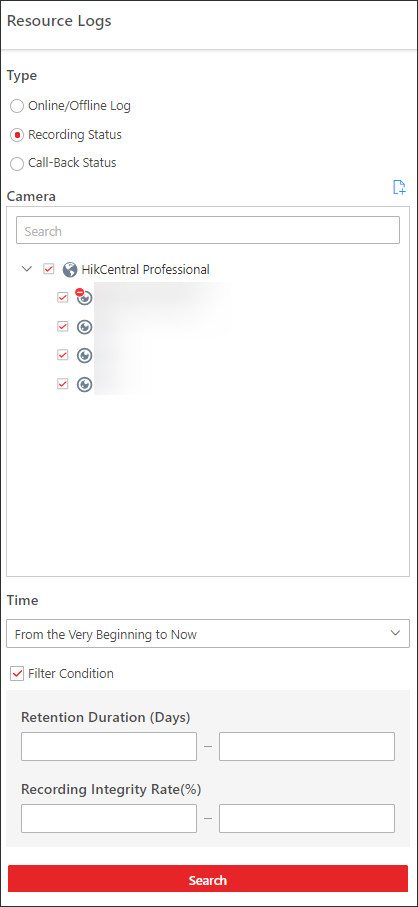
    Figure 1 Search for Resource Recording Status
  3. In Type, select Recording Status.
  4. Click to show the area list of the current site and then select the cameras whose logs are to be searched for.
  5. Optional: Modify your selection in the selected camera list.
    Option Description

    Remove a Camera

    Click and then click to remove a camera from the list.

    Remove All Cameras

    Click and then click to remove all cameras in the list.

  6. In Time, specify the time range of this search.
    Note:

    You can select Custom Time Interval to set a precise start time and end time.

  7. Optional: If there are a large number of resources, check Filter Condition and set the filter conditions.
    Retention Duration (Days)

    Set a range of the retention duration of the recorded video footage to filter the cameras.

    Recording Integrity Rate

    Set a range of the recording integrity rate to filter cameras. The recording integrity rate refers to the percentage obtained from dividing the actual recording duration by the scheduled recording time.

    Note:

    For details about recording schedule, refer to Configure Recording Schedule Template.

  8. Click Search.

    Recording status of each camera are listed on the right, including camera name, camera IP address, area where the camera belong, video storage type, etc.

    Start Time

    The time when the camera started recording.

    End Time

    The latest time when the camera was recording.

    Retention Duration (Days)

    The retention duration (unit: day) of the recorded video footage refers to the duration between Start Time and End Time.

    Total Length

    The total time length of video storage.

    Abnormal Total Length

    The total time length of the video loss within the scheduled time.

    Recording Interruption

    The total times of recording interruption within the scheduled time.

  9. Optional: Check historical recording status.
    1. Optional: Click Rule in the top right corner to view the analytical rules for history videos.
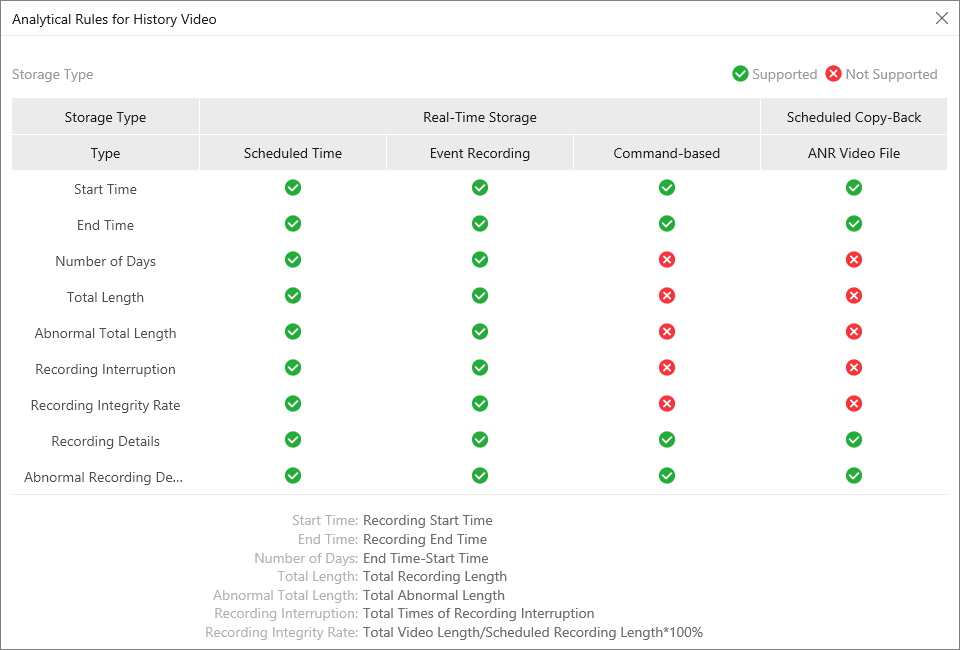
      Figure 2 Analytical Rules for History Video
    2. Click a camera name to open the History Recording Status panel.
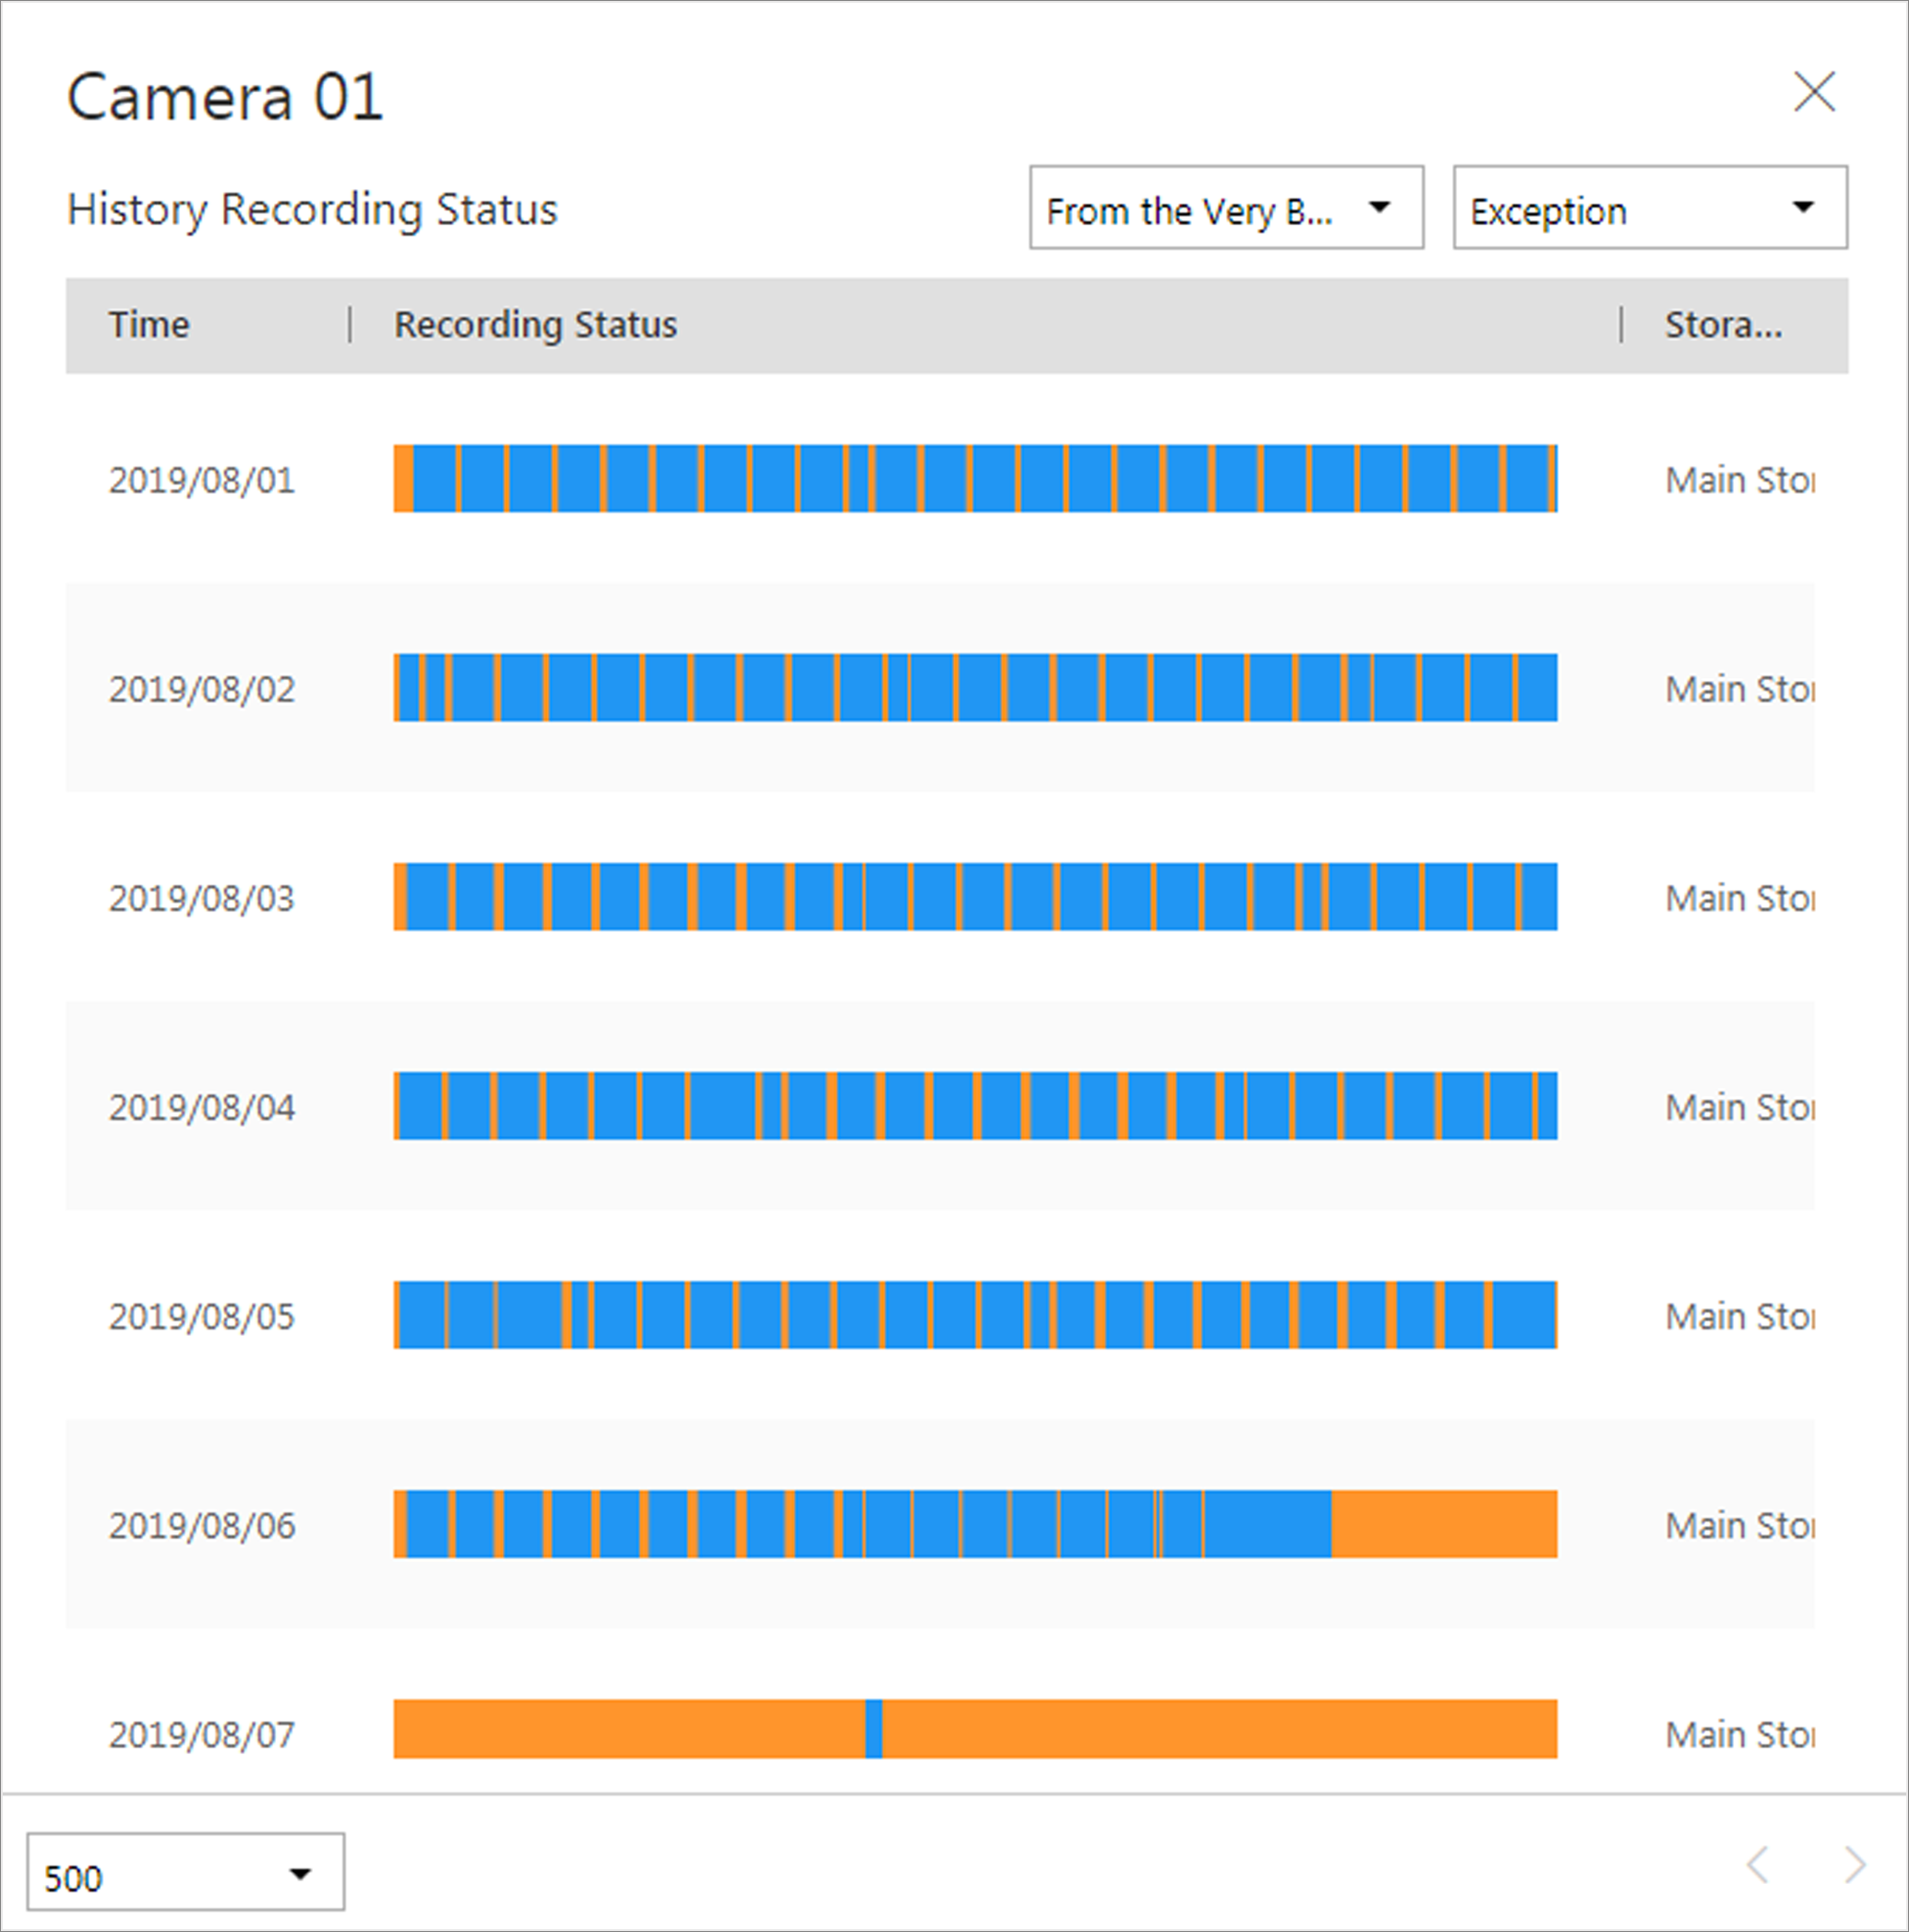
      Figure 3 History Recording Status
      Note:

      The blue parts on the time bars represent the time periods during which video footage were recorded. The orange parts on the time bars represent the time periods during which video loss occurred or the time periods during which no recording schedule existed.

    3. Select a time period and a status (abnormal or all) from the drop-down lists respectively to filter data.
    4. Optional: Select the number of records displayed on each page of the History Recording Status panel from the drop-down list at the lower-left corner of the panel.
    5. Optional: Move the cursor to the time bar to show the 24 hours on it, and click one hour to view recording status details within the hour.
  10. Optional: Click Export, and then select a file format and a report type to download the searched logs as a single file to your local PC.