Check In a Reserved Visitor
If a visitor has a reservation, you can check in the visitor by entering reservation information and visitor information.
-
On the top left of the Web Client, select
 > Passing Management > Visitor > Visitor Check-In/Out > Visitor Check-In.
-
Go back to the Visitor Check-In page to check whether the visitor information
fails to be applied to the visitor terminal(s). If it fails, check failure
details, troubleshoot, and apply again.
Note:
If there is visitor information failing to be applied to visitor terminal(s), a notification will show above the visitor list on the Visitor Check-In page. In this case, you can click View to view the failure details and troubleshoot according to the reasons shown on the window, and then click Apply Now or Apply Again to apply the visitor information to visitor terminal(s) again.
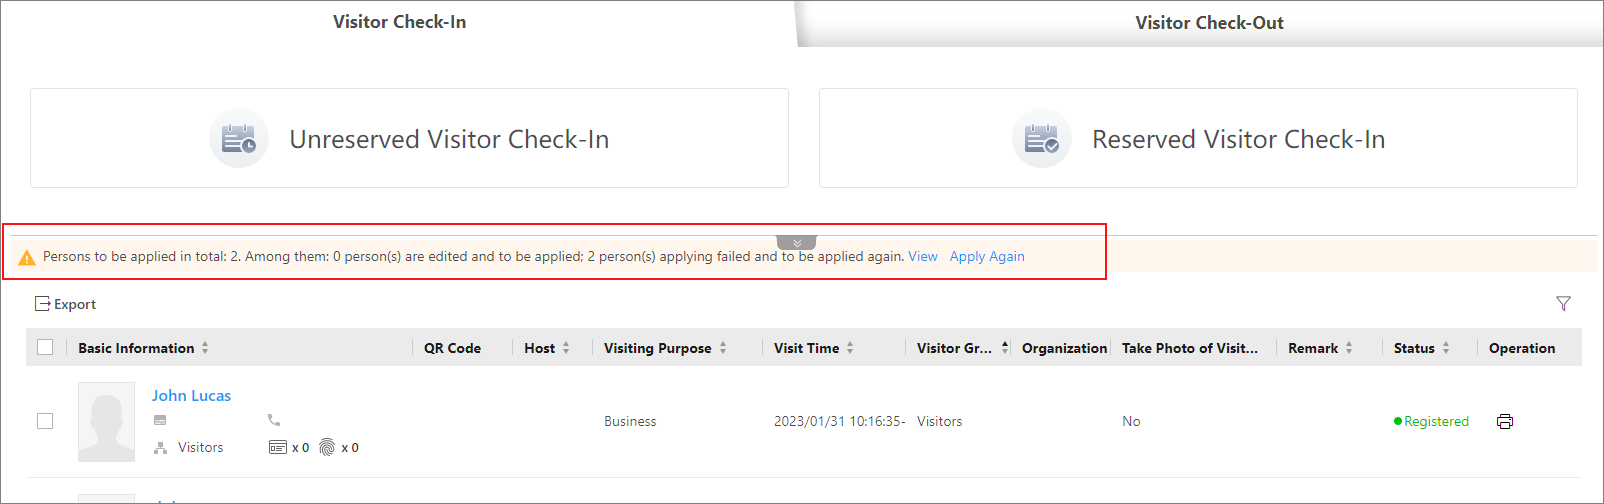 Figure 1 Notification of
Applying Failures
Figure 1 Notification of
Applying Failures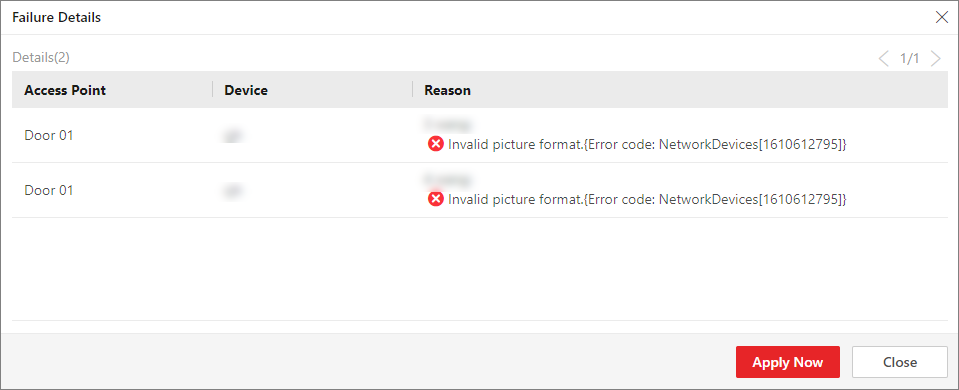 Figure 2 Failure
Details
Figure 2 Failure
Details - Optional:
Perform the following operations on the Visitor Check-In page if needed.
Option Description Filter Visitors
Click
 to filter visitors
by conditions such as the ID No., name, phone, and organization.
to filter visitors
by conditions such as the ID No., name, phone, and organization.For the Status condition, you can click
 to select one or
more reservation status
(reserved,
expired, checked in, etc.) to filter
visitors.
to select one or
more reservation status
(reserved,
expired, checked in, etc.) to filter
visitors.You can also click Select Additional Information to filter visitors.
Export Visitors
Select visitors and click Export to export checked-in visitors to the local PC as a file.
Note:You will be required to set a password for the exported file for security. We highly recommend you change the password of your own choosing (using a minimum of 8 characters, including at least three kinds of following categories: upper case letters, lower case letters, numbers, and special characters) in order to increase the security of your product.
Edit Visitor Information
Click on a visitor's name to edit the information.Note:If the visitor is checked out, you cannot edit the information.
Download a Visitor QR Code
Click
 in the QR Code column to download the QR code
for the visitor. You can print it or send it to the visitor for
identity authentication at access points.
in the QR Code column to download the QR code
for the visitor. You can print it or send it to the visitor for
identity authentication at access points.Print a Visitor Pass
Click
 to print the visitor
pass for the visitor.
to print the visitor
pass for the visitor.