Add Decoding Device by IP Address
When you know the IP address of the decoding device to add, you can add the device to your system by specifying IP address, user name, password and other related parameters. This adding mode requires you to add the devices one by one, so it is a good choice if you only want to add a few devices and know all the details mentioned above.
Make sure the devices you are going to use are correctly installed and connected to the network as specified by the manufacturers. Such initial configuration is required in order to be able to connect the devices to the HikCentral Professional via network.
-
On
the top navigation bar, select
 > Basic Management > Device.
-
Select IP Address as Adding Mode.
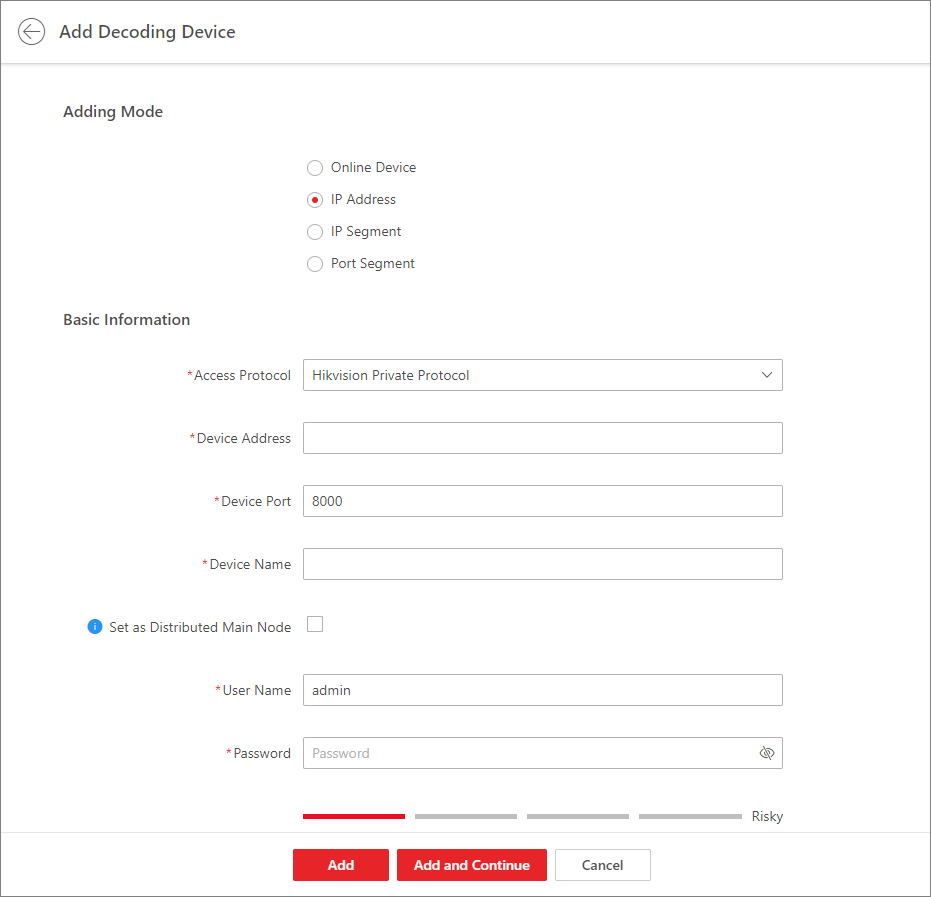 Figure 1 Add Decoding Device
Page
Figure 1 Add Decoding Device
Page - Optional:
Check
Set
as Distributed Main Node to set the device as
the main node of distributed
devices.
Note:
-
It is generally used for scenarios such as large-scale command centers and exhibition halls which require thousands of decoding outputs.
-
You can add nodes to the main node later via the device editing page by clicking Add in the Node Details field, or via the decoding device list by hovering over the main node and clicking
 .
.
-
- Optional:
Perform the following operations after adding the decoding device.
Option Description View Decoding Output
Click
 to show the decoding
outputs. You can view the output resolution and linking status after
linking the output to smart wall. For details about linking decoding
output with smart wall, see Add Smart Wall.
to show the decoding
outputs. You can view the output resolution and linking status after
linking the output to smart wall. For details about linking decoding
output with smart wall, see Add Smart Wall. Edit Decoding Device
Click
 to edit information
about the decoding device. You can also modify the network location
as LAN IP address or WAN IP address according to the type of the
network where the device is, and the names of the local signal
sources.
to edit information
about the decoding device. You can also modify the network location
as LAN IP address or WAN IP address according to the type of the
network where the device is, and the names of the local signal
sources.Remote Configuration
Click >
>  to set the remote configurations of the device.Note:
For detailed operations, see the user manual of the device.
Delete
Click
>  to delete the device.
Configure Cascade
Click
 behind the added
video wall controller to enter the Cascading page. See Configure Cascade for details.
behind the added
video wall controller to enter the Cascading page. See Configure Cascade for details.