Link Decoding Output with Window
After adding the decoding device and smart wall, you should link the decoding device's decoding output to the window of the smart wall.
-
On the top navigation bar, select
 > Basic Management > Device.
-
Click
 in front of a decoding device to
show its decoding outputs.
in front of a decoding device to
show its decoding outputs.
-
Click in front of a smart wall to show
its windows.
-
Drag the decoding output from the Decoding Device panel to the display window
of the smart wall, to configure a one-to-one correspondence.
Note:
You can also press the Ctrl key and Alt key at the same time, and select two decoding outputs. All decoding outputs between the two outputs will also be selected, then you can drag all outputs to the display window.
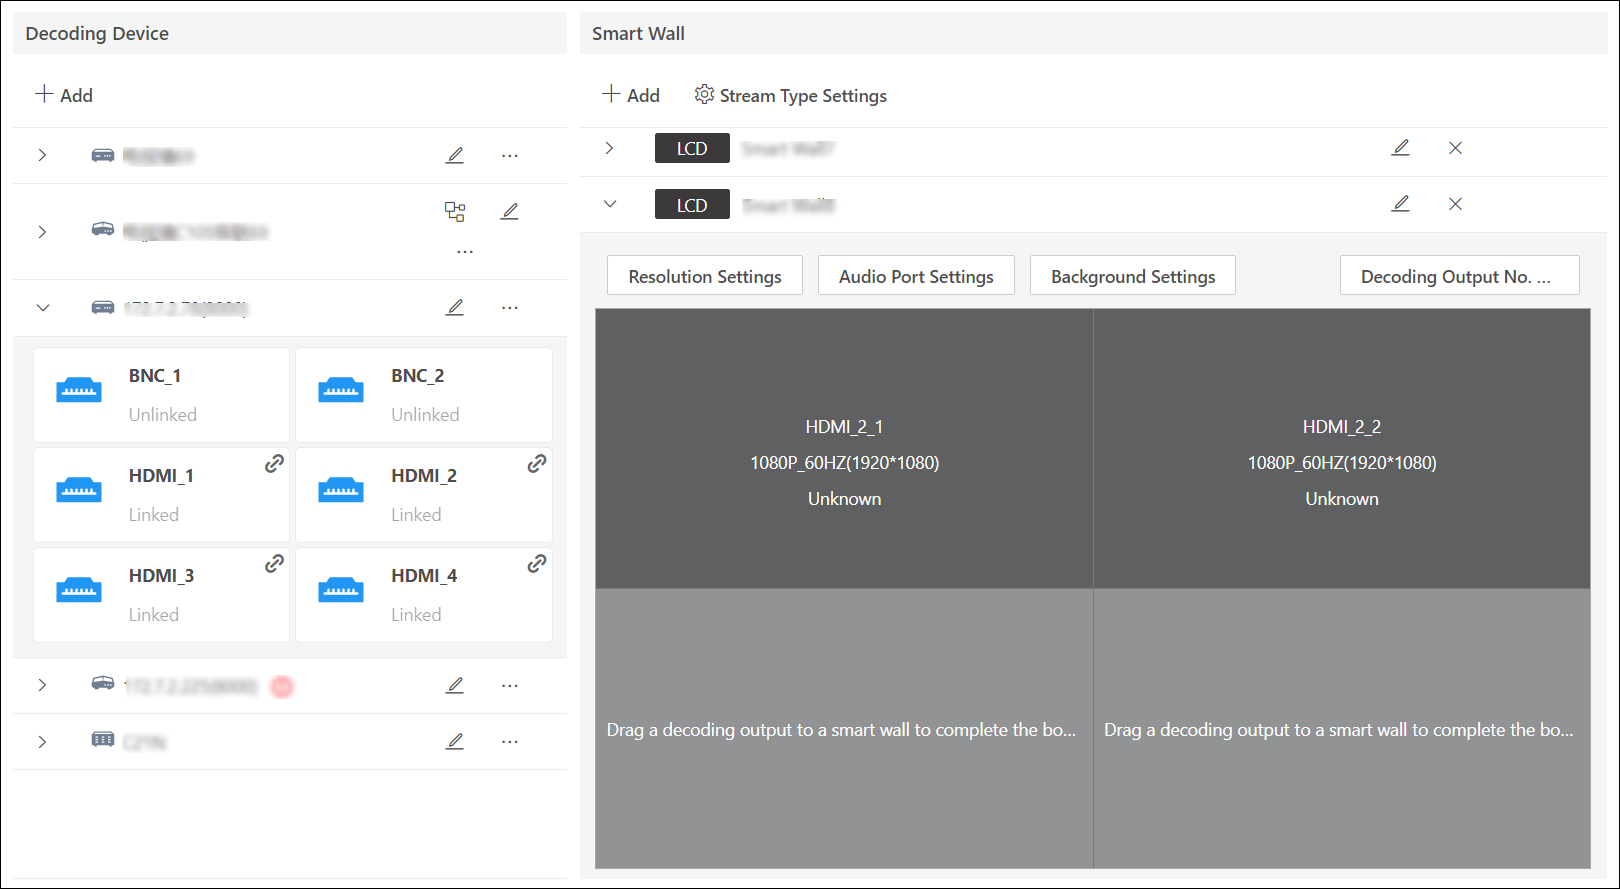 Figure 1 Link Decoding Device
with Window
Figure 1 Link Decoding Device
with Window - Optional:
Perform the following operations after linking the decoding output with the
window.
Option Description Cancel Linkage
Click
 on the top right
corner of each window to release the linkage.
on the top right
corner of each window to release the linkage.Set Resolution
Click Resolution Settings to select a decoding output resolution from the drop-down list.
Set Audio Port
Click Audio Port Settings to select an audio port.
Set Background
-
Click Background Settings.
-
Enable Background.
-
Select background type.
-
If the type is Color, set the background color below.
-
If the type is Background Picture, click Upload Picture to upload background pictures. Up to 64 pictures can be uploaded.
-
-
Click Save.
Set Decoding Output No. Displayed on Screen
Click Decoding Output No. Displayed on Screen. After it is clicked, the decoding output No. will be displayed on the screen for 30 to 60 seconds.
-