You can enable and set the general authentication code on the platform, and
then enter the authentication code on the interactive flat panel (referred to as device in the
following pages). By this method, you can add the device to the platform.
-
On the top navigation bar, select to enter the device management page.
-
On the top, select Device.
-
On the left navigation pane, click .
-
Click General Authentication Code Settings.
-
Switch on General Authentication Code Settings.
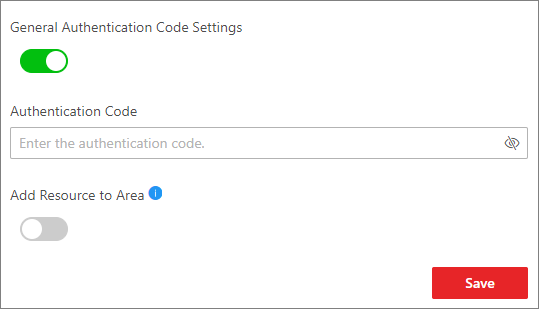 Figure 1 Set General Authentication
Code
Figure 1 Set General Authentication
Code
-
Enter the authentication code.
Note:
The authentication code should contain 8 to 16 characters, including at
least two of the following categories: upper case letters, lower case letters, and
digits.
- Optional:
Import the resources of the device to the area.
-
Switch on Add Resource to Area.
-
Select Create Area by Device Name or Existing Area.
- Create Area by Device Name
-
Create a new area by the device name.
- Existing Area
-
Select an existing area from the area list.
Note:
You can create a new area by the device name or select an
existing area. Also, you can click
Add
to add new area(s). For details, refer to Add an Area for Current Site.
-
Click Save.
- Optional:
Perform the following operations.
| Option |
Description |
|---|
|
Delete Device
|
Select one or more devices, and click Delete to
delete the selected devices.
|
|
Set Time Zone
|
Select one or more devices, and click Time Zone
to configure the time zones of the selected devices.
You can select Get Device's Time Zone or
Manually Set Time Zone as needed.
|
|
Search Device
|
Enter keywords in the upper right corner to search for the target
device(s).
|
|
Edit Device
|
Click a device to edit its basic information and time zone settings if
needed.
|
Register the interactive flat panel online: Enter the IP address of the
platform, device name, registration port No. (7660 by default), and the authentication code
on the Integrated Control App on the device. Then the device will be added to the platform
automatically.
 > Basic Management > Device to enter the device management page.