Add a Video Intercom Device by IP Address
When you know the IP address of a video intercom device, you can add it to the system by specifying the IP address, user name, password, etc. for management and further video intercom applications.
Make sure the devices you are going to use are correctly installed and connected to the network as specified by the manufacturers. Such initial configuration is required in order to be able to connect the devices to the HikCentral Professional via network.
-
In the top left corner of Home page, select
 > Basic Management > Device.
-
Select IP Address as the adding mode.
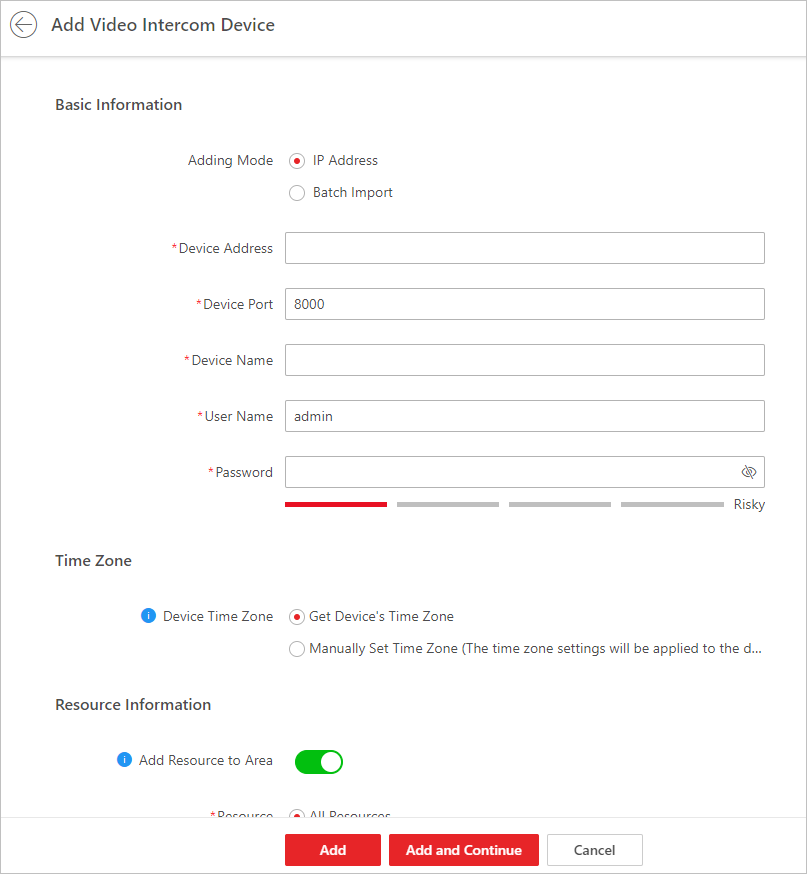 Figure 1 Add Video Intercom Device
Page
Figure 1 Add Video Intercom Device
Page - Optional:
Set the time zone for the device.
-
Click Get Device's Time Zone to get the device's time zone.
-
Click Manually Set Time Zone, and click
 to select a time zone from the drop-down list.Note:
You can click View to view the details of the current time zone.
-
- Optional:
Perform the following operation(s) after adding the devices.
Option Description Remote Configurations
Click
 to set the remote configurations of
the corresponding device. For details, refer to Configure Device Parameters.
to set the remote configurations of
the corresponding device. For details, refer to Configure Device Parameters.Change Password
Select the added device(s) and click to change the password for the device(s).Note:
-
You can only change the password for online HIKVISION devices currently.
-
If the devices have the same password, you can select multiple devices to change the password for them at the same time.
Restore Default Settings
Select the added device(s) and click Restore Default Settings to restore the configured device parameters excluding network parameters and account information.
Note:If you want to restore all the device parameters, you should check Restore device network parameters and account information, such as user name and password. in the pop-up window.
Set Device's Time Zone
In the device list, select one or multiple devices and click Time Zone to edit their time zones.
Search for Devices
Enter one or more key words in the search box and click
 to search for a specific device.
 -