Create Video Wall Program
You can create video wall programs on the platform. The program can be used to display programs of multiple terminals joined in the video wall. The platform provides multiple layout choices for video wall programs. You can select a layout according to the actual scene and edit it as needed. After creating the program, you can preview the program, cut in program, etc.
You have configured video wall before applying the video wall programs. For details, refer to Configure Video Wall.
-
On the top navigation bar, select
 > Integrated Service > Digital Signage to enter the digital signage page.
-
Click OK to enter the creating program page.
Table 1 Page Description Number
Description
1
There are 2 types of windows including Picture and Video.
2
You can select materials from All or My Favorites list. Click
 to add
other materials from local PC to the platform. Also, you
can search materials, delete materials, and refresh
material list.
to add
other materials from local PC to the platform. Also, you
can search materials, delete materials, and refresh
material list.3
You can click
 to
display rulers in the right side and top side.
to
display rulers in the right side and top side.You can click
 /
/ /
/ /
/ to make
the window layer move up / move down / stick on top /
stick at bottom.
to make
the window layer move up / move down / stick on top /
stick at bottom.You can click
 /
/ to undo
or redo the operation.
to undo
or redo the operation.4
You can enable Auto Snap, and the two windows will be connected when they are near enough.
5
-
You can click Preview Current Page to preview the content of the current page.
-
During previewing, you can click
 or
or
 to
pause or start playing. You can click
to
pause or start playing. You can click  or
or
 to
adjust the playing speed as 1x, 2x, or 4x. Also,
you can click
to
adjust the playing speed as 1x, 2x, or 4x. Also,
you can click  to
preview the current page in fullscreen.
to
preview the current page in fullscreen.
-
-
Edit page properties, including page name, background, and play time.
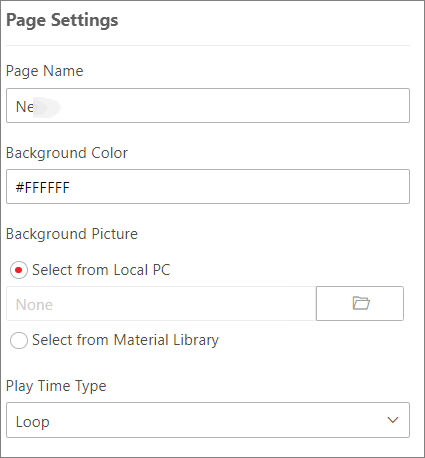 Figure 1 Page Settings
 - Optional:
Add, adjust, or delete program page(s) at the bottom side.
Option Description Add
Click
 /
/ to add new
page(s).
to add new
page(s).Delete
Put the cursor on the page, and click
 on the upper right
corner to delete the current page.
on the upper right
corner to delete the current page.Adjust Sequence
Click a page and drag it to the desired location to adjust the sequence of program pages.
-
Set window properties, including window position, window type, switching
method, etc.
- Current Window
-
Select the material added to the current window.
- Window Position
-
Set the window position by entering the width, height, and coordinate of the window.
- Window Type
-
- Normal
-
The normal window is displayed by default when the program is played. You can set a window jump link or page jump link for such a window.
- Popup Window
-
The pop-up window is hidden by default. Only after setting a redirect link for a normal window and clicking the link, the hidden window will be popped up.
- Switching Method
-
For Android touchscreen terminals, you can open the specified content by linking to a window or page.
- No Skip
-
When the Window A played on the terminal, there is no other pop-up window or page.
- Jump to Next Window
-
You should set the jump link. When the Window A is played on the terminal, you can click the link to jump to its linked window.
- Jump to Next Page
-
You should set the jump link. When the Window A is played on the terminal, you can click the link to jump to its linked page.
- Move Window Layer
-
Click
 /
/ /
/ /
/ to make the
window layer move up / move down / stick on top / stick at
bottom.
to make the
window layer move up / move down / stick on top / stick at
bottom. - Switching Effect
-
Select the switching effect from the drop-down list for the current window. There are 11 types of switching effect.
- Play Time (sec)
-
Set the playing duration for the current window.
Note:The play time of a window can not exceed the playing time of a page, or the exceeding part of the program will not be played.
- Optional:
On the current editing program page, perform the following operations if
needed.
Option Description Edit Program
Click
 to edit program
parameters in the pop-up window. For details, refer to Step 3.
to edit program
parameters in the pop-up window. For details, refer to Step 3.Preview Program
Click Preview to preview the current program.
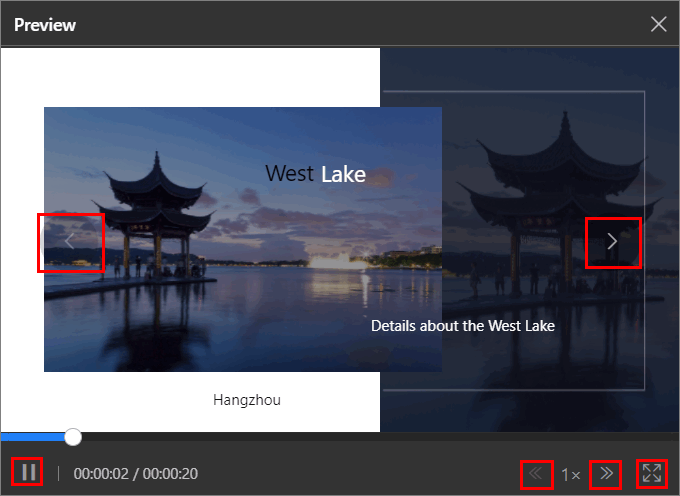 Figure 2 Preview
Program
Figure 2 Preview
ProgramDuring previewing, you can click
or to pause or start
playing; click or to adjust the
playing speed as 1x, 2x, or 4x; and click to preview the
current page in fullscreen.For the program with multiple pages, it will be played automatically according to the page play time you have set. Also, you can manually click
 or
or  to preview the
previous or the next page of the program.
to preview the
previous or the next page of the program.Cut In Program
Click Cut In to cut in the current program.
Note:For details, refer to Cut in Program.
Create Schedule
Click Next to enter the managing schedules page and create a schedule for the program.
Note:For details, refer to Schedule Management.
- Optional:
On the program list page, perform the following operations if needed.
Option Description View Program in List or Thumbnail Mode
Click
 /
/ to view the added
programs in the thumbnail mode or in the list mode.
to view the added
programs in the thumbnail mode or in the list mode.Add Program to Favorites
Click
 to add the current
program to Favorites.
to add the current
program to Favorites.Preview Program
Click
 to preview the
program.
to preview the
program.During previewing, you can click
or to pause or start
playing; click or to adjust the
playing speed as 1x, 2x, or 4x; and click to preview the
program in fullscreen.For the program with multiple pages, it will be played automatically according to the page play time you have set. Also, you can manually click
or to preview the
previous or the next page of the program.Copy Program
Click
 to enter editing
program page. Click Save on the upper right
corner to copy the current program, and a new program with the same
content is created.Note:
to enter editing
program page. Click Save on the upper right
corner to copy the current program, and a new program with the same
content is created.Note:When copying a program (e.g., Program A) for the first time, the name of the new program (Program A_1) will be generated automatically. If you need to copy this program (Program A) for a second or more times, you should manually edit its name, or the program cannot be created successfully.
Cut In Program
Click
 to cut in the
current program. For details, refer to Cut in Program.
to cut in the
current program. For details, refer to Cut in Program.Create Schedule
Click
 to enter the
managing schedules page and create a schedule for the program. For
details, refer to Schedule Management.
to enter the
managing schedules page and create a schedule for the program. For
details, refer to Schedule Management.Enlarge Program Page
Click
 to enlarge the
program page and view it.
to enlarge the
program page and view it.Filter Program
Click
 , and filter programs
by conditions such as name and sharing property.
, and filter programs
by conditions such as name and sharing property.Refresh Program List
Click Refresh to refresh the program list. The programs will be listed according to the time they are added.
Delete Program
Check one/more programs, or click Select All to select all programs, and click Delete to delete the selected programs.
Note:Programs that are releasing or cutting in cannot be deleted.