Set Active Directory
If you have the AD (Active Directory) domain controller which contains the information (e.g., user data, computer information), you can configure the settings to get the related information. In this way, you can add the users that belong to an organization unit (OU) (e.g., a department of your company) to HikCentral Professional conveniently.
-
In the top left corner of Home page, select
 > Basic Management > System.
-
Configure the basic information parameters to connect to the AD domain
controller.
- Domain Name
-
The domain name of the AD domain controller.
Note:-
HikCentral Professional only supports the NetBIOS format, e.g., TEST\user, instead of the DNS Domain name format.
-
To get the NetBIOS domain name, open the CMD window and enter nbtstat – n.
The NetBIOS domain name is the one in GROUP type.
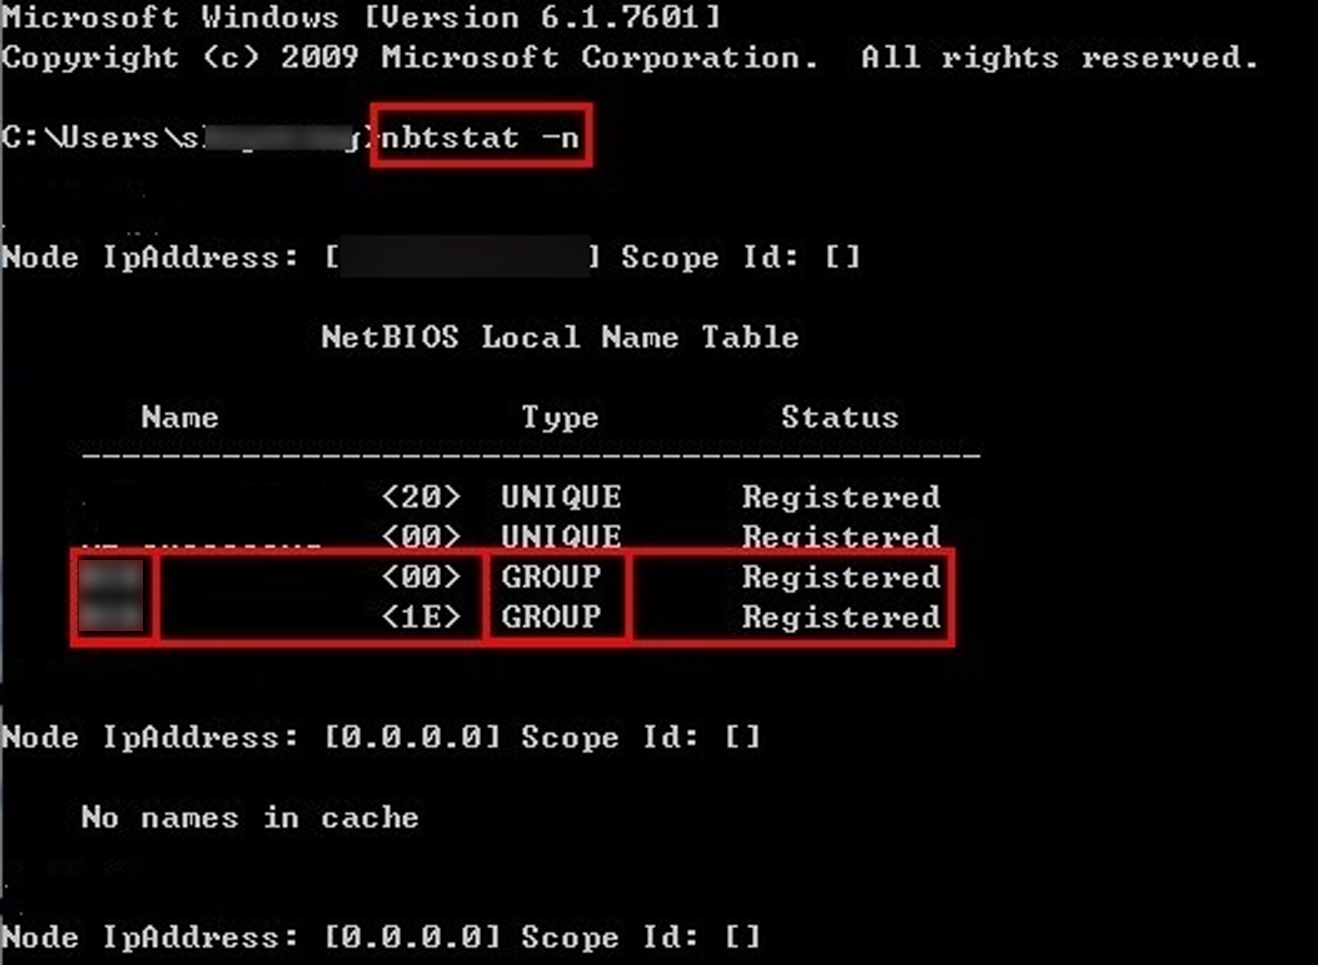 Figure 1 How
to Get NetBIOS Domain Name
Figure 1 How
to Get NetBIOS Domain Name
-
- Host Name
-
The DNS server's IP address. You can get it in Network Connection Details.
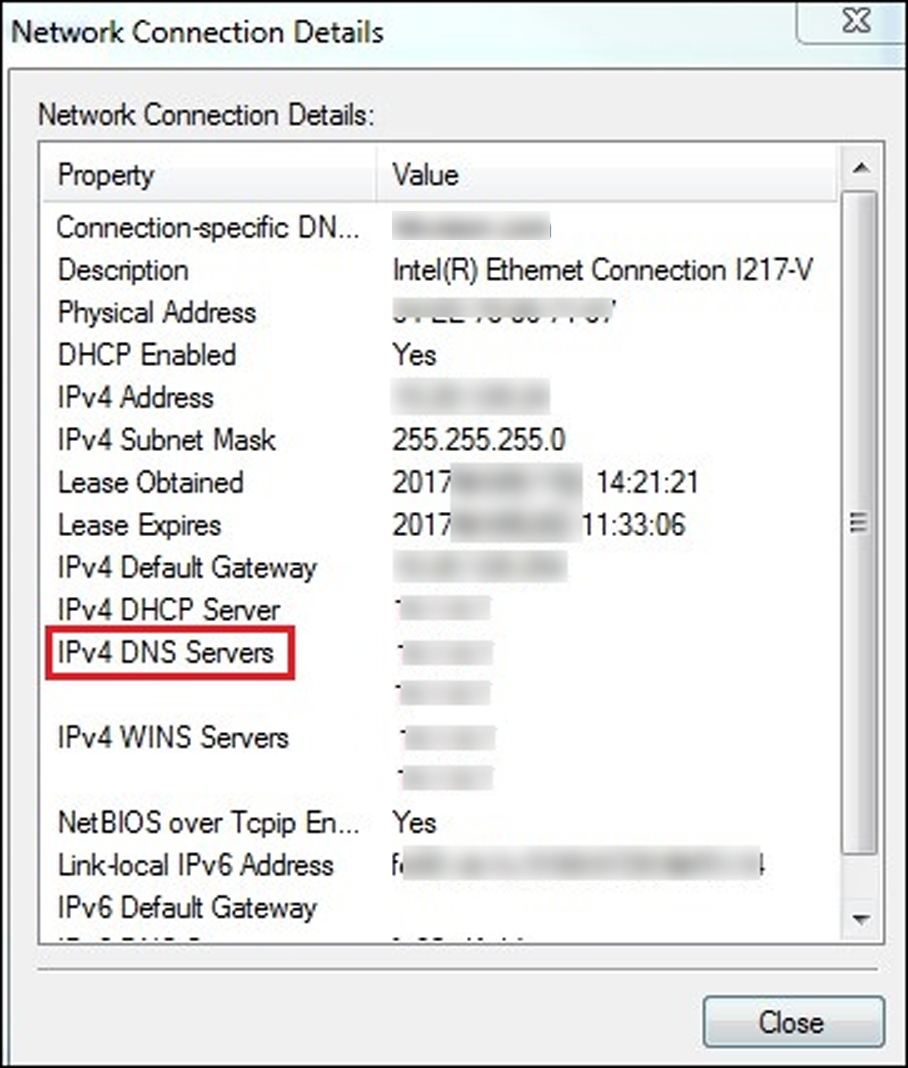 Figure 2 How to Get
Host Name
Figure 2 How to Get
Host Name - Port No.
-
The port No. of the AD domain controller. By default, it is 389.
- Enable SSL (Optional)
-
Enable SSL if it is required by the AD domain controller.
- User Name
-
The user name of the AD domain controller. The user should be the domain administrator.
- Password
-
The password of the AD domain controller.
- Base DN (Distinguished Name)
-
Enter the filter condition in the text field if you are familiar with the format. Or you can click Fetch DN to get the filter condition entered automatically.
Note:-
Only users found within an OU in the domain can be imported. Click Fetch DN to have the filter condition entered automatically.
-
If you enter the Base DN manually, you need to define the root node as desired. If you click Fetch DN, then the entire structure stored in the AD domain controller will be obtained.
-
- Optional:
Link the person information you are concerned about in the domain to the person
information in the system.
- Optional:
Click
 to show the person
information items stored in the domain.
to show the person
information items stored in the domain.
- Optional:
Hover over the linked person information in the domain and click
 to remove the
relationship. You can also change the relationship between each other by
clicking and dragging one item to another.
to remove the
relationship. You can also change the relationship between each other by
clicking and dragging one item to another.
- Optional:
Click