Solar-powered cameras can be added to your device through OTAP
protocol.
Ensure the network between your device and solar-powered camera is accessible through
OTAP protocol.
-
Go to to enable Enable OTAP Network Camera
Service.
-
Go to to set OTAP Server Port and
Encryption Key.
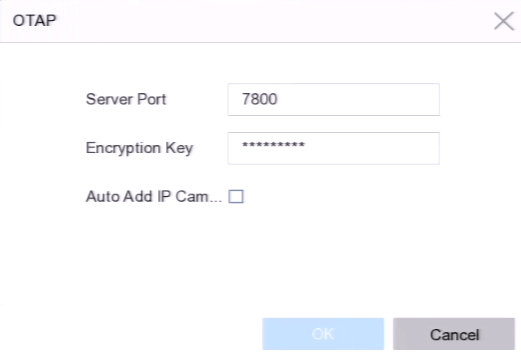 Figure 1 Set OTAP Parameters
- Optional:
Enable Auto Add IP Camera.
- Auto Add IP Camera
-
After the device OTAP parameters are configured, the newly signed
network cameras (through OTAP protocol) can be automatically
added to your device.
-
Configure the solar-powered camera OTAP protocol parameters through web
browser. Refer to the camera user manual for details.
Note:
The solar-powered camera OTAP protocol parameters shall be the same as
the device.
-
Add solar-powered camera(s) to your device.
-
If you have enabled Auto Add IP Camera in , the newly signed network cameras (through OTAP protocol)
would automatically be added to your device.
-
Select solar-powered camera(s) from Number of Unadded Online
Device list, and click Add.
-
Click Custom Add, select
Protocol as OTAP, and
click Add.
-
After a solar-powered camera is add to your device, you can wake
it up, view its battery power, view its live video, configure its parameters
through web browser, etc.
- Set ANR (Automatic Network Replenishment) for the camera. Refer to ANR.