Activate via Client Software
The client software is versatile video management software for multiple kinds of devices.
Get the client software from the supplied disk or the official website, and install the software according to the prompts.
-
Run the client software and the control panel of the software pops up, as shown
below.
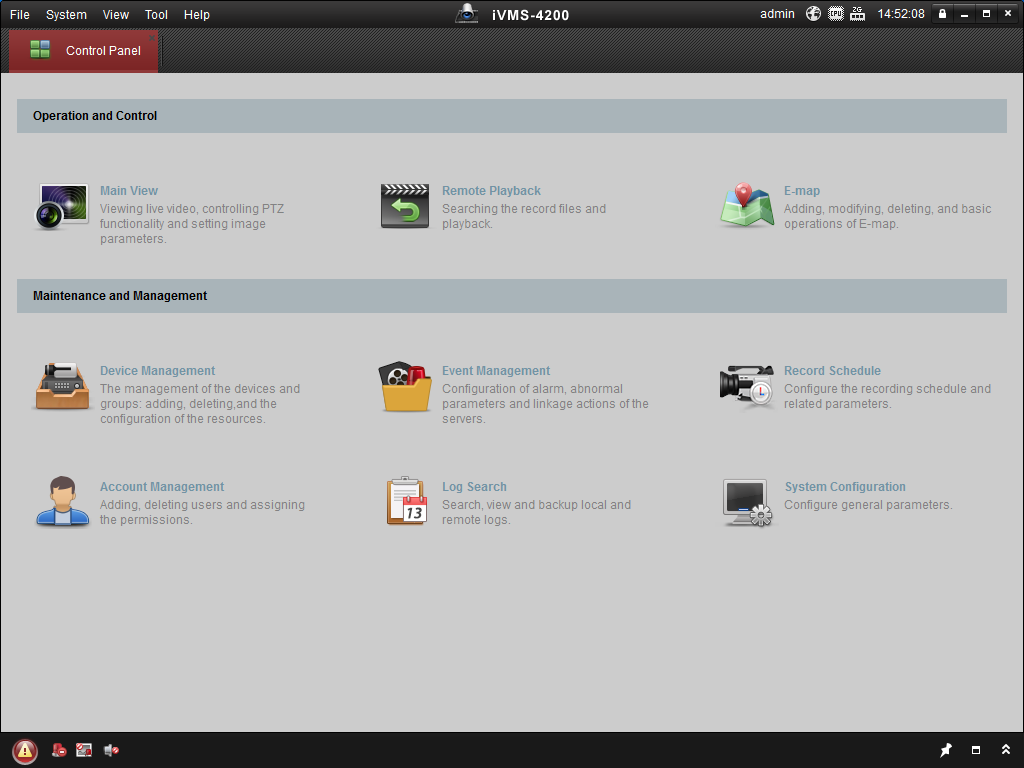 Figure 1 Control Panel
 -
Click Device Management to enter the Device Management
interface, as shown below.
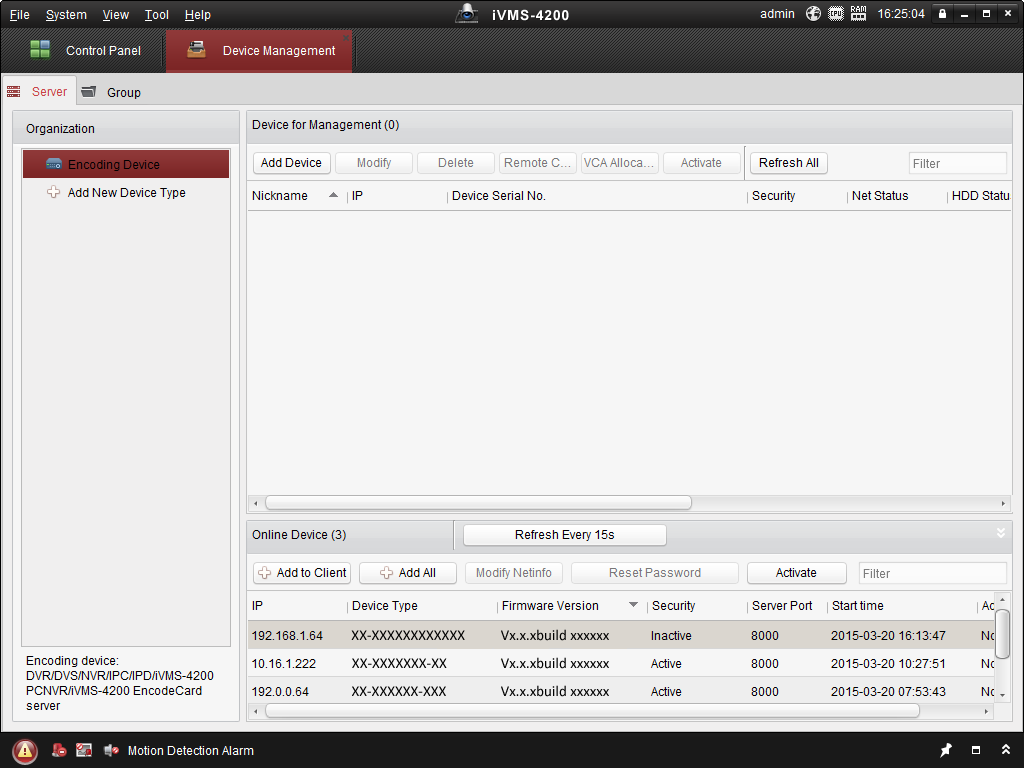 Figure 2 Device Management
Interface
Figure 2 Device Management
Interface -
Create a password and input the password in the password field, and confirm the
password.
Note:
We highly recommend you to create a strong password of your own choosing (using a minimum of 8 characters, including at least three kinds of following categories: upper case letters, lower case letters, numbers, and special characters) in order to increase the security of your product. And we recommend you reset your password regularly, especially in the high security system, resetting the password monthly or weekly can better protect your product.
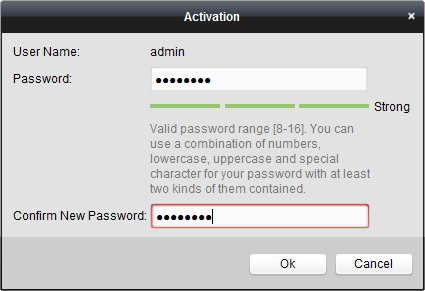 Figure 3 Activation
 -
Click Modify Netinfo to pop up the Network Parameter
Modification interface, as shown below.
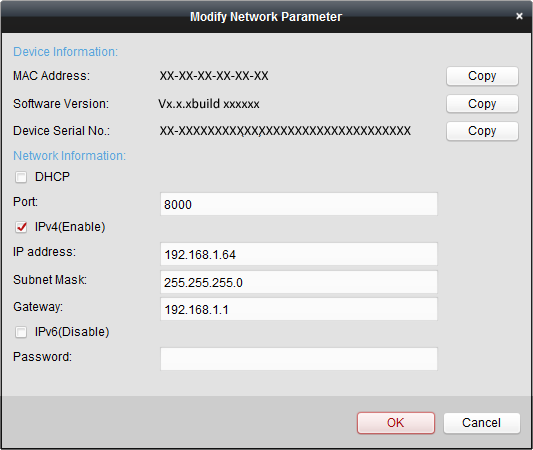 Figure 4 Modify Network
Parameters
Figure 4 Modify Network
Parameters