Plan Turnstile Solution
By selecting the turnstile model, setting the area width, and setting the number of lanes and the barrier material, you can plan the turnstile solution, to generate the turnstile installation picture and generate the turnstile solution.
-
Click Preview to view the installation
picture.
Note:
The system will generate the top view of installation, to display the turnstiles, the number of lanes, the lane width, the turnstile width, the turnstile length and the distance from the sidebar to the wall.
Figure 1. Preview the Installation Picture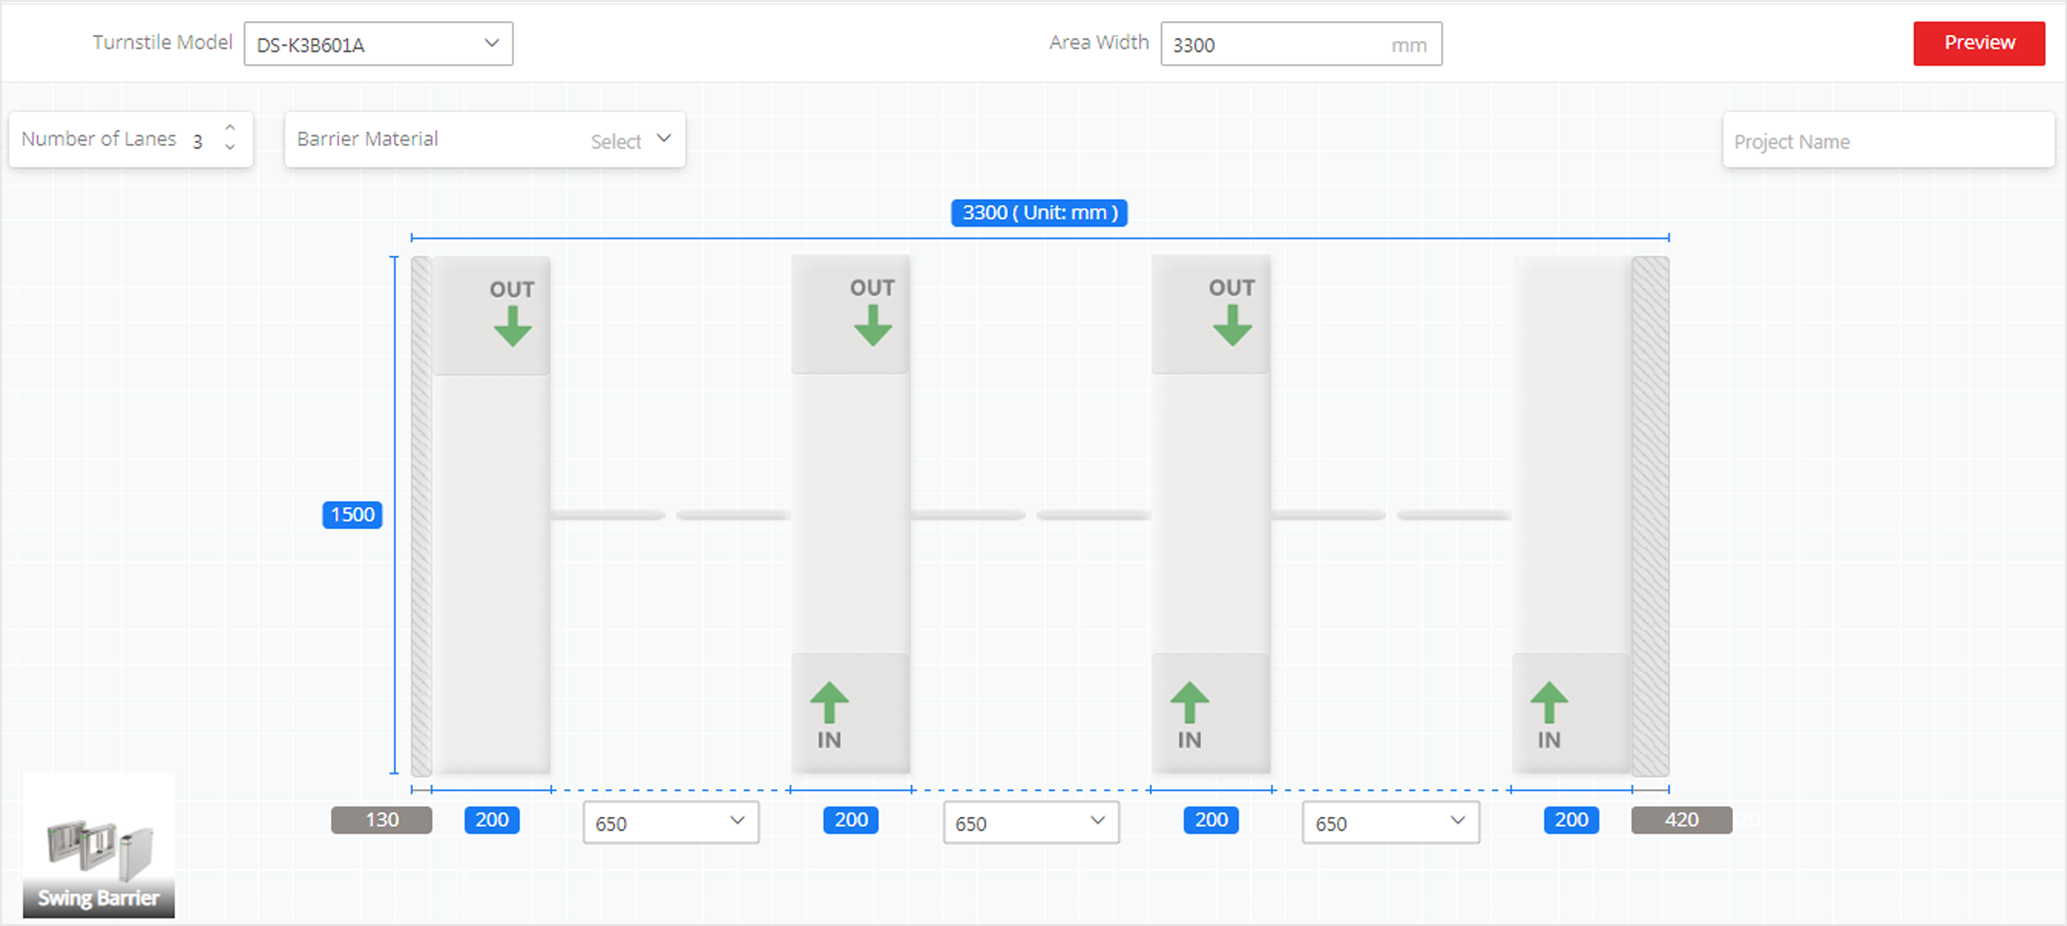