Add Combined Alarm
For some complicated scenarios, the alarm should be triggered when multiple events or alarms are detected or triggered. For example, the platform detects intrusion in area B, then the arming of area A starts. After that, if the platform detects intrusion in area A, then an alarm will be triggered to notify the security personnel.
-
In the top left corner of Home page, select
 > Security Monitoring > Event and Alarm.
-
Click Add Combined Alarm to open the Add Combined Alarm
pane.
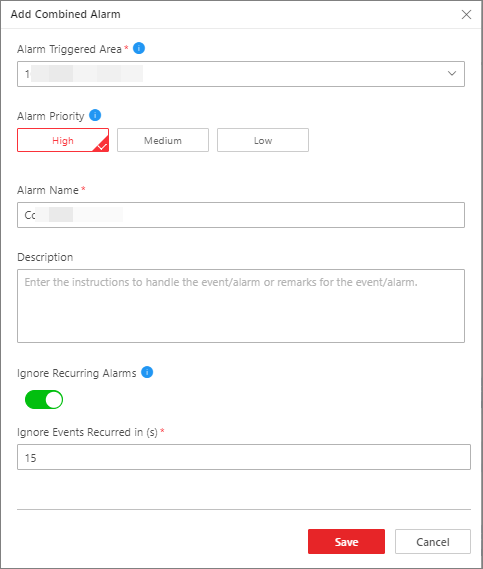 Figure 1 Add Combined
Alarm
Figure 1 Add Combined
Alarm -
Configure a receiving schedule for the combined alarm.
-
Click
 on the configuration
page to open the Select Schedule Template pane.
on the configuration
page to open the Select Schedule Template pane.
-
Click Save.
A Receiving Schedule card will appear on the page.
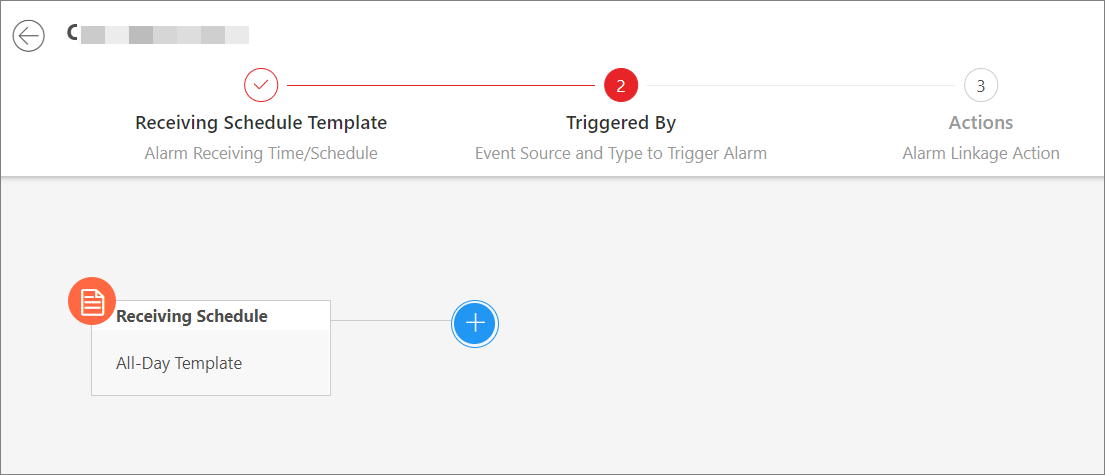 Figure 2 Receiving
Schedule Card
Figure 2 Receiving
Schedule Card
-
Click
-
Configure conditions for triggering the combined alarm.
-
Click at the right of the
Receiving Schedule card to open the Select Alarm Triggering Logic
pane.
-
Click on the condition card to
open the Select Event Source and Event Type pane.
-
Select a triggering event and a source, and click
Save.
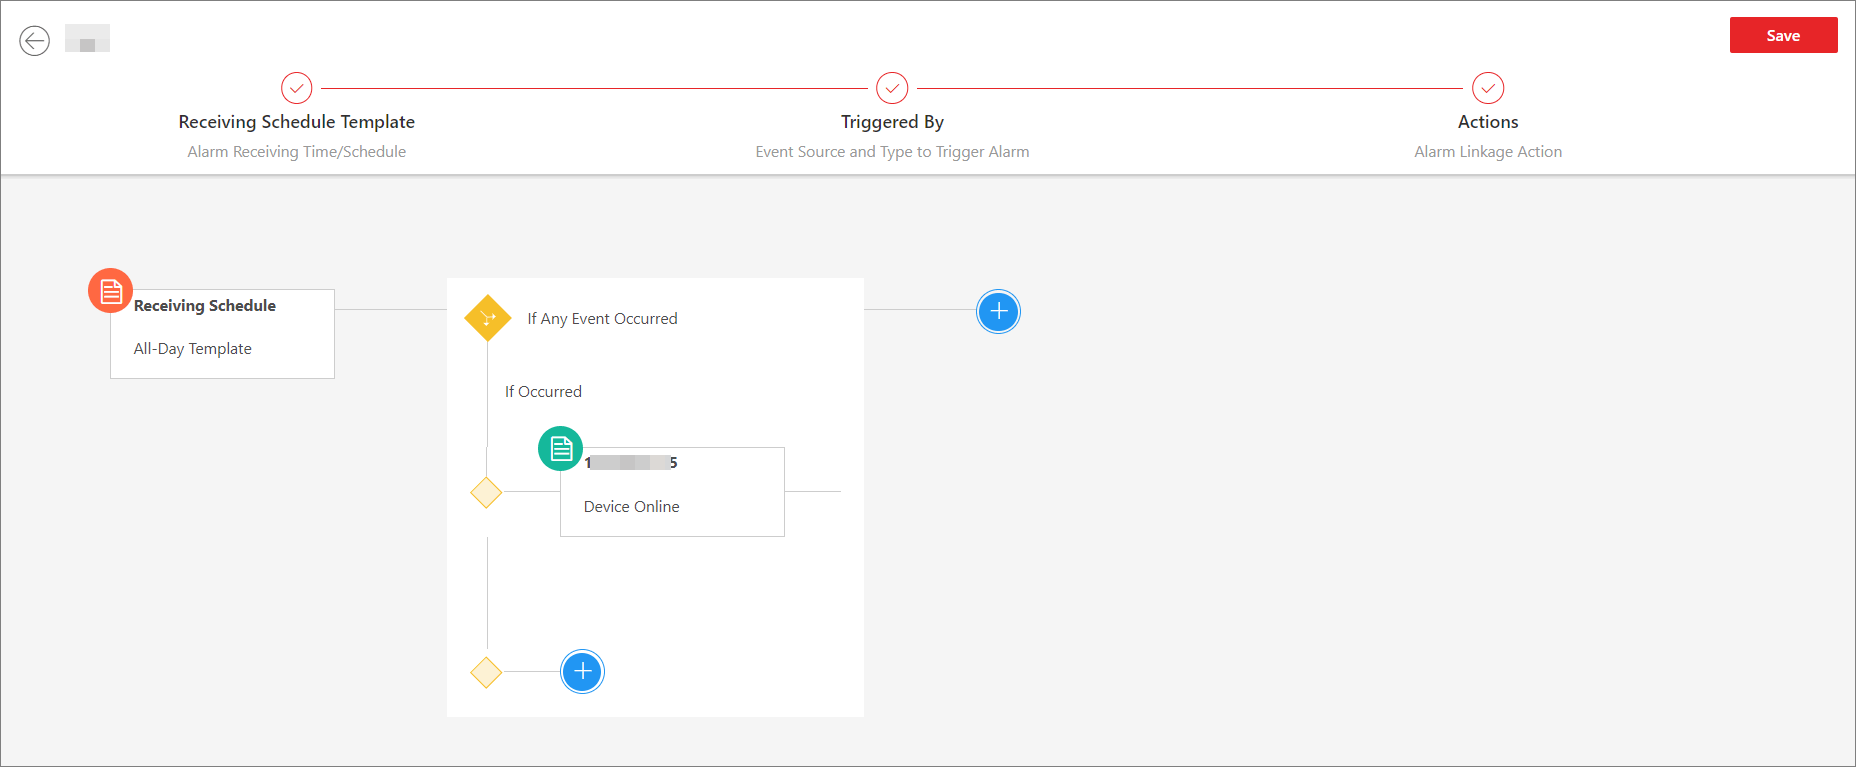 Figure 3 Condition
Card
Figure 3 Condition
Card - Optional:
Click below the newly added
event source and type card to select more event sources and types.
- Optional:
Click
 on the event source and
type card to enter the remote configuration page of the event source.
For details about remote configuration, refer to the user manual of the
corresponding device.
on the event source and
type card to enter the remote configuration page of the event source.
For details about remote configuration, refer to the user manual of the
corresponding device.
-
Click
-
Configure the alarm recipient(s) and linkage action(s) for the combined
alarm.
-
Click
 at the right of the
triggering logic card to open the Select Alarm Linkage Action
panel.
at the right of the
triggering logic card to open the Select Alarm Linkage Action
panel.
-
Click below the Alarm
Recipients card to select a linkage action and set the corresponding
parameters. For details, refer to Add Normal Event and Alarm.
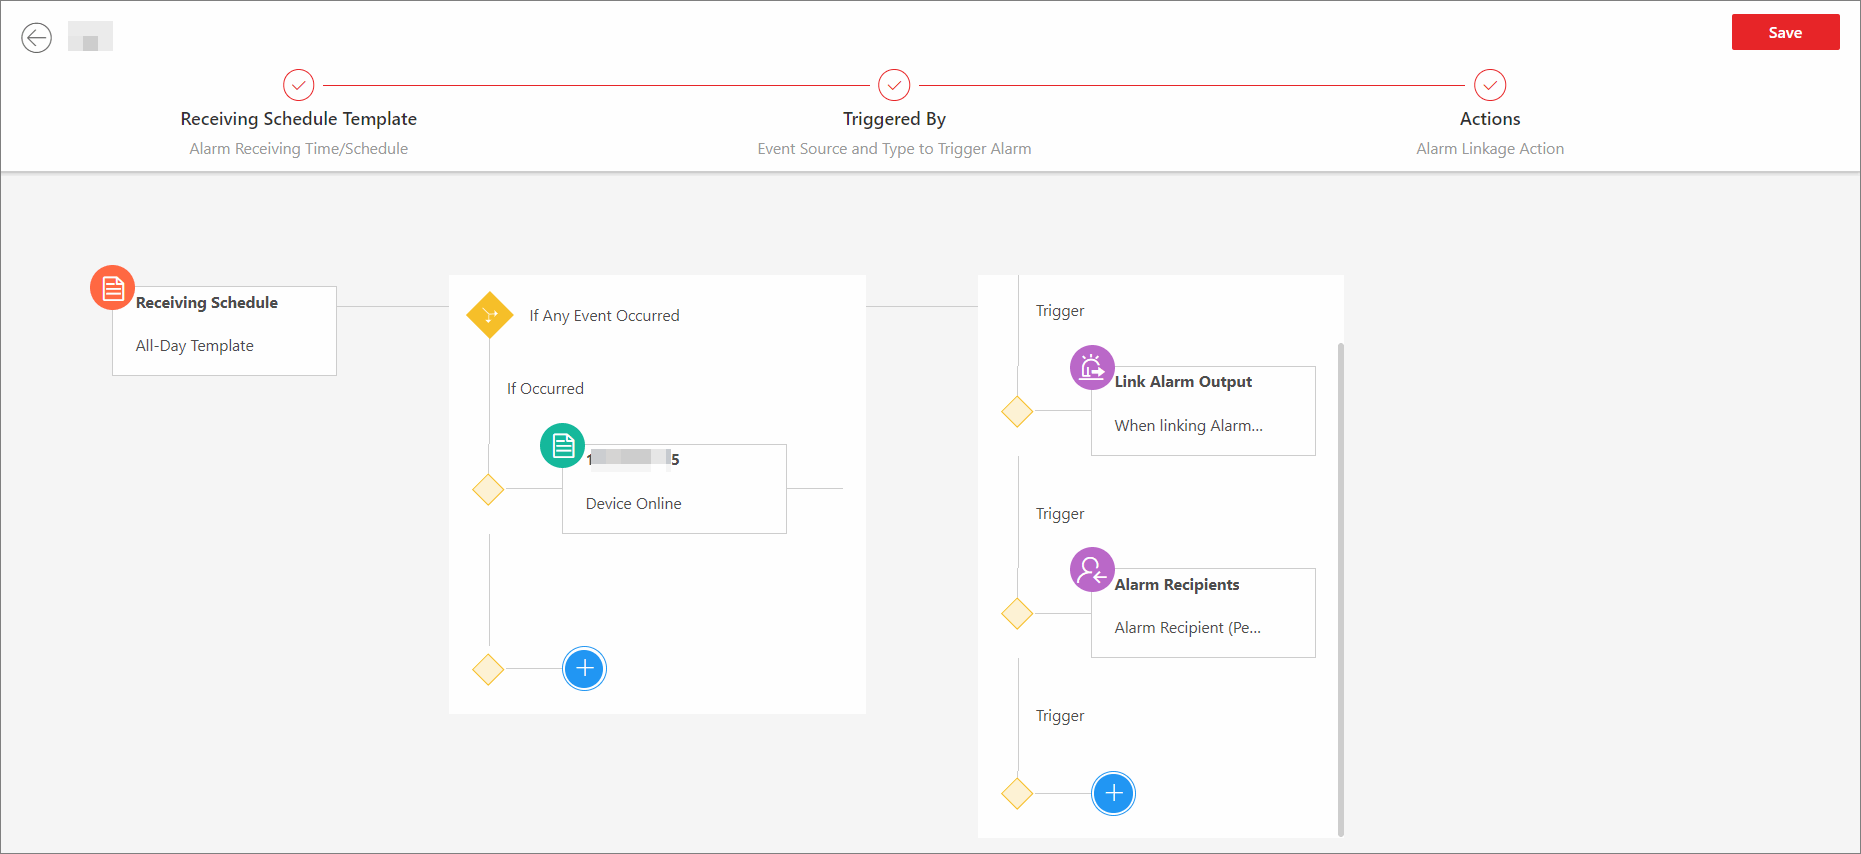 Figure 4 Action
Card
Figure 4 Action
Card - Optional:
Click below the Alarm
Recipients card to add more linkage actions.
-
Click
- Optional:
Move the cursor on each card and click
 appeared on the top right of the card to delete the
card.
Note:
appeared on the top right of the card to delete the
card.
Note:If the card is deleted, the following cards or sub cards (if any) will also be deleted.