Configure Panorama Tracking
Panorama tracking is a target tracking function based on the linkage between a bullet/box camera and a speed dome. After you configure panorama tracking on the Web Client, the security personnel will be allowed to enable this function during the live view of the bullet/box camera on the Control Client. If this function is enabled, when a Video Content Analysis (VCA) event is detected by the bullet/box camera, or the security personnel manually select a target, the bullet/box camera will work together with the speed dome to locate, zoom in, and track the target.
Make sure you have added the device supporting this function.
-
In the top left corner of the Home page, select
 > Video > Video Applications > Configure
Panorama Tracking.
> Video > Video Applications > Configure
Panorama Tracking.
-
Calibrate the camera and the linked speed dome, and then click
Next.
-
Manual Calibrating: In Manual Calibrating mode, click Add Calibration Point, and click the position on the left image of box/bullet camera to add a calibration point. Select the calibration point, and then pan, tilt, and zoom in or out the view of speed dome by digital zoom and PTZ control to make sure the live view of speed dome and the target position of the camera are mostly same.
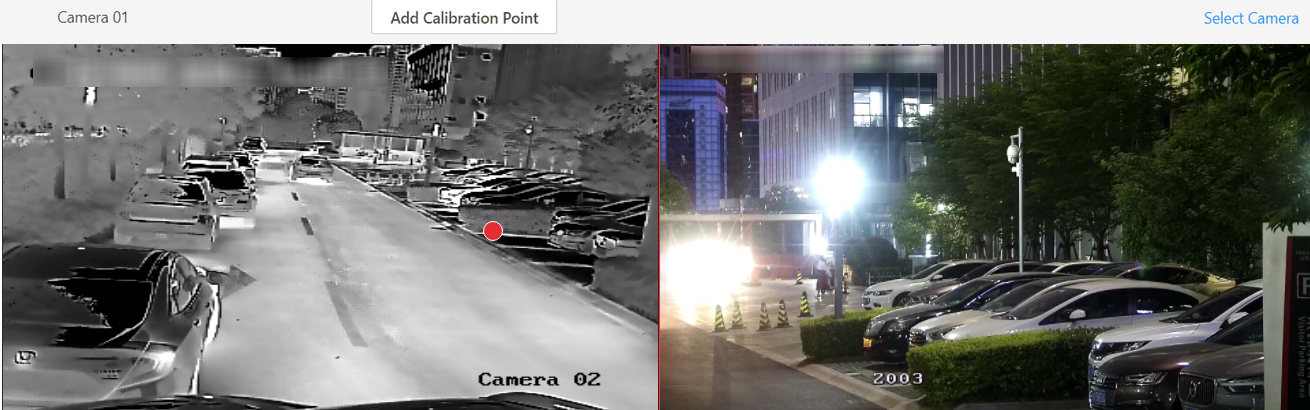 Figure 1 Manual
CalibratingNote:
Figure 1 Manual
CalibratingNote:-
You can repeat the operations to add more calibration points. At least 4 calibration points should be added. It is recommended to add at least 9 calibration points in one scene. For higher tracking precision, up to 12 calibration points are required.
-
Click the added calibration point, and you can move it to other position, or delete it.
-
It is recommended to place calibration points at distinct positions in live image (for example, corners). If no distinct position is available, you can place the points at something (for example, box, stool, or people) to mark the position.
-
-
Auto Calibrating: In Auto Calibrating mode, click Start Calibration to add calibration points automatically.
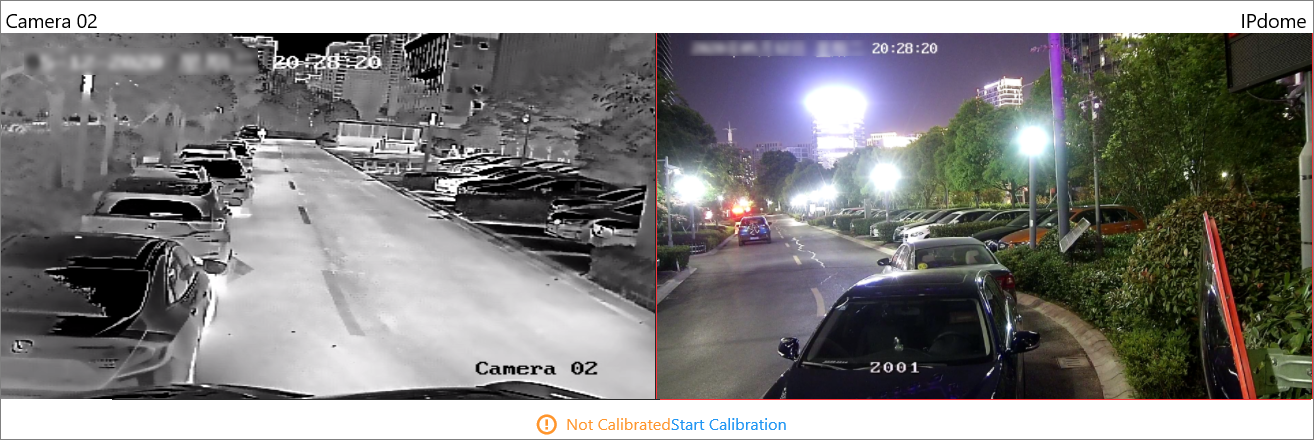 Figure 2 Auto
CalibratingNote:
Figure 2 Auto
CalibratingNote:You should avoid using auto calibrating for vast similar scenes (for example, lake, lawn, or public square) or dark scenes (for example, night scenes).
-