Add Role
You can add roles and assign permissions to roles, so that users can be assigned with different roles to get different permissions.
The platform has predefined two default roles: Administrator and Operator. You can click the role name to view details. The two default roles cannot be edited or deleted.
-
On the top, select
 > Basic Management > Account and Security.
-
Click Add to enter Add Role page.
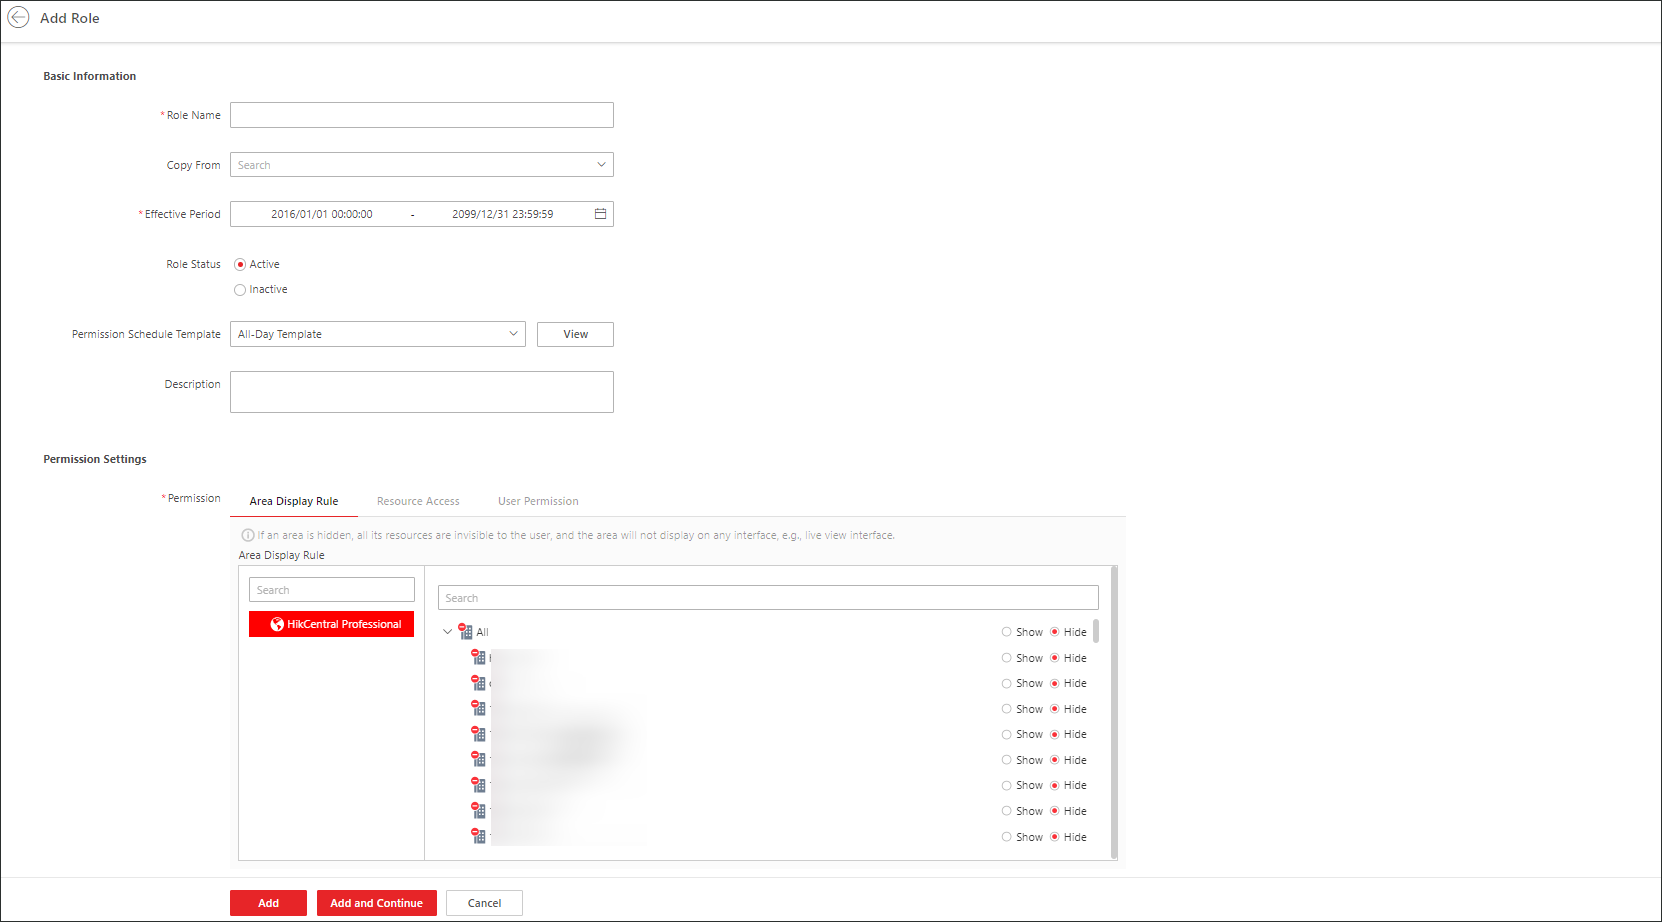 Figure 1 Add Role Page
 -
Configure permission settings for the role.
- Area Display Rule
-
Show or hide specific area(s) for the role. If an area is hidden, the user assigned with the role cannot see and access the area and its resources.
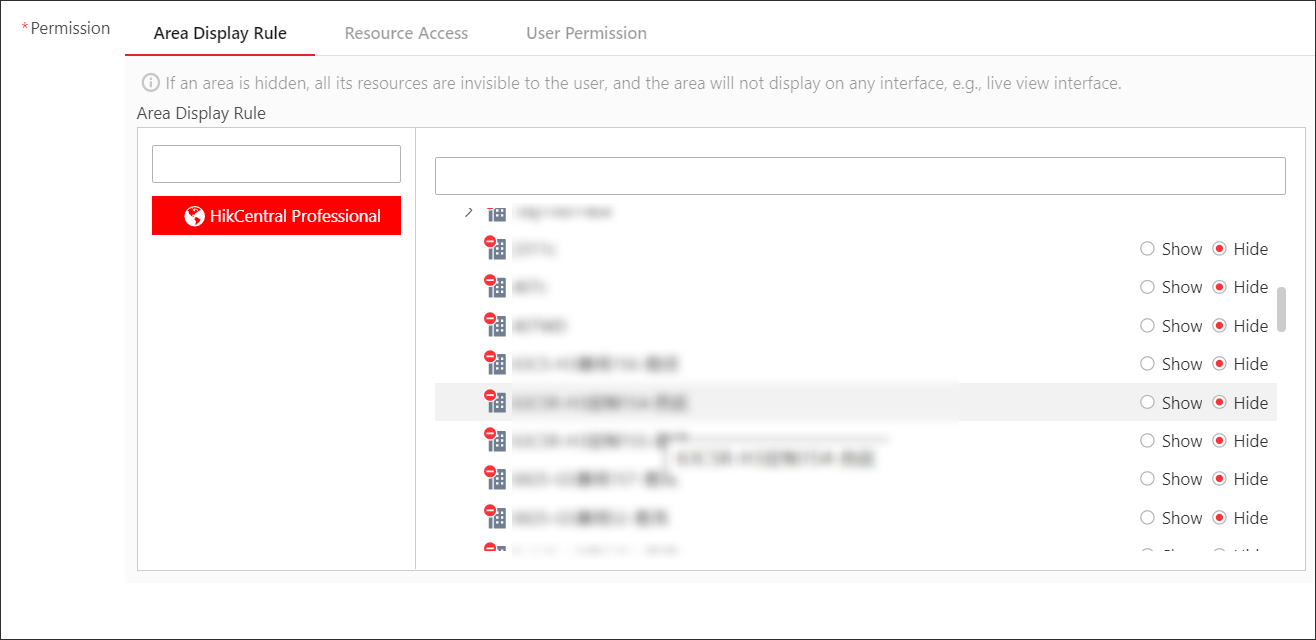 Figure 2 Area
Display Rule
Figure 2 Area
Display Rule - Resource Access
-
Select the functions from the left panel and select resources from right panel to assign the selected resources' permission to the role.
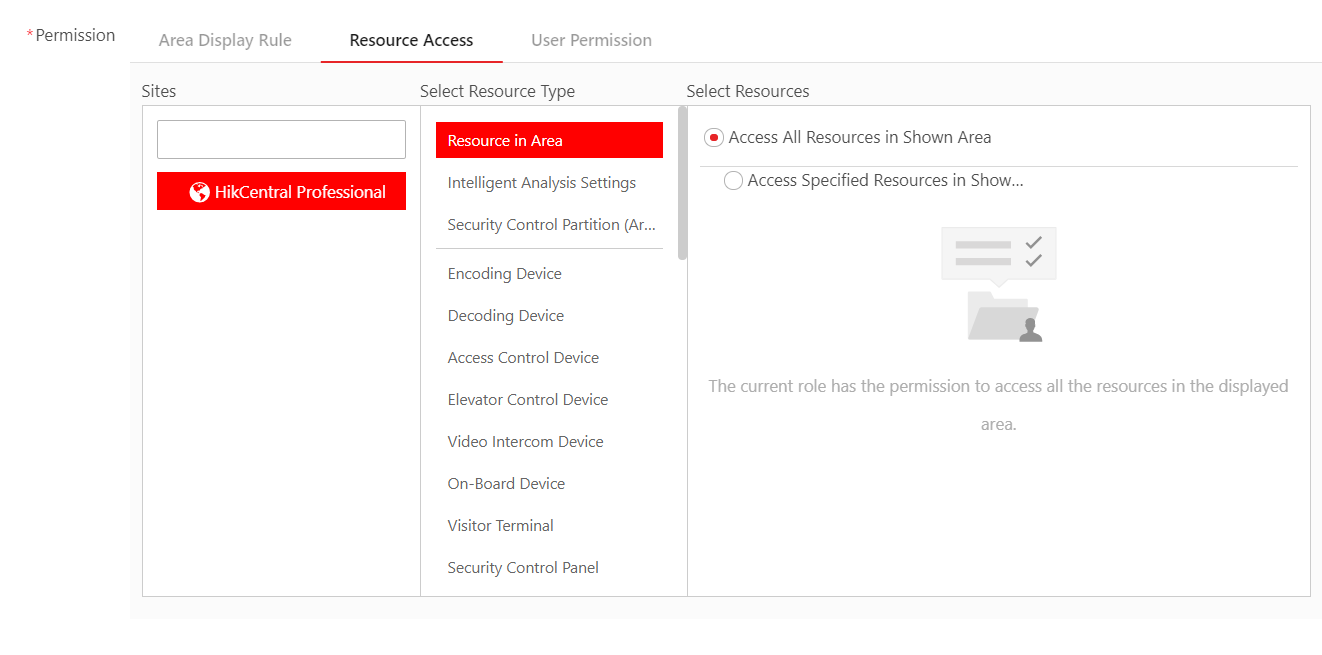 Figure 3 Resource
AccessNote:
Figure 3 Resource
AccessNote:If you do not check the resources, the resource permission cannot be applied to the role.
- User Permission
-
Assign resource permissions, configuration permissions, and operation permissions to the role.
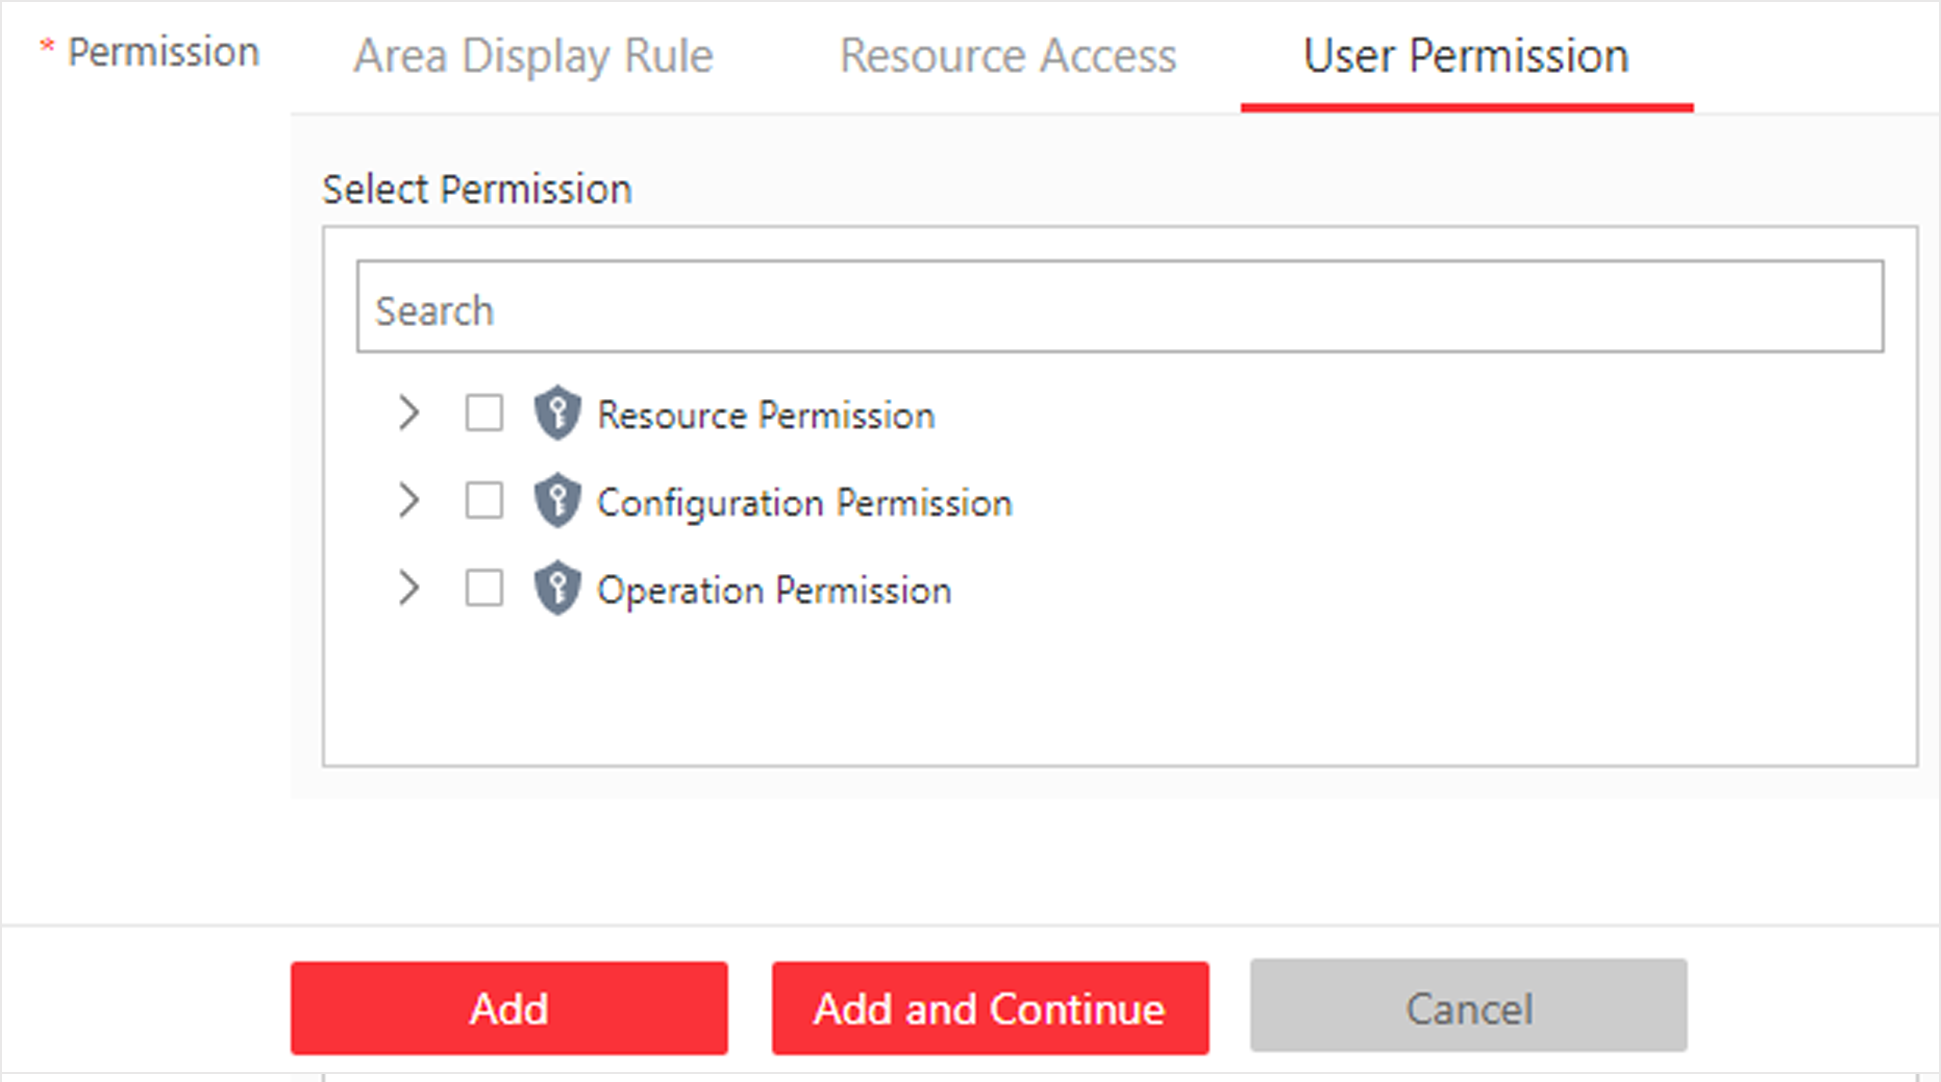 Figure 4 User
Permission
Figure 4 User
Permission
- Optional:
Perform further operations on added roles.
Option Description Edit Role
Click a role name to view and edit role settings.
Note:The two default roles cannot be edited.
Delete Role
Check a role and click Delete to delete the role.
Note:The two default roles cannot be deleted.
Inactivate Role
Check a role and click Inactivate to set the role status to Inactive.
Activate Role
Check an inactive role and click Activate to set the role status to Active.
Refresh Role
Click Refresh All to get the latest status of the roles.
Filter Role
Click
 to expand the filter
conditions. Set the conditions and click
Filter to filter the roles according to
the set conditions.
to expand the filter
conditions. Set the conditions and click
Filter to filter the roles according to
the set conditions.