Encoding Devices
You can add and manage encoding devices including network cameras, DVRs and NVRs on Hik-Partner Pro. The following chapter introduces functionality supported by these devices such as live view and playback.
View Live Video and Play Back Recorded Videos
View Live Video
You can view live videos of the added online encoding devices. By live view, you can know what happens at this moment.
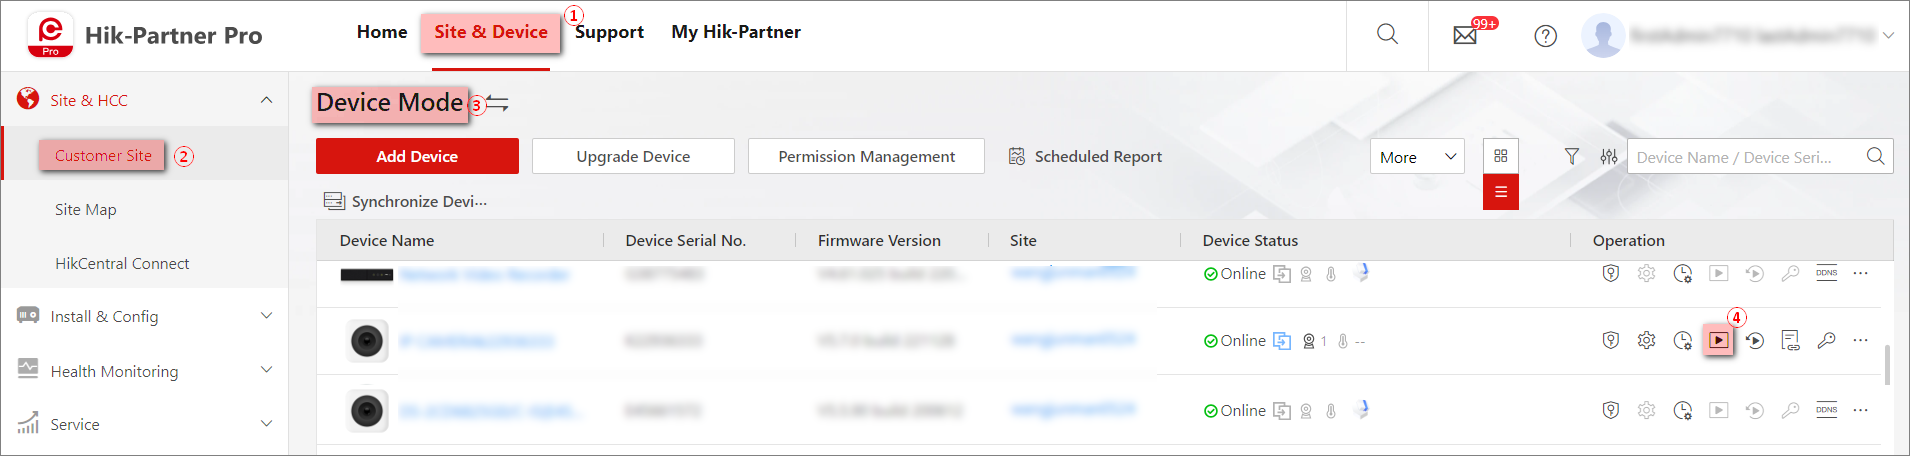
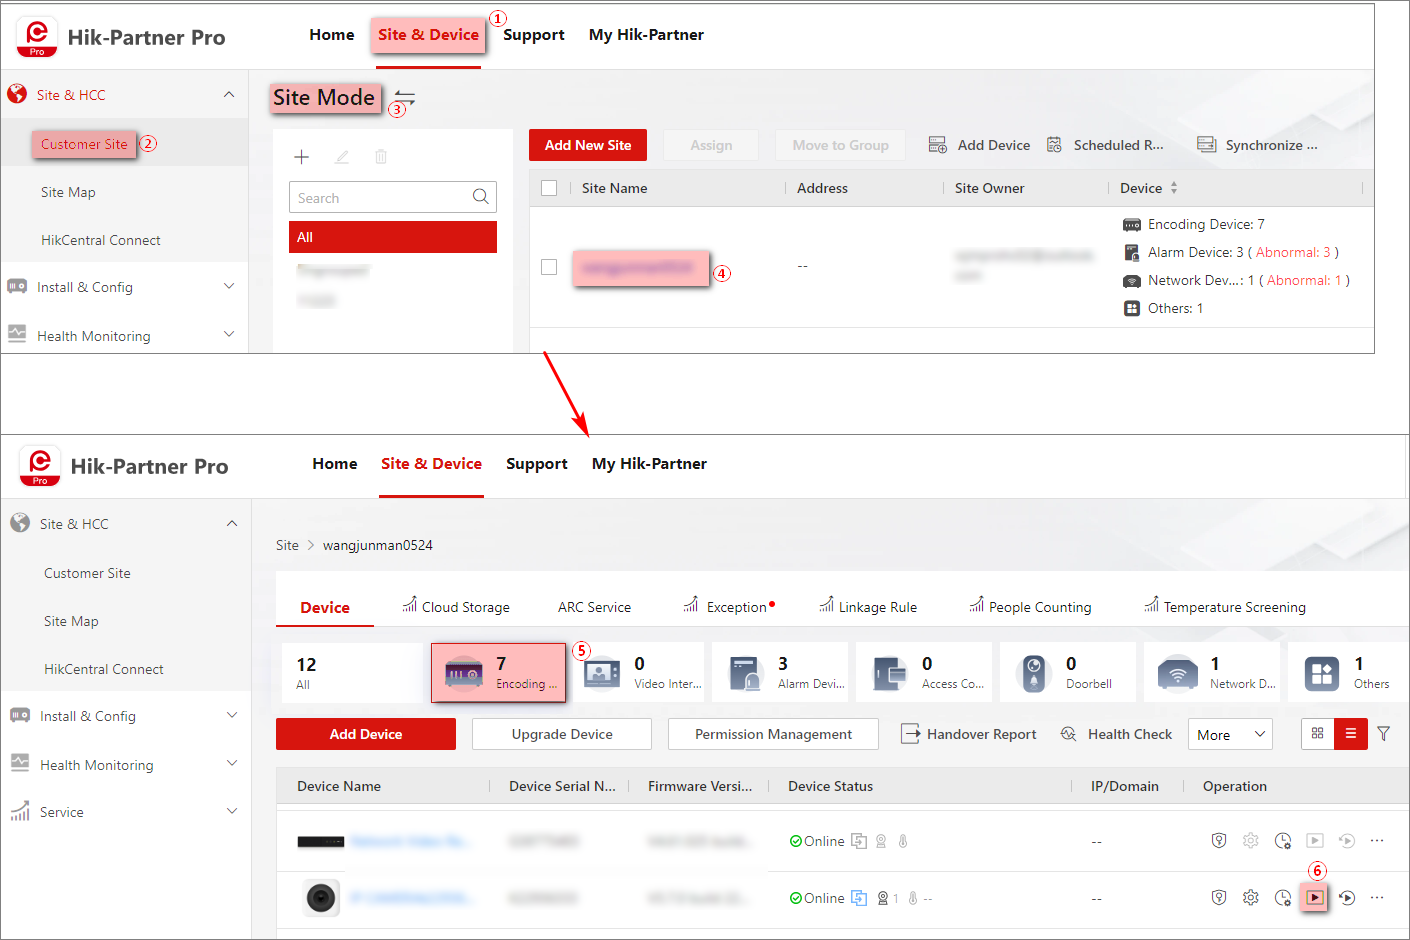
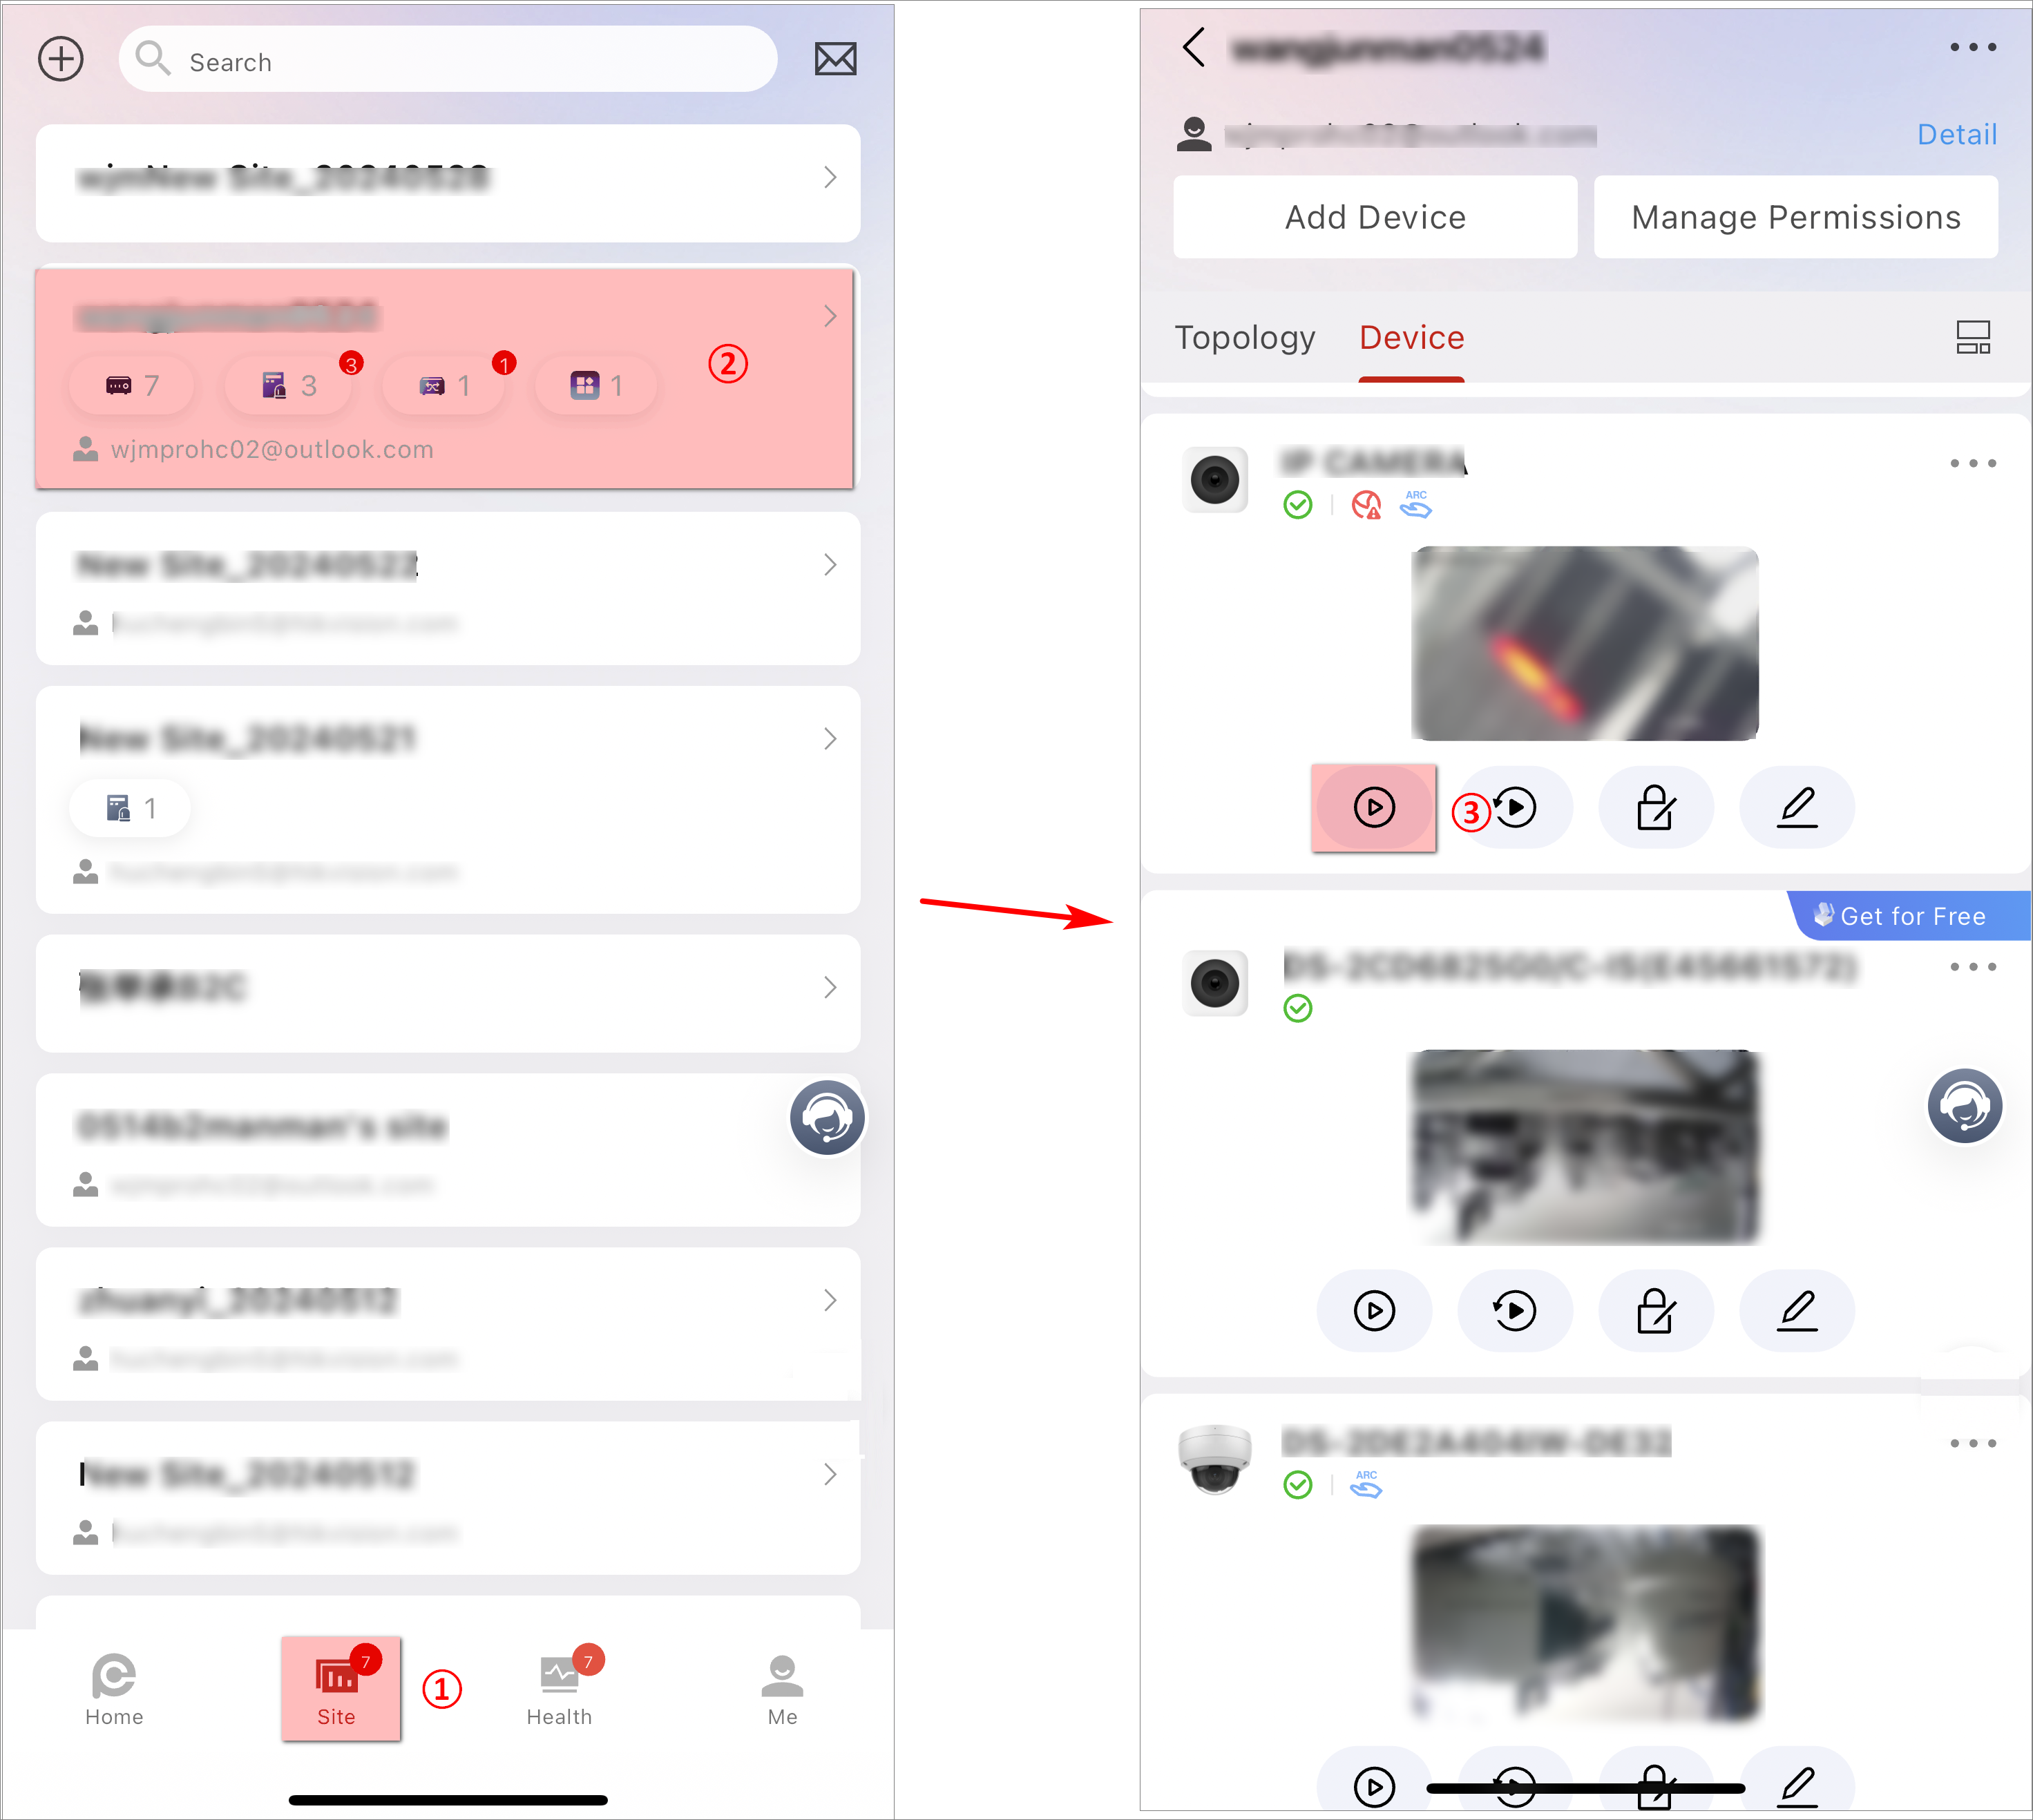
The following figures show the entries of live view page on the Portal and the Mobile Client.
|
Figure 1 The Entry of Live View Page
on the Portal (Device Mode) Figure 2 The Entry of Live View Page
on the Portal (Site Mode) |
Figure 3 The Entry of Live View Page
on the Mobile Client |
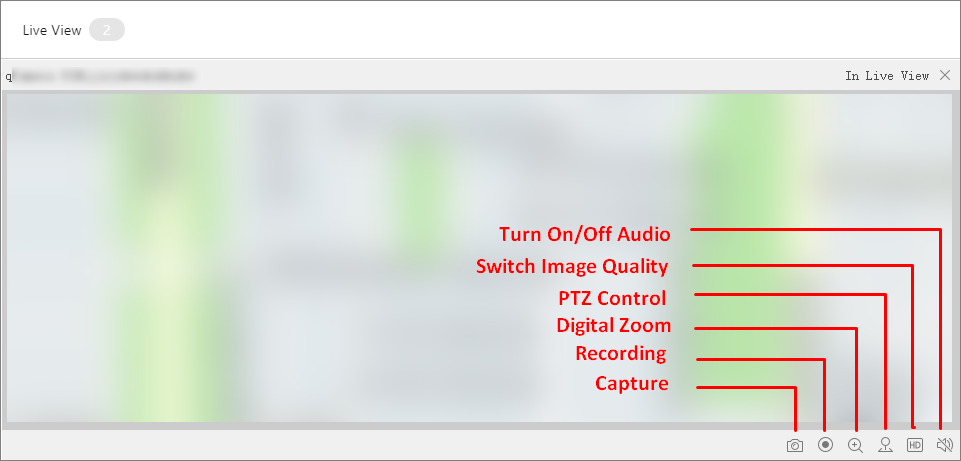
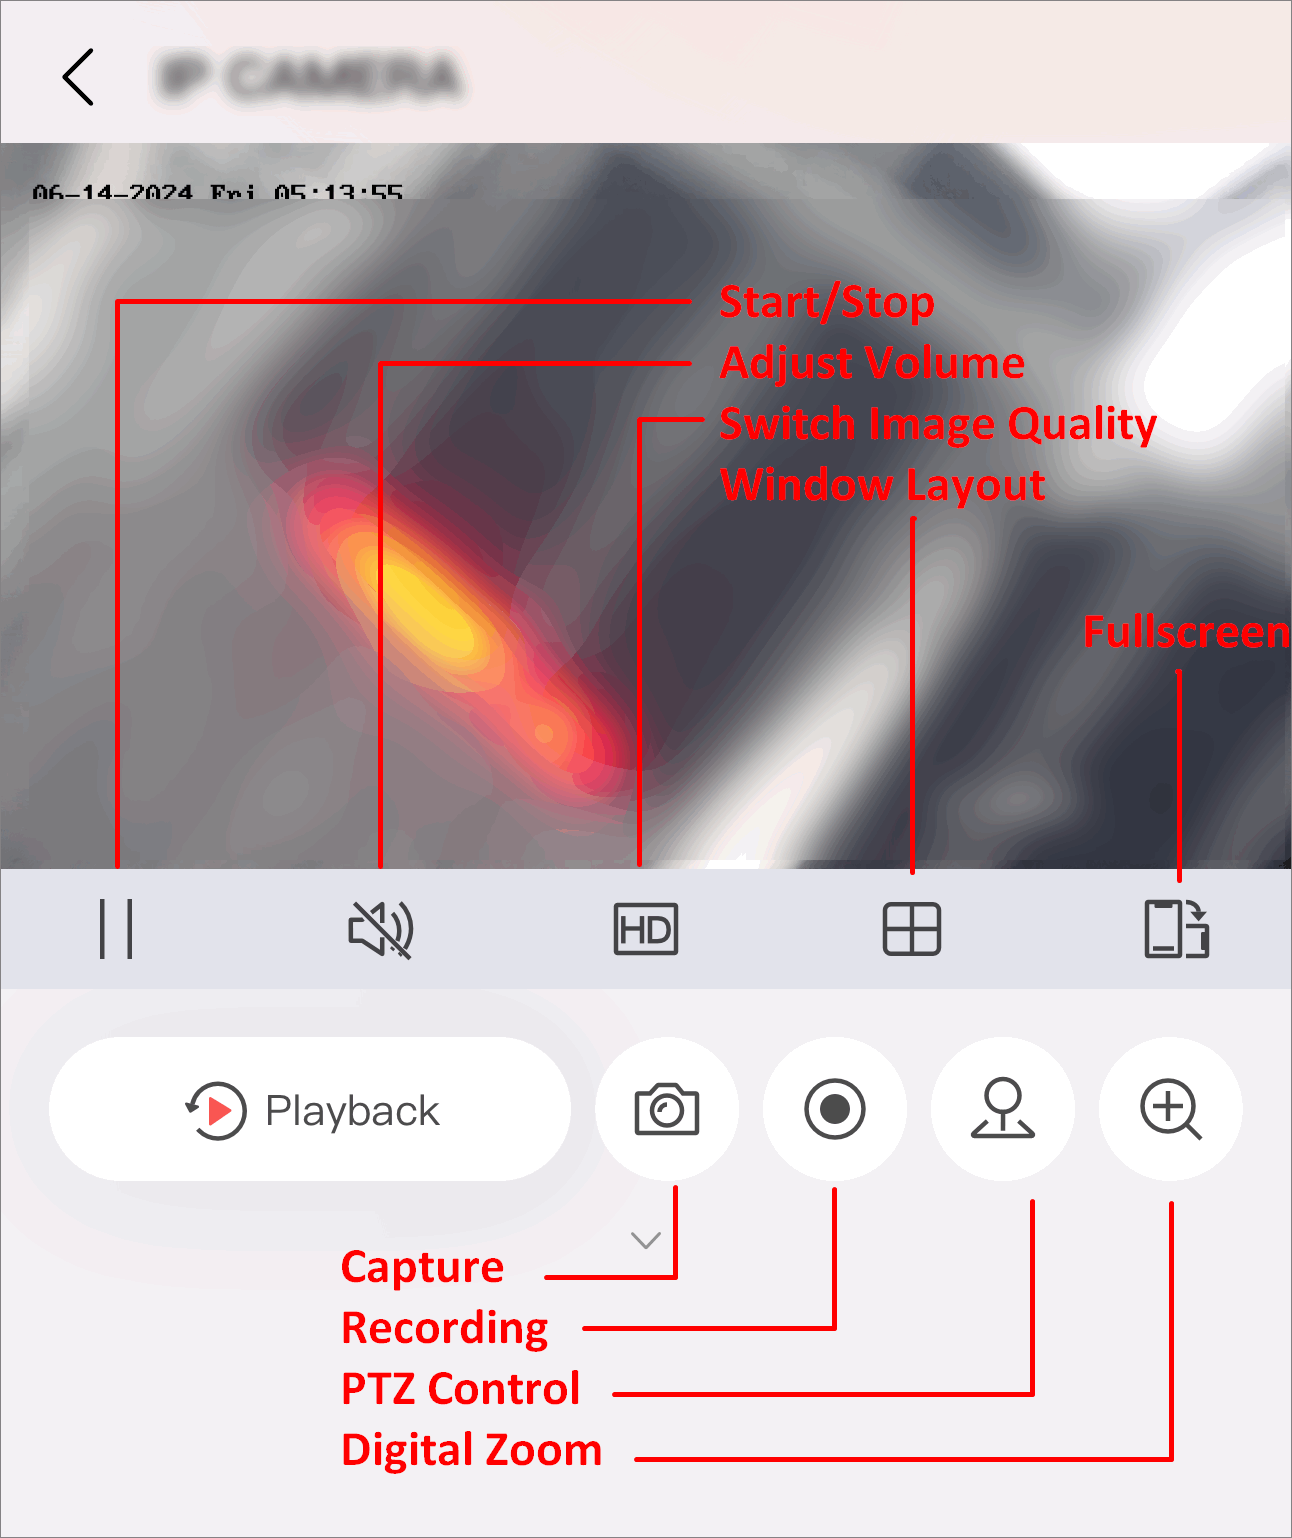
On the Live View page, you can perform operations such as capturing and recording. Refer to the following figures for the explanation of these icons.
|
Figure 4 Live View Page and Icon
Explanations (Portal) |
Figure 5 Live View Page and Icon
Explanations (Mobile Client) |
-
Up to 16 live view windows are supported.
-
If Image and Video Encryption has been enabled for the device on the Hik-Connect mobile client, you are required to enter the device verification code before starting live view. If you don't know the device verification code, ask the end user for it. For details about Image and Video Encryption, see Hik-Connect Mobile Client User Manual.
-
Please inform your end users to download or update the Hik-Connect Mobile Client (V 4.15.0 or later). You can send the QR code or download link shown in the banner on the Home page to them.
Play Back Video Footage
You can view the recorded video footage of the added online encoding devices. By playback, you can know what happens at the specific time.
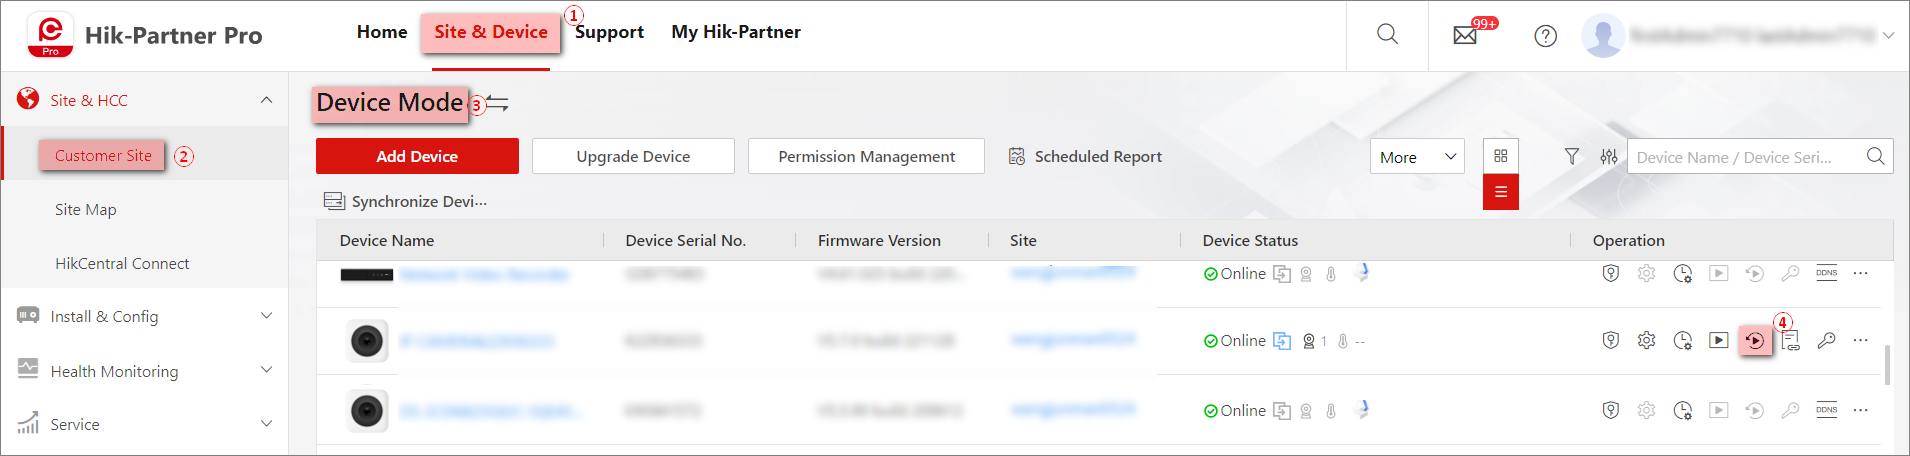
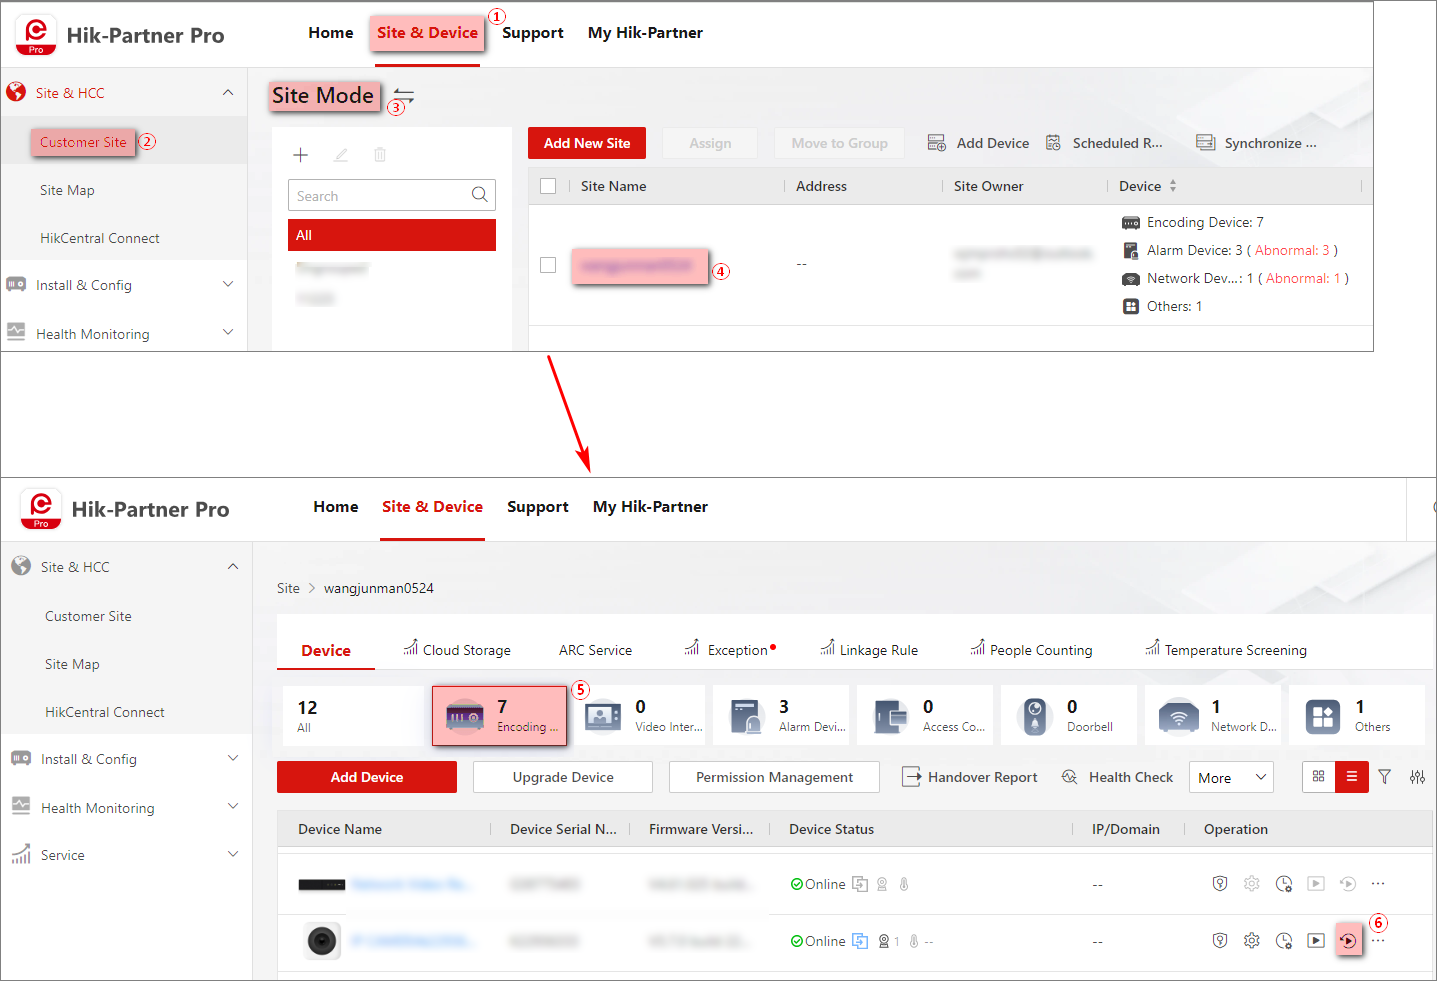
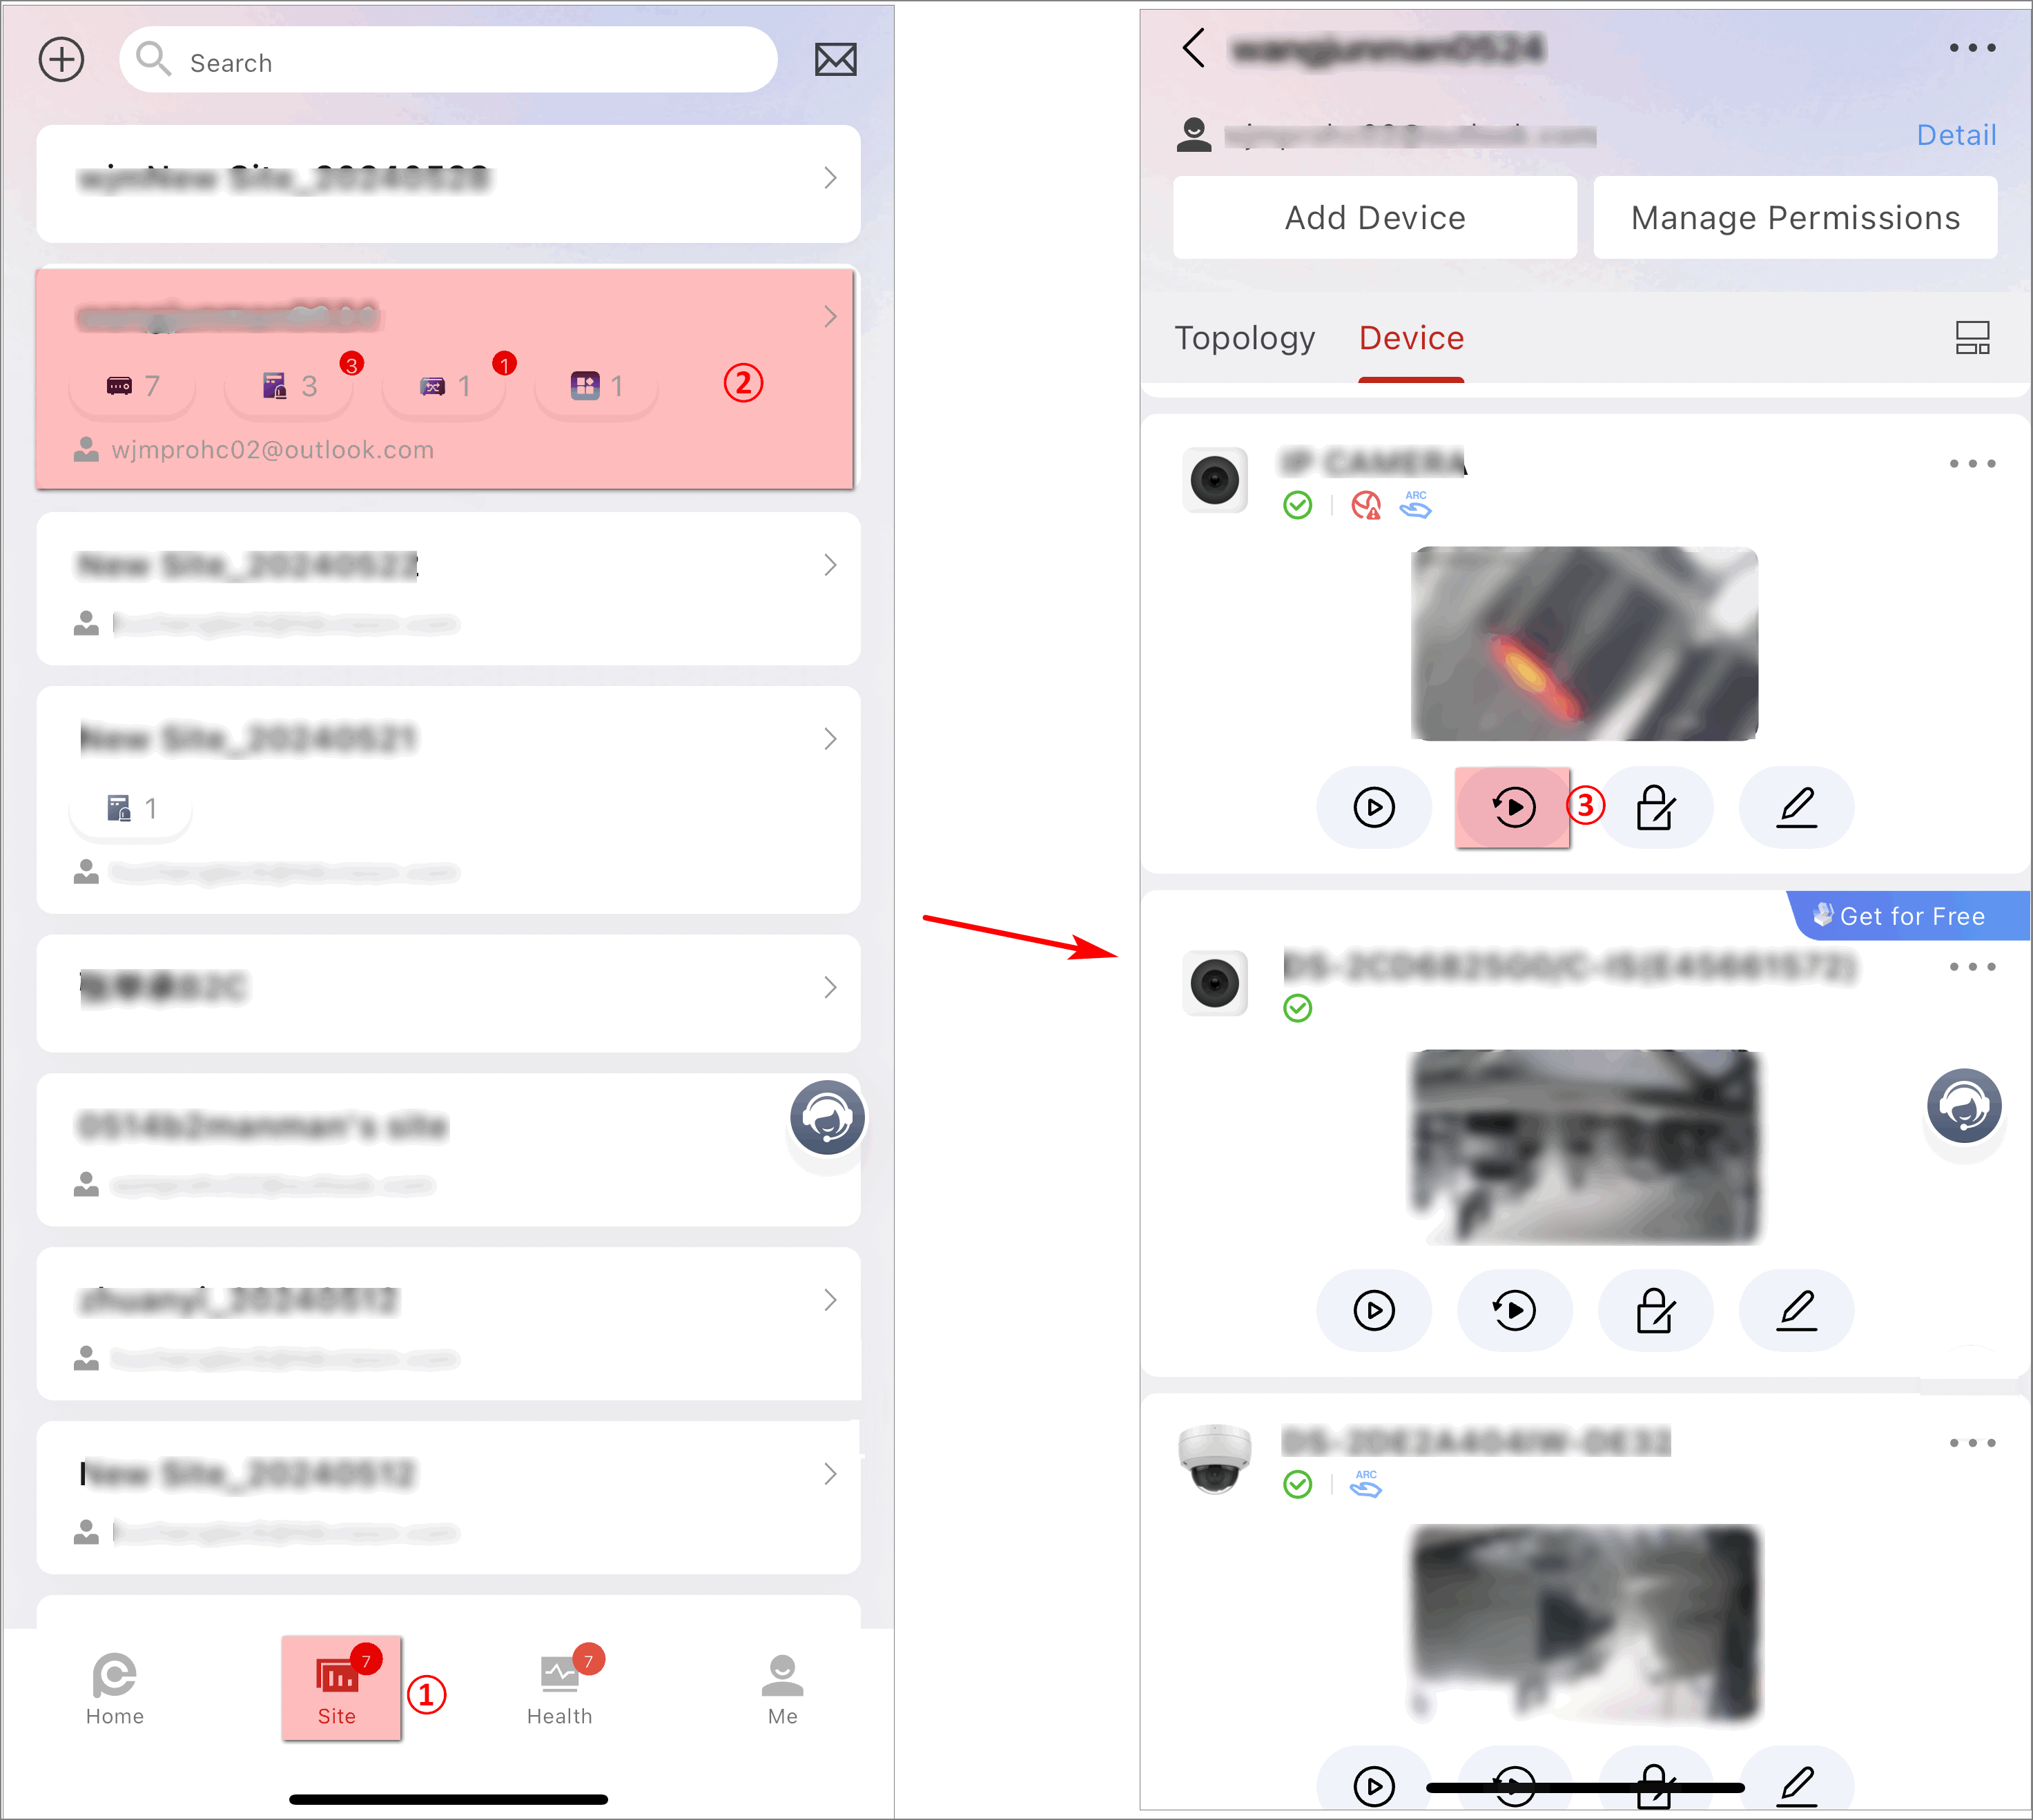
The following figures show the entries of playback page on the Portal and the Mobile Client.
|
Figure 6 The Entry of Playback Page
on the Portal (Device Mode) Figure 7 The Entry of Playback Page
on the Portal (Site Mode) |
Figure 8 The Entry of Playback Page
on the Mobile Client |
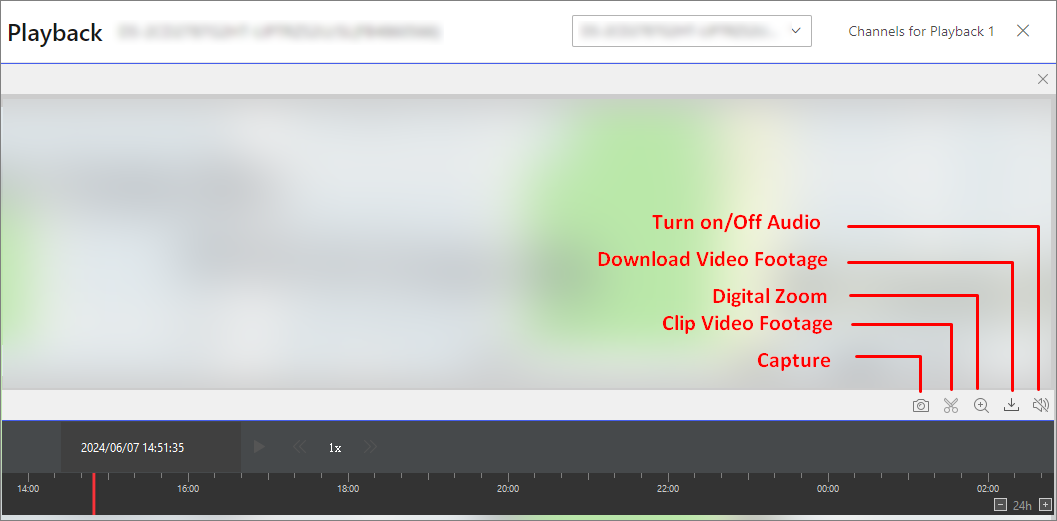
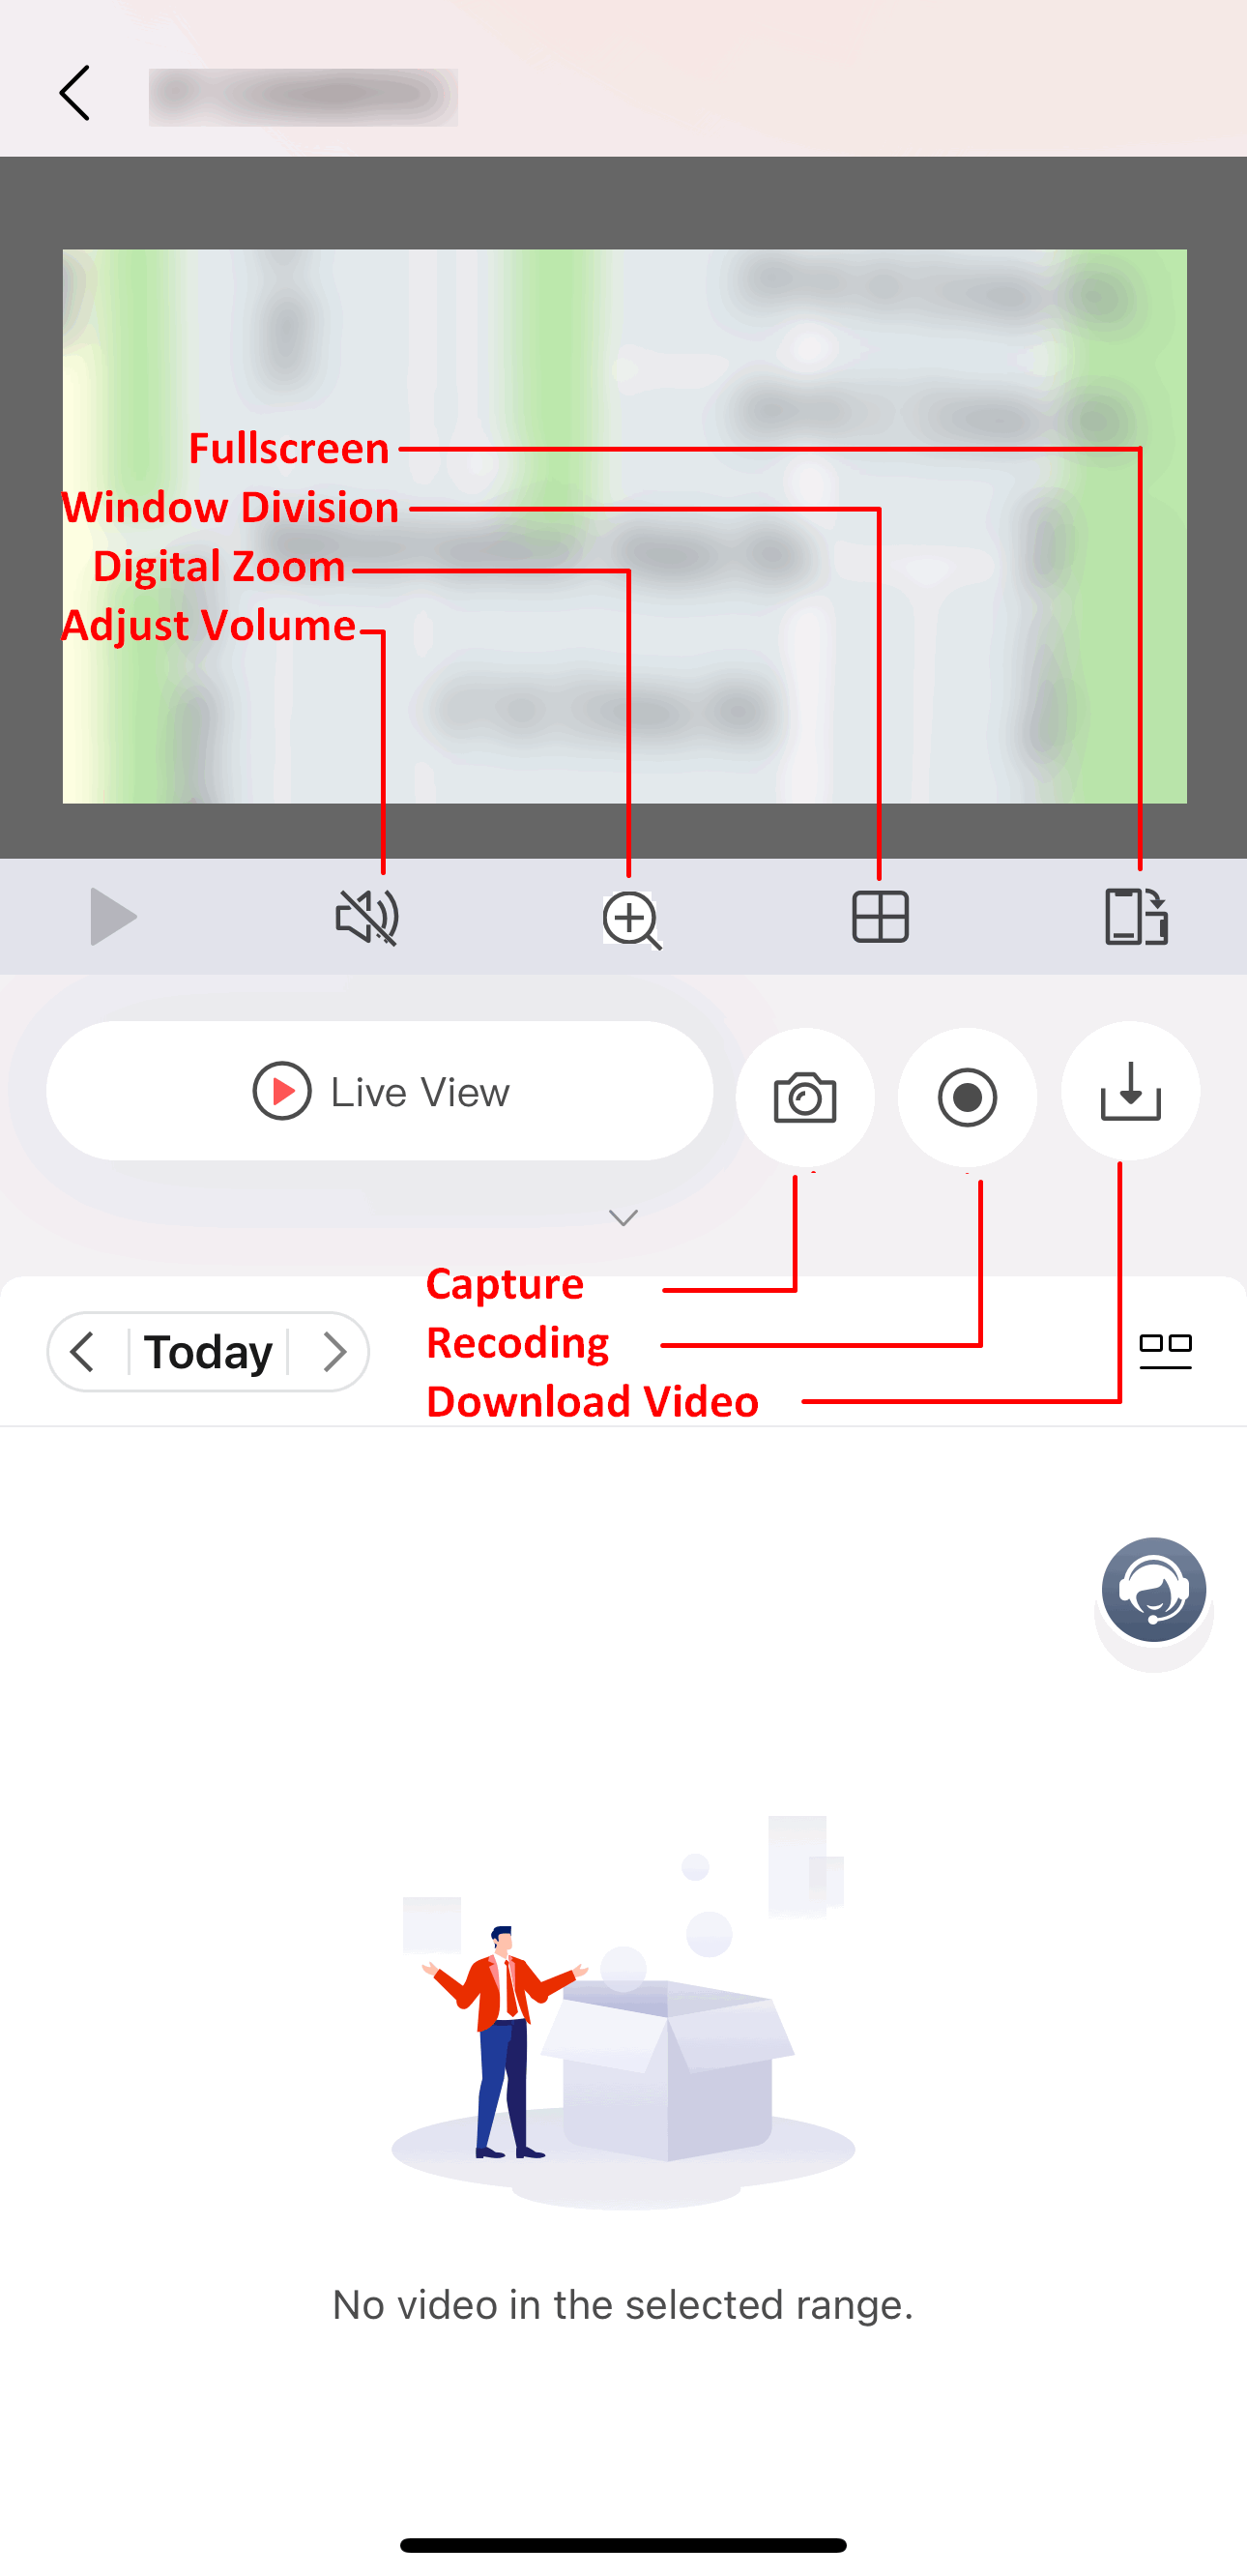
On the Playback page, you can perform operations such as capturing and clipping. Refer to the following figures for the explanation of these icons.
|
Figure 9 Playback Page and Icon
Explanations (Portal) |
Figure 10 Playback Page and Icon
Explanations (Mobile Client) |
Up to 4 playback windows are supported.
Set DDNS to Make Sure Encoding Devices Can Be Managed by Hik-Partner Pro
For devices with invalid or old firmware version, you can configure DDNS for them to make sure they can be managed by Hik-Partner Pro properly.
Only encoding devices added by Hik-Connect (P2P) support this function.
-
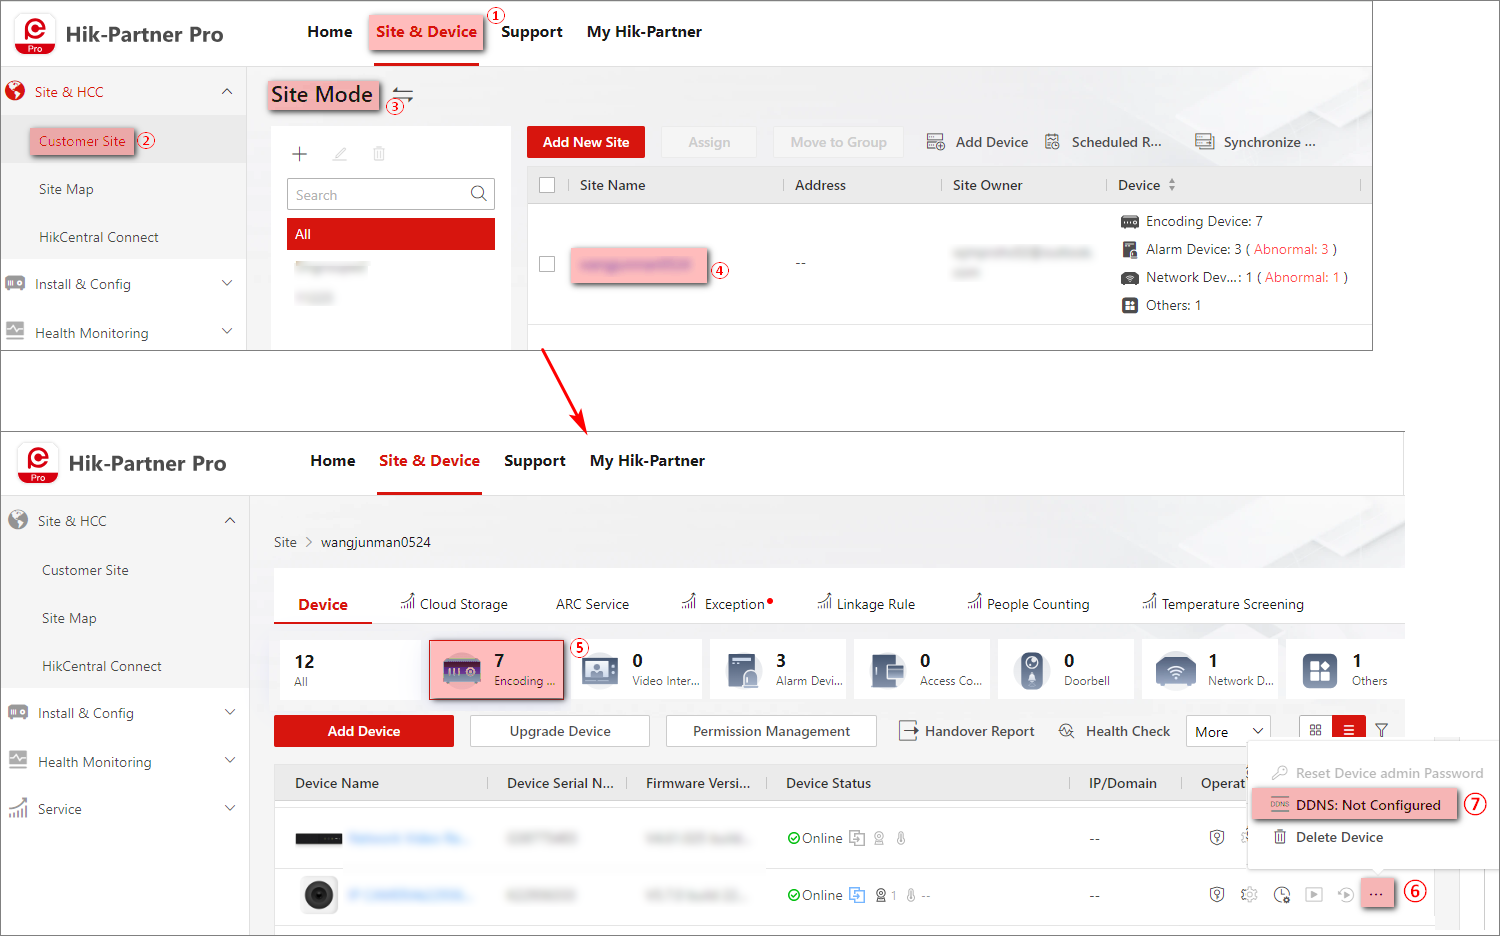
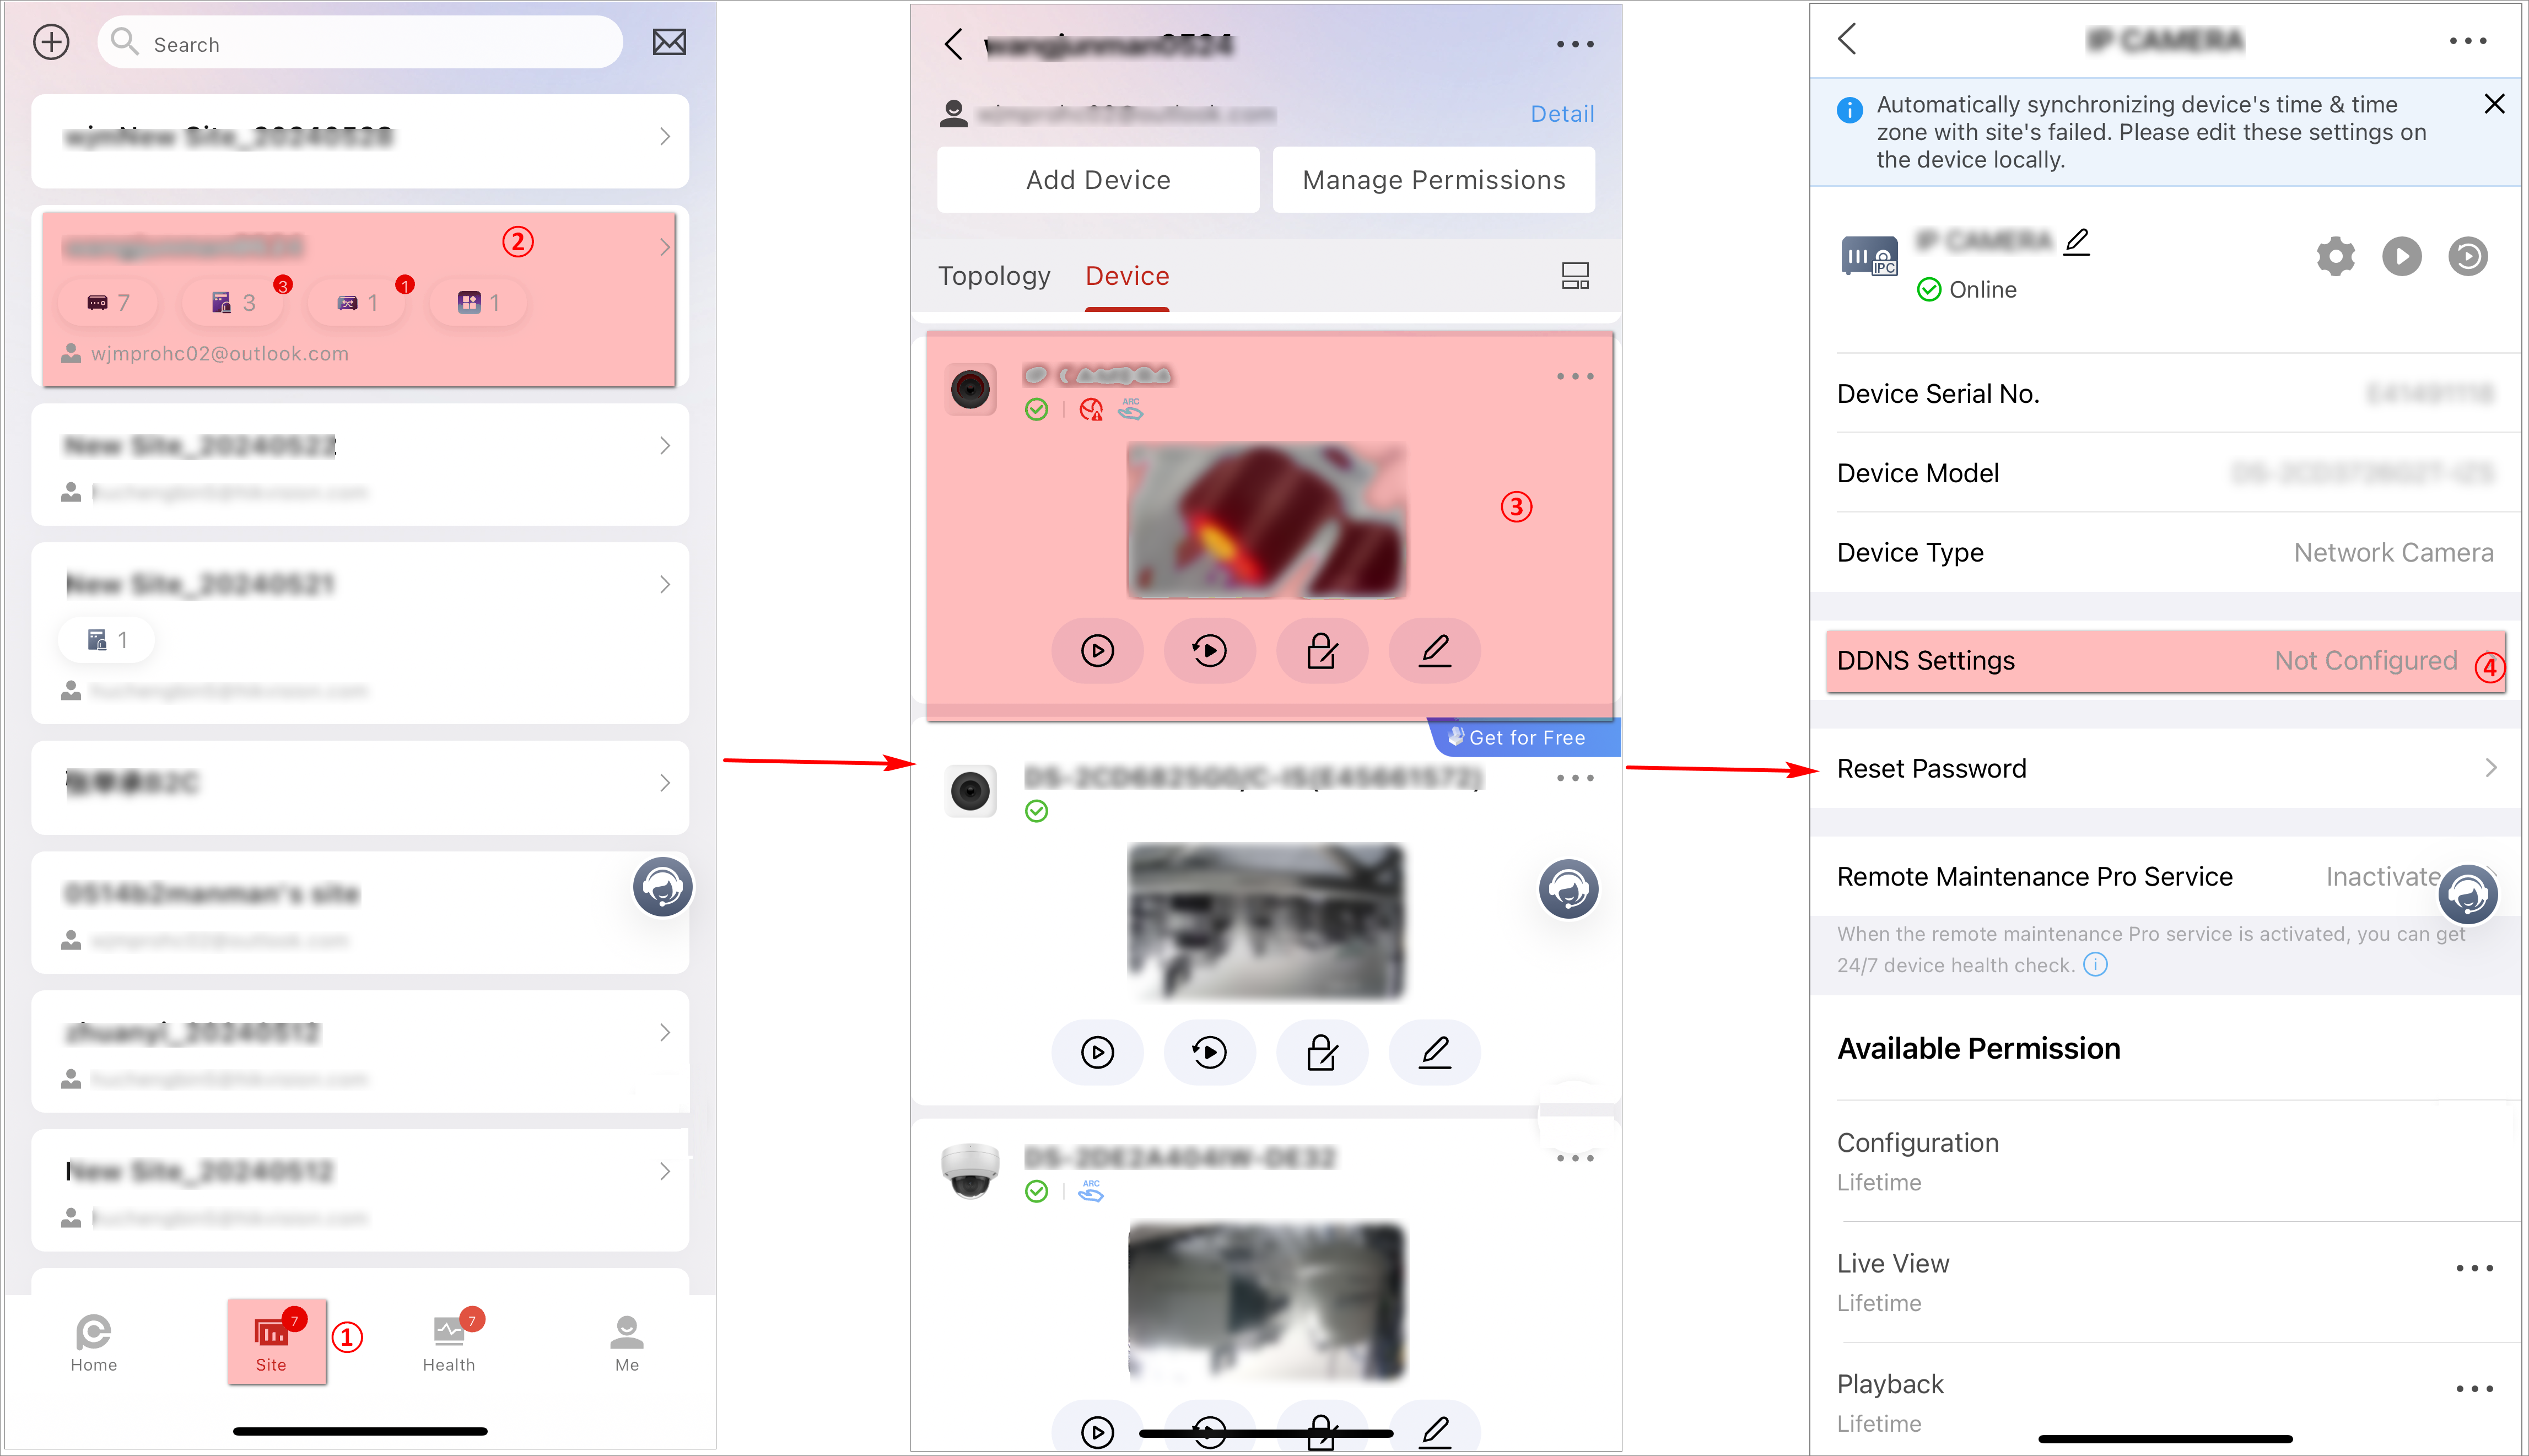
Enter the DDNS settings page.
Figure 11 The Entry of Entering DDNS Settings Page in Device Mode (Portal)Figure 12 The Entry of Entering DDNS Settings Page in Site Mode (Portal)Figure 13 The Entry of Entering DDNS Settings Page (Mobile Client)

Set Cloud Storage for Uploading Recorded Video to the Cloud
You can enable and set up cloud storage for an encoding device (DVR, NVR, or network camera) when you complete adding a device that supports cloud storage to a site. After that, the device will be able to upload event-related footage of its channel to the cloud.
If your device does not support cloud storage, you can add the channel(s) of the device to Hik-ProConnect box and then enable cloud storage.