Quick Start Guide: Add Devices to Hik-Partner Pro for Remote Maintenance
You can select an adding method according to your needs and the device types. Hik-Partner Pro accesses devices by two modes: Hik-Connect (P2P) and Device IP Address / Domain Name, providing different capabilities.
Device Access Mode
|
Device Access Mode |
Device Adding Method |
Description of Access Mode |
|---|---|---|
|
Hik-Connect (P2P) |
Scan for Devices on LAN Scan for |
|
|
Enter Serial Number |
||
|
Scan Device QR Code |
||
|
Synchronize Devices from Hik-Connect |
||
|
IP Address / Domain Name |
Add a Single Device: Enter IP Address / Domain |
|
|
Add Devices in a Batch: Import IP Addresses / Domains |
Device Adding Methods Supported by Different Device Types
|
Adding Method / Device Type |
Encoding Devices |
Security Control Panels |
Access Control Devices |
Video Intercom Devices |
Network Devices |
Radars |
Audio |
Doorbells |
|---|---|---|---|---|---|---|---|---|
|
Add by IP Address or Domain Name |
√ |
× |
× |
× |
× |
× |
× |
× |
|
Add by Scanning QR Code |
√ |
√ |
√ |
√ |
√ |
√ |
√ |
√ |
|
Add by Entering Serial No. |
√ |
√ |
√ |
√ |
√ |
√ |
√ |
√ |
|
Add Devices on LAN (via SADP Tool) |
√ |
× |
√ |
√ |
√ |
√ |
√ |
× |
|
Add Devices After Batch Configuring Them on LAN (via On-Site Config) |
√ |
× |
× |
× |
× |
× |
× |
× |
|
Synchronize Devices with Hik-Connect Account |
√ |
√ |
√ |
√ |
√ |
√ |
√ |
√ |
Detailed Instructions for Device Adding
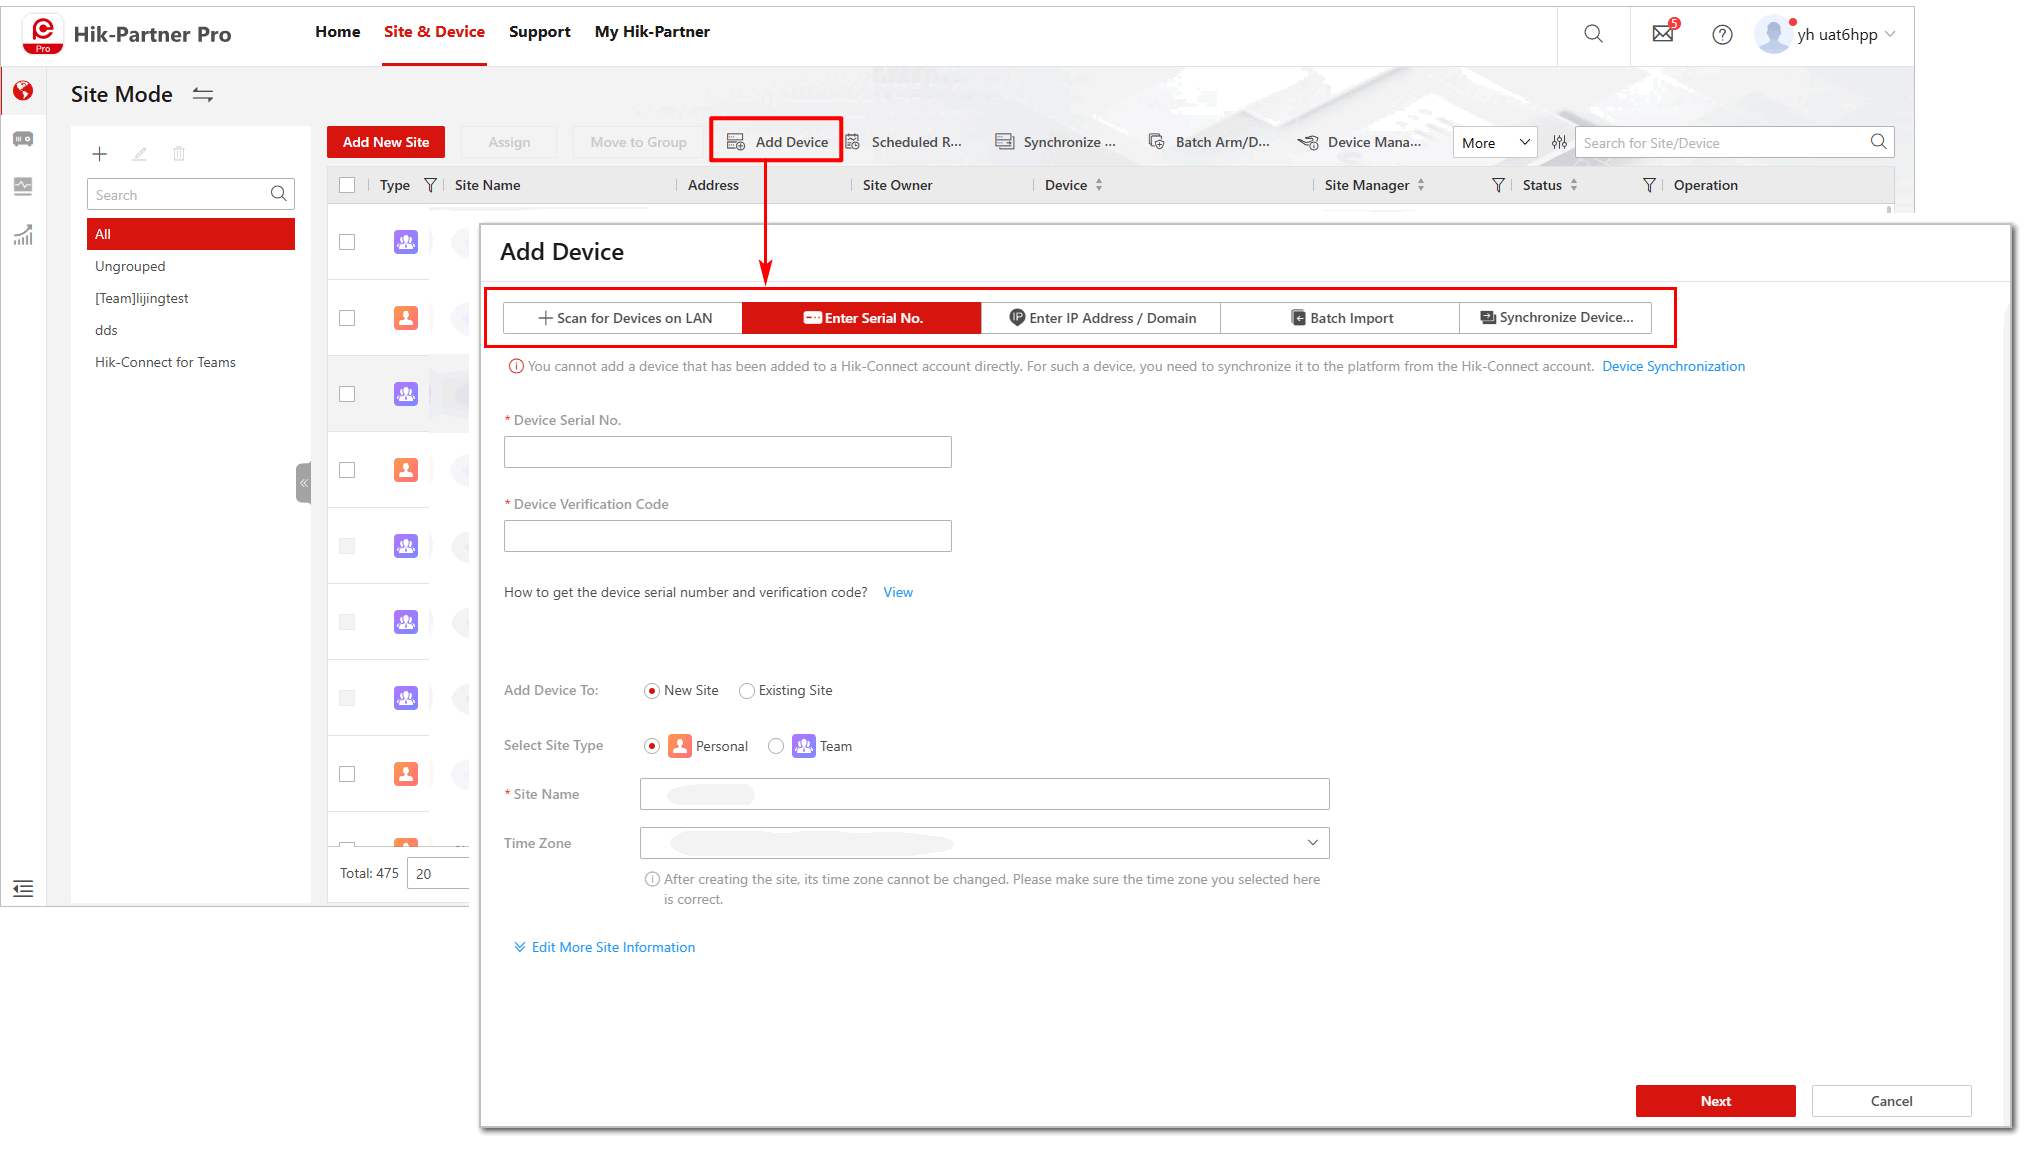
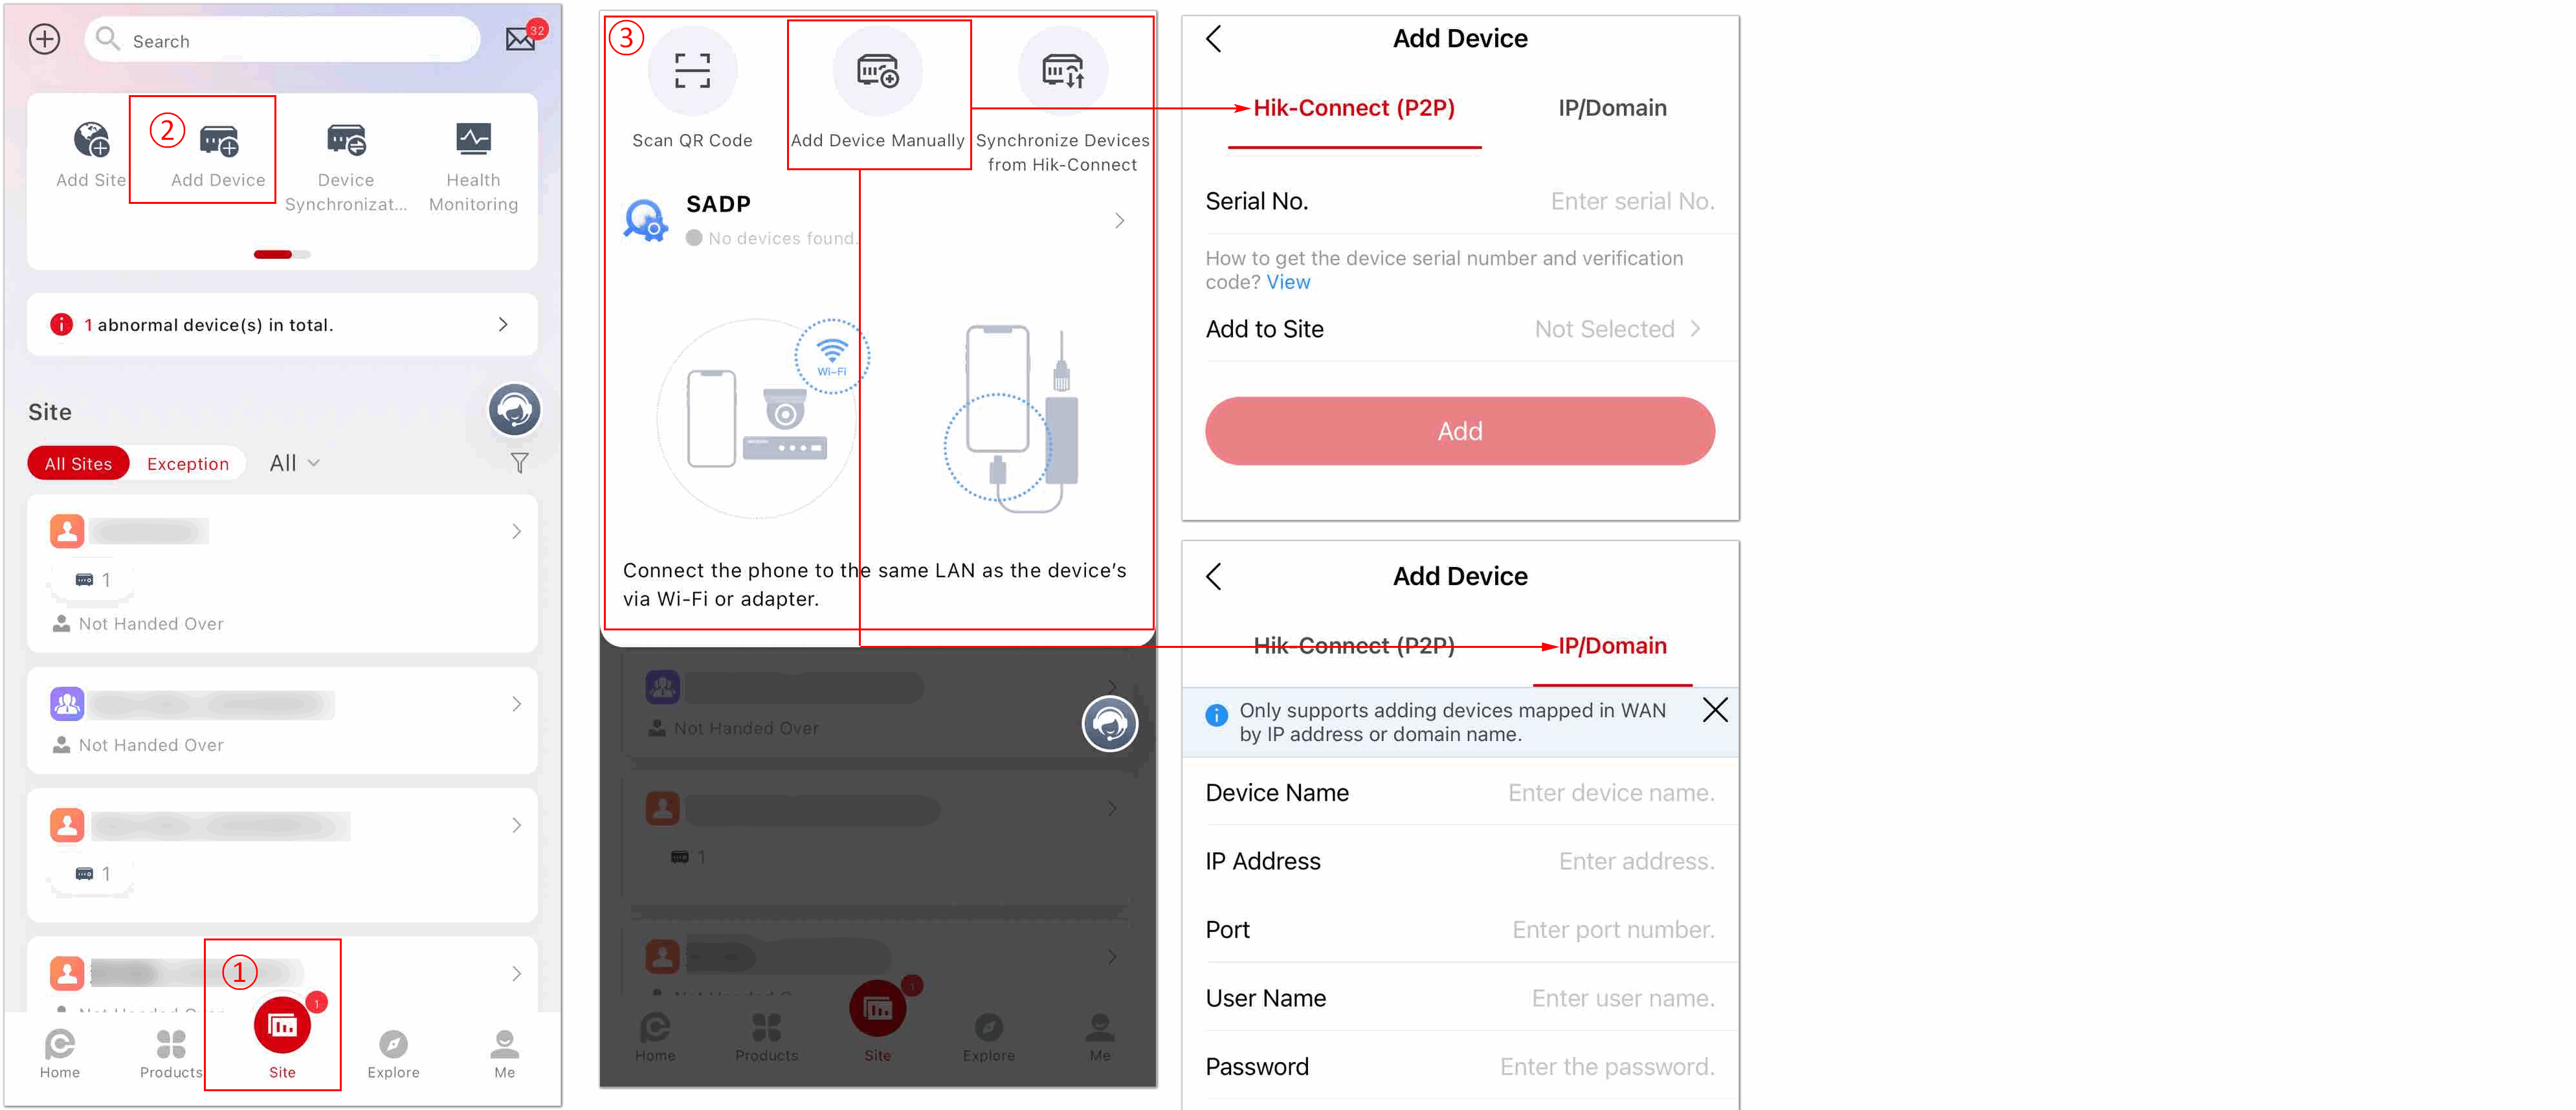
Select one of the following ways to enter the Add Device page.
-
For Portal:
Click to enter the Customer Site page.
Figure 1 Add Devices on Portal -
For the Mobile Client:
Figure 2 Add Devices on Mobile Client
Before you begin:
-
Make sure the devices you are going to use are correctly installed and connected to the network as specified by the manufacturers.
-
Make sure the device has been activated and connected to Hik-Connect service.
|
Adding Methods |
Application Scenario |
|---|---|
|
Add by IP Address or Domain Name |
|
|
Add by Scanning QR Code (Only Mobile Client) |
You can add a device to a site by scanning the QR code on the device, or add multiple devices to a site by scanning the QR code generated by iVMS-4200 or iVMS-4500. |
|
Add by Entering Serial No. |
If a device is connected to Hik-Connect service, you can manually add it to a site by entering the device serial number and device verification code. Enter the device serial number and device verification code. Note
The device serial number and the default device verification code are usually on the device label. If no device verification code found, enter the verification code you created when enabling Hik-Connect service. Upgrade the device firmware version, or some functions (including health monitoring, linkage, and remote configuration) cannot be used if the device is not compatible with the Hik-Partner Pro. |
|
Add Devices After Batch Configuring Them on LAN (via On-Site Config) |
After the devices on LAN are batch configured, select the device(s) to be added, and add the device(s) to an existing or a new site. |
|
Synchronize Devices with Hik-Connect Account |
In the following two cases, you need to synchronize devices in the Hik-Connect account with devices in the Hik-Partner Pro account.
|
|
Add Devices to Hik-Partner Pro or Hik-Connect Using the SADP Tool |
|