1. Home Page
  2. Activation and Login

Activation and Login

If you use the switch for the first time, you need to activate it and configure the password.

Ensure that your computer and switch are on the same network segment.

Note

All figures in this manual are for illustration purpose only.

  1. Enter the switch's super IP address (10.180.190.200 by default) or default IP address (DHCP-assigned) in the address bar of a web browser, and press Enter.
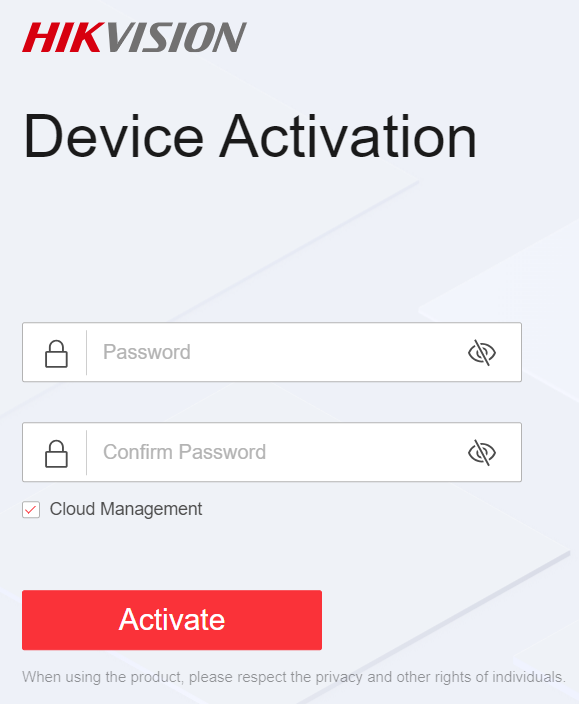
    Figure 1 Activate Device
    Note
    • The switch's default IP address is dynamically assigned via DHCP. You can obtain it using the SADP tool.

    • You are recommended to use the following web browsers: Microsoft Edge 89 or later, Google Chrome 89 or later, and Firefox 78 or later.

  2. Set a password and confirm the password.
    Note
    • The password should contain 8 to 16 characters, including at least two types of the following categories: uppercase letters, lowercase letters, digits, and special characters.

    • The password cannot contain user name, '123', or 'admin' (case-insensitive), 4 or more consecutively increasing or decreasing digits (such as '1234' and '4321'), or 4 or more identical characters (such as '1111' and 'aaaa').

    • The password cannot contain only 'hik', 'hkws', or 'hikvision' (case insensitive).

    • The password cannot be a common risky password.

    • Remember to store your password securely. If you forget it, you can reset the password using the SADP tool or restore the device to factory settings via the reset button. Please note that resetting will erase all device configurations, so proceed with caution.

  3. Optional: Check Cloud Management.

    The Hik-Connect service is enabled.

  4. Click Activate.

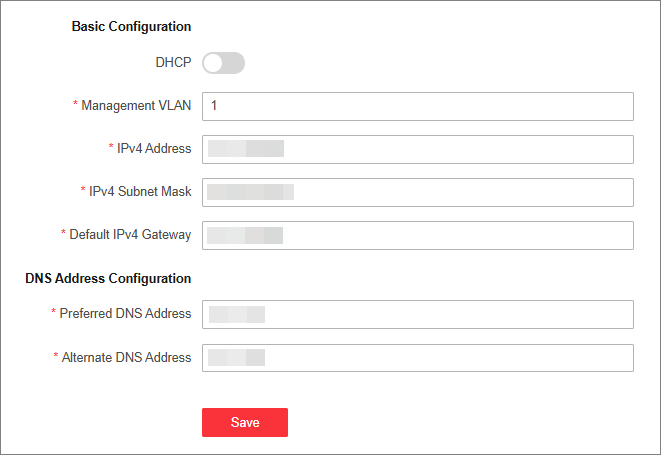
    The network configuration page is displayed.

  5. Optional: Modify the network configurations.
    1. Go to System Management > Network Configuration > Network Configuration.
      Figure 2 Modify Network Parameters
    2. Modify the management VLAN, IPv4 address, IPv4 subnet mask, default IPv4 gateway, preferred DNS address, and alternate DNS address as required, or enable DHCP for automatic IP address assignment.
      Note

      You are recommended to modify the network configurations to better manage your switch.

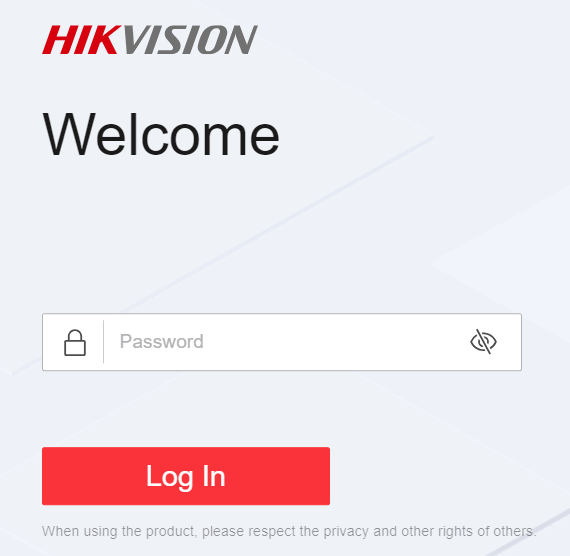
    3. Log in to the switch web again with the new IP address after modification.
      Figure 3 Log In