Configure NTP Synchronization / Device Access Protocol / WAN Access / Server Address, and Reset Network Info
The network settings provided by the client encompass configuring NTP synchronization, device access protocols, WAN access, server addresses, and resetting network information. These settings are essential for ensuring devices operate correctly within network environments.
On the Home page, go to .
Configure NTP Synchronization
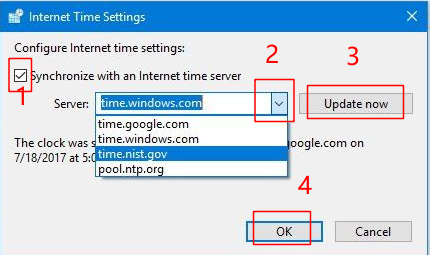
You can set NTP parameters for synchronizing the time between resources managed on the platform and the NTP server. Three system time sync modes are supported. See the table below for details.
Select Internet Time Sync.
|
Mode |
Description |
|---|---|
|
Operating System Time Sync |
Note
During the initial deployment, if the operating system has an NTP server configured and the NTP client is running, the system will choose the Operating System Time Sync mode by default. |
|
Local Server Time Sync |
|
|
NTP Time Sync |
|
Configure Device Access Protocol
Before adding devices supporting ISUP and/or ONVIF protocol to the platform, you need to set the related configuration to allow these devices to access the platform.
Go to to allow devices to access the platform via the ONVIF protocol or ISUP.
-
After enabling or disabling Allow ISUP Registration, the Server will be restarted.
-
Only ISUP protocol 5.0 is supported.
Configure WAN Access
In some complicated network environments, you need to set a static IP address or a domain name and ports for the client to access WAN (Wide Area Network).
Go to WAN Access and enable the button.
You can select one or more application scenario(s) and click Export to export an Excel file about the port information for WAN configuration, including port name, LAN port, WAN port, protocol, etc.
When changes to the LAN port occur, it is necessary to adjust the port mapping configuration on the router correspondingly.
Configure Server Address
You can select the NIC of the current Server so that the platform can receive the alarm information of the device connected via ONVIF protocol, and to perform live view and playback for the devices connected via ISUP.
Go to Address for Receiving Device Info.
Reset Network Info
When system network domain changes (such as server migration), you must reset the network information of the added device to adapt to the new network environment. Otherwise the live view or playback will be affected.
Go to .