Add Devices
You can add encoding devices, access control devices, and video intercom devices by auto detect, batch import, manually add, as well as data migration from iVMS-4200.
- Add Device
-
On the Home page, go to to select supported adding modes: Auto Detect, Batch Import, and Manually Add.
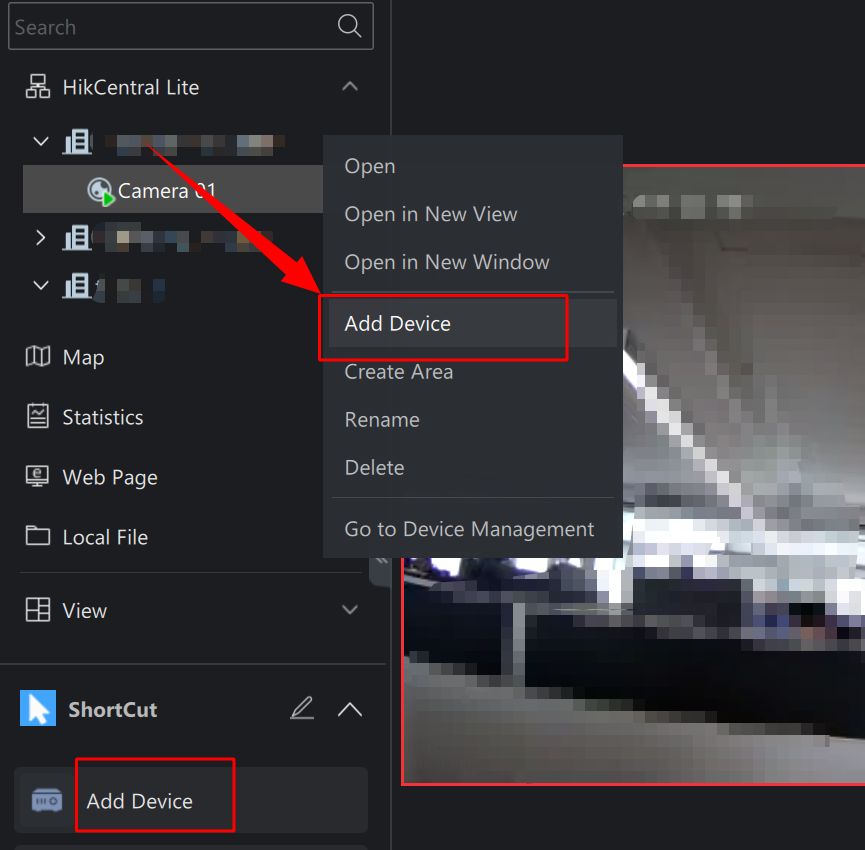
You can also add device(s) by right-clicking an area or through a shortcut.
Figure 1 Other Entries for Adding Devices - Data Migration
-
-
On the Home page, go to .
-
(Only supported on the Server) On the Home page, go to .
-
|
Mode |
Description |
|---|---|
|
Auto Detect |
Select this one to detect devices that are on the same LAN as the server or client. You can perform the following operations.
|
|
Batch Import |
Select this one if the IP address, port No., ID, and secret key of multiple devices are known.You can quickly add a batch of devices without verifying their validity. Select this one if the device is offline or the device and the server or the client are not on the same LAN. |
|
Manually Add |
Select this one if the IP address, port No., ID, and secret key of single device are known. You can choose from the following access protocols and enter the required device information:
|
|
Data Migration from iVMS-4200 |
Only supported on the server when an admin performs the operation. You can import the following information from iVMS-4200:
|
 to edit
Device IP Address and Port
number.
to edit
Device IP Address and Port
number. to reset the
password.
to reset the
password. to filter by
After adding devices, right-click the device to perform further operations on the device list. Viewing the serial number and version number of cameras under NVRs is supported.
- Set Time Zone
-
Select one or more device(s), click Time Zone to set / edit the time zone.
NoteYou can only set time zone for online devices.
- Remote Configuration
-
Hover on one device, then right-click and select Device Remote Configuration.
- Apply Settings Manually to Access Control Devices
-
For offline device(s), parameters are stored on the platform. After the device(s) goes online, the stored parameter configurations need to be manually pushed to the device.
-
You need to apply platform access control settings (including multi-factor authentication, multi-door interlocking, first person in, and remaining unlocked/locked) to device manually, after you restore device parameters to default values, restore database, or set doors to remain locked/unlocked.
-
On the Access Control panel, click Apply Manually.
-
See System Configurations and Performance for the number of devices supported by the client.
For devices configured with the linkage action of capturing, and devices added by Hikvision ISUP Protocol, the pictures from the devices may be transmitted to the Server via HTTP.