System Security Settings
System security is crucial for your system and property. You can lock IP address to prevent malicious attacks, enable auto lock the Control Client, and set other security settings to increase the system security.
-
In the top left corner, select
 > General > Account and Security.
-
Select Security Settings > Basic Parameter on the left.
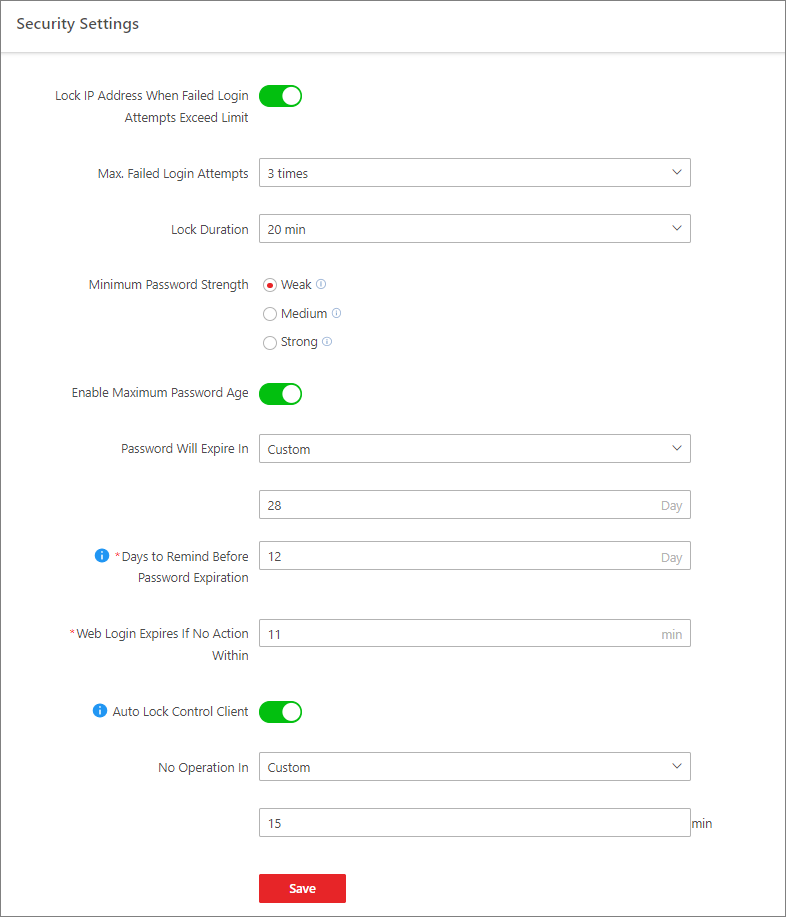 Figure 1 Security Settings Page
 -
Switch on Lock IP Address When Failed Login Attempts
Exceeds Limits to limit the number of failed login
attempts.
-
Select the maximum allowable login attempts for accessing HikCentral Professional.
Note:
Failed login attempts include failed password attempt and failed verification code attempt.
- Set the locking duration for this IP address. During the locking duration, the login attempt via this IP address is not allowed.
The number of login attempts is limited.
-
Select the maximum allowable login attempts for accessing HikCentral Professional.
- Select the Minimum Password Strength to define the minimum complexity requirements that the password should meet.
-
Set the maximum password age.
- Switch on Enable Maximum Password Age to force user to change the password when the password expires.
-
Set the maximum number of days that the password is valid.
Note:
After the maximum number of days, you should change the password. You can select the predefined time length or customize the time length.
- Set days to remind you at each time you login or in the small hours of each day by sending an email notification before password expiration.
- Set minutes after which the Web login will expire if there is no actions during the set minutes.
-
Configure the settings to automatically lock the Control Client after a time
period of inactivity on the Control Client.
- Switch on Auto Lock Control Client.
-
Select time period for user inactivity.
Note:
You can select the predefined time period or customize the time period.
-
Configure double authentications by selecting the authenticator and the users
who need authentication.
Note:
Double authentications means the users who need authentication should let the authenticator enter the user name and password so that they can use the functions of manual recording, video playback, and video exporting. Resources on the site support double authentication. Only one resource can be configured for a user who needs authentication.
- Switch on Double Authentications.
- Click Add to enter the Add Authenticator panel.
- Select a user from the drop-down list, configure the authenticatable resource(s) and permission(s), and click Add to add the authenticator.
- Select the user(s) who need authentication.
- Click Save to save the above settings.