Configure Recording Schedule
The camera would automatically start/stop recording according to the configured recording schedule.
-
Ensure you have installed the HDDs to the device or added the network disks before storing the video files, pictures and log files.
-
Before enabling Motion, Alarm, M | A (motion or alarm), M & A (motion and alarm), and Event triggered recording and capture, you must configure the motion detection settings, alarm input settings and other events as well. Refer to VCA Event Alarm for details.
-
Drag the cursor on time bar to set the record schedule.
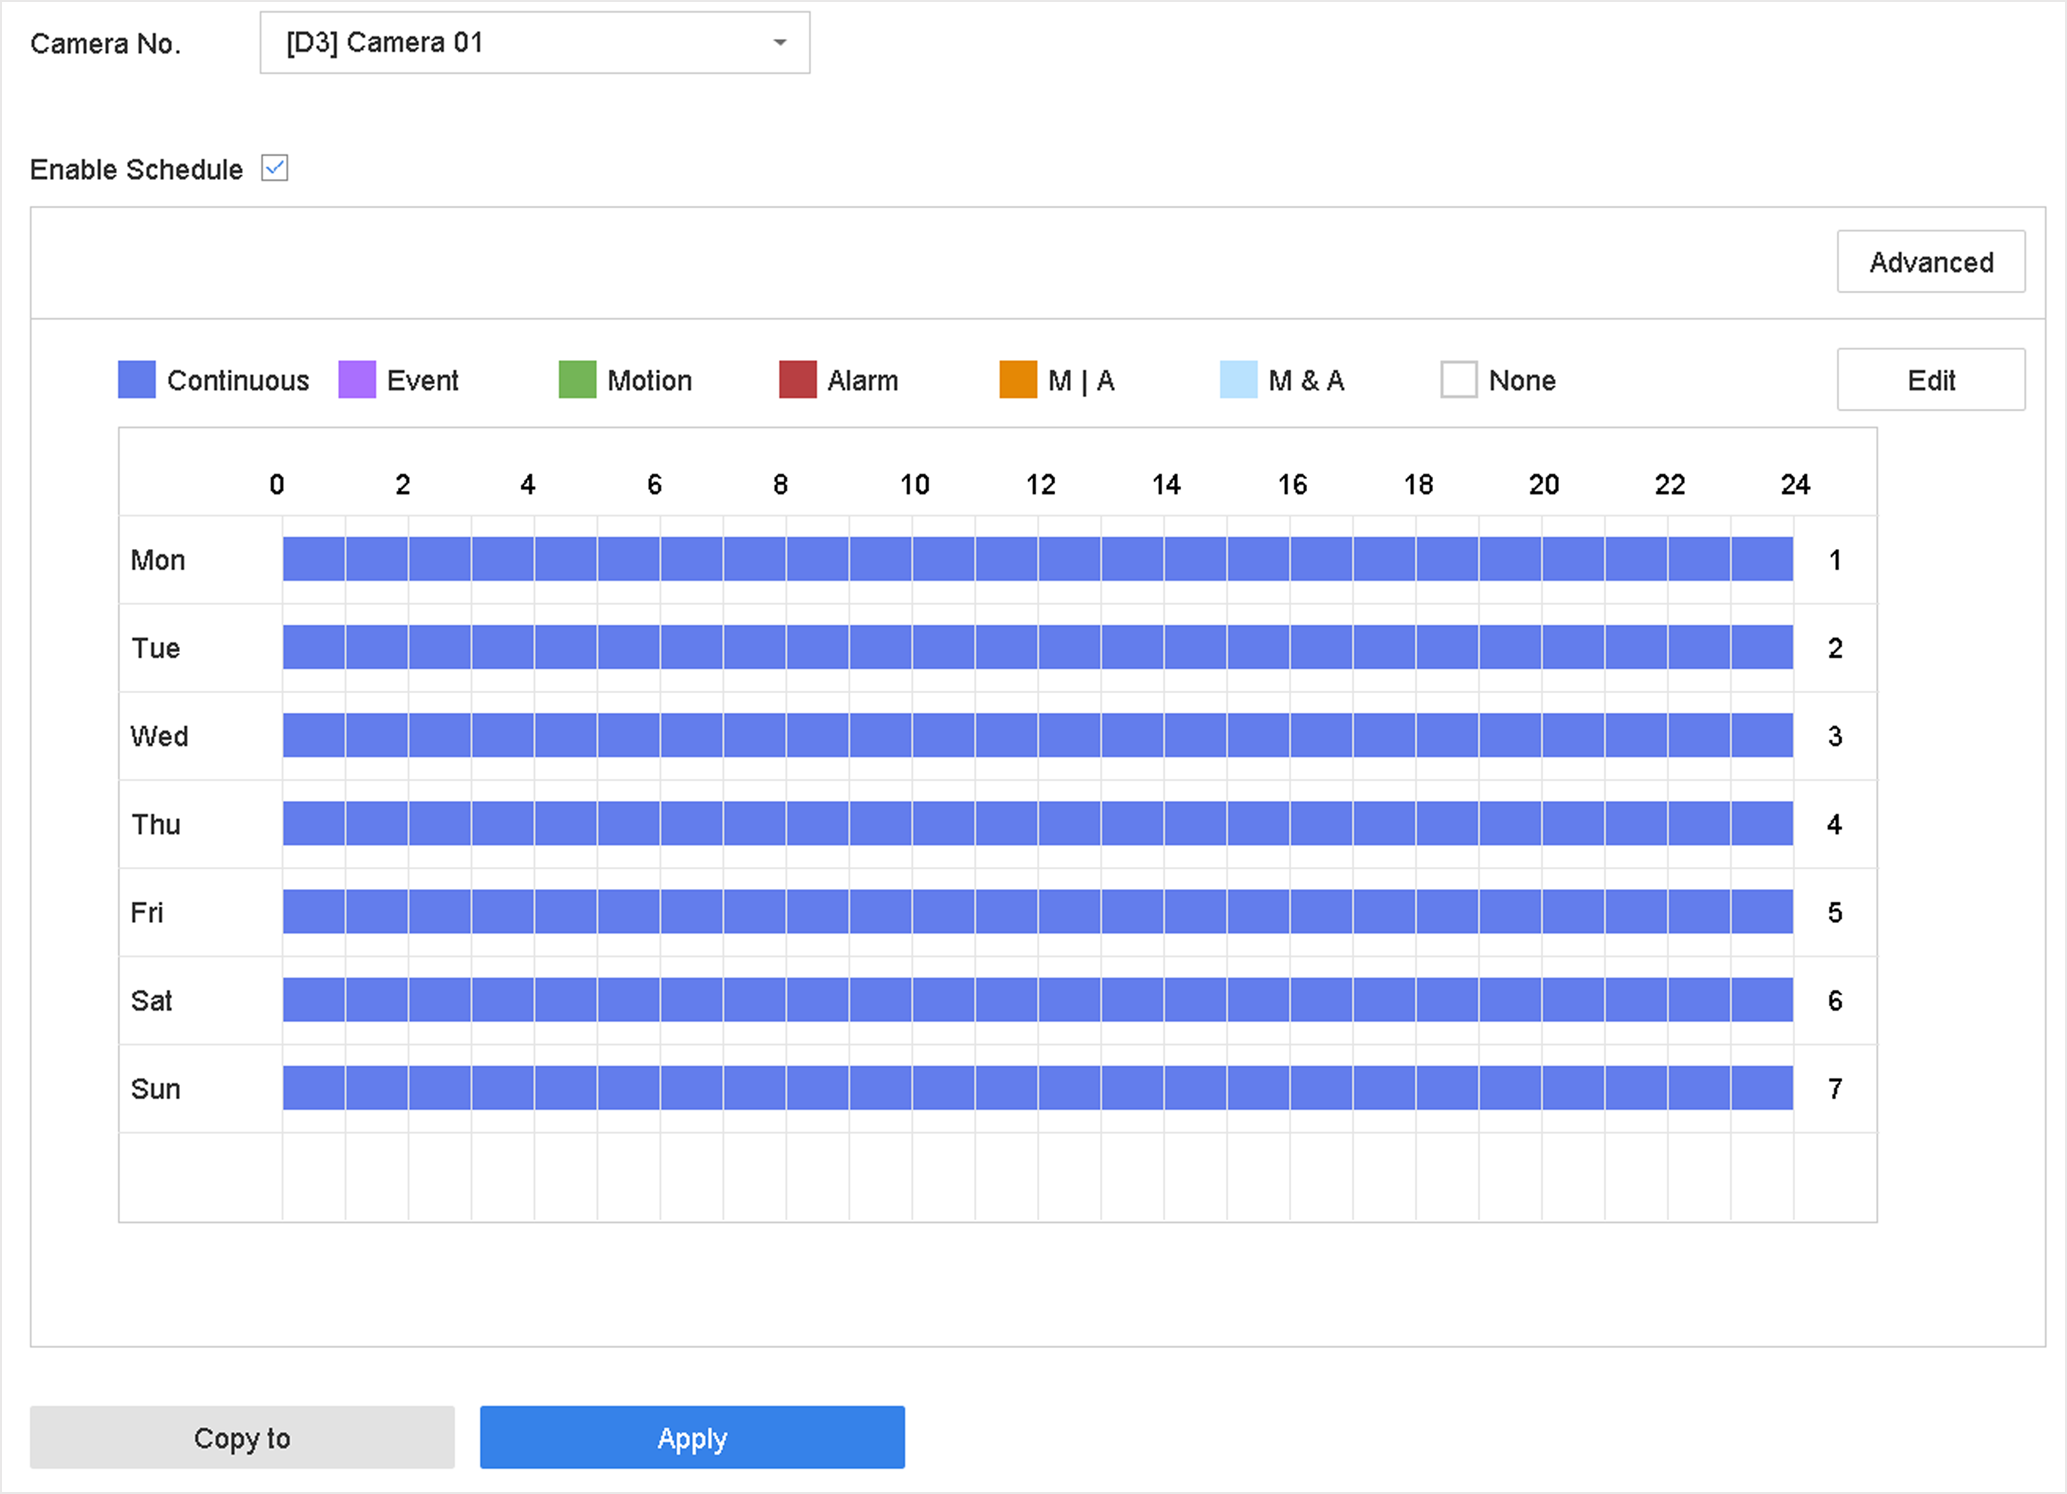 Figure 1 Record
ScheduleNote:
Figure 1 Record
ScheduleNote:-
You can repeat the above steps to set schedule recording or capture for each day in the week.
-
Continuous recording is applied to each day by default.
-